Singer
288
49
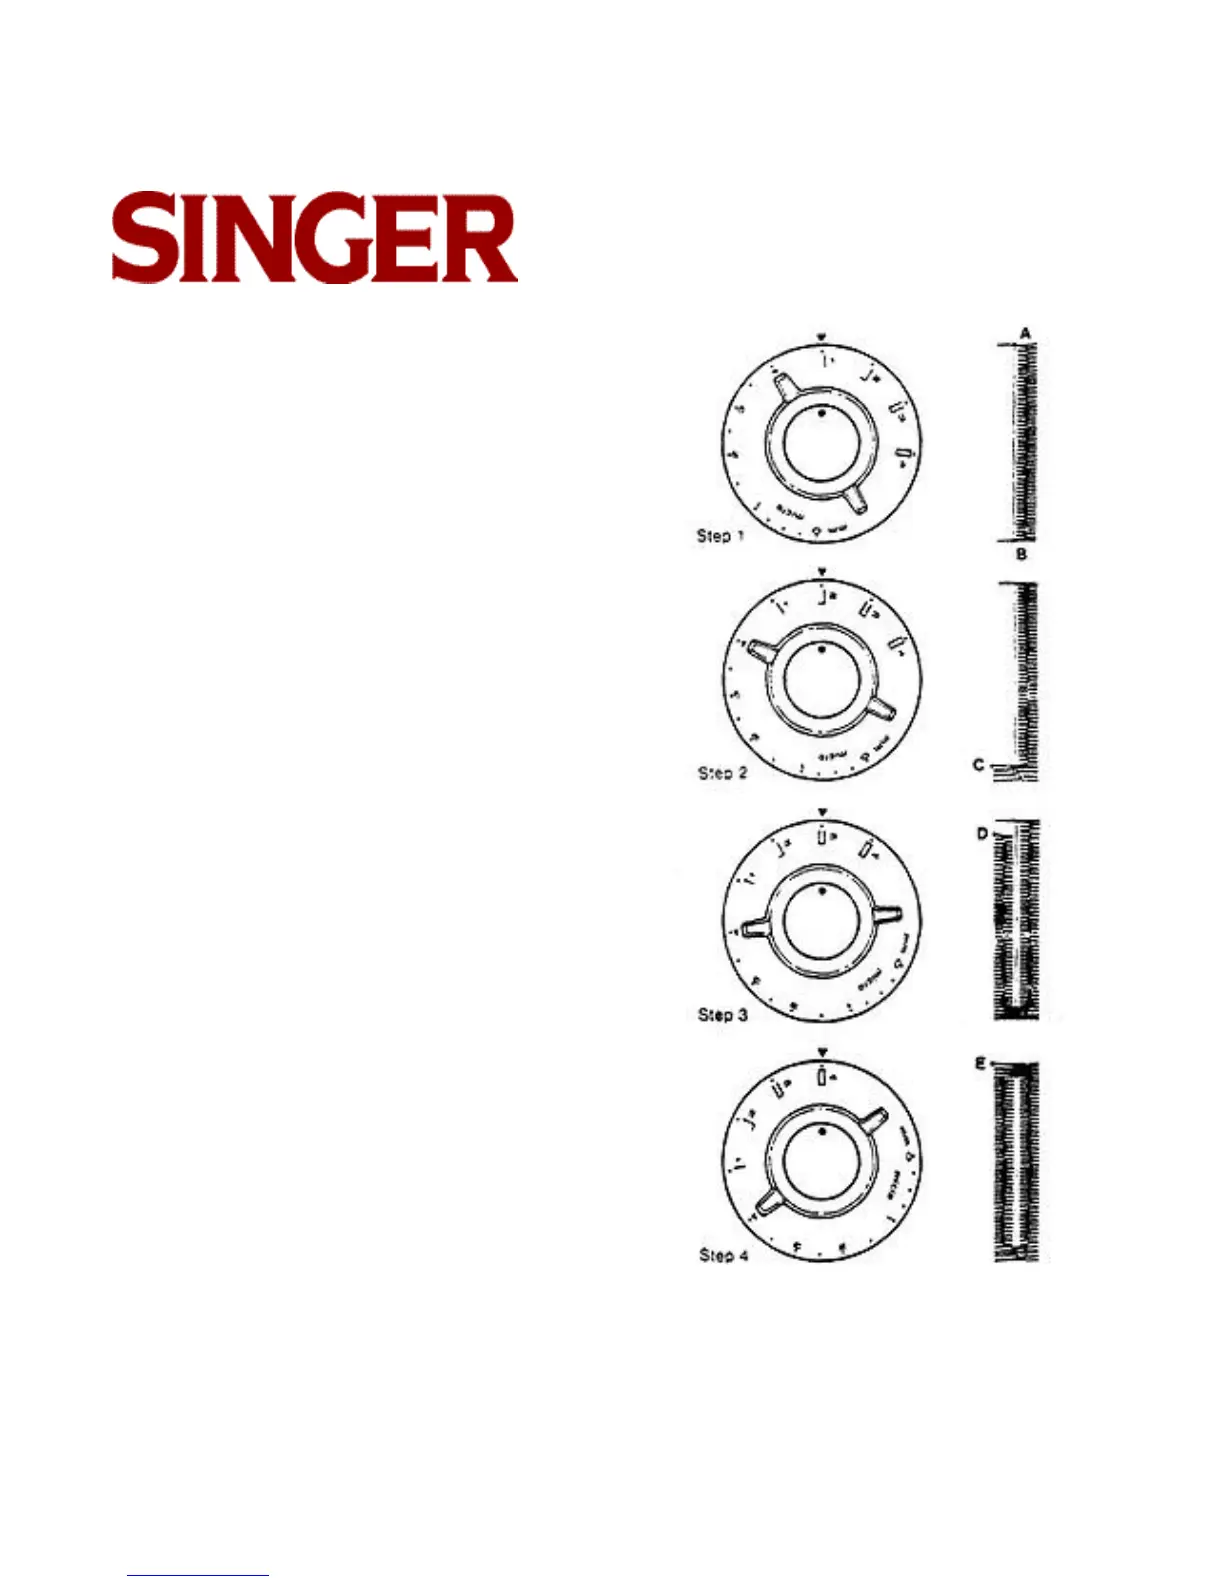
Step 1: Side Stitching
With the needle raised above the fabric, turn the but-
tonholed dial clockwise to step 1. Position needle in
fabric at point A. Lower the foot and stitch to end of
buttonhole (point B). The end marking should be
aligned with the horizontal score lines on the foot.
Step 2: Bar Tack
Raise the needle above the fabric. Turn buttonhole dial
counterclockwise to step 2. Take four or five stitches to
point C.
Step 3: Side Stitching
Raise the needle above the fabric. Turn buttonhole dial
counterclockwise to step 3. Stitch to within two stitches
of the end of the buttonhole (point D).
Step 4: Bar Tack
Raise the needle above the fabric. Turn buttonhole dial
counterclockwise to step 4. Take four or five stitches to
point E. For a smooth, satin appearance and greater
durability, stitch around the buttonhole a second time
by repeating the four-step sequence.
Remove the work, draw threads to the underside ties,
a, and trim. Cut button opening with sharp scissors.
When buttonholes are completed, rotate dial
counterclockwise to stitch length settings to set
machine for regular stitching.
 Loading...