3-1 Check points before operation
Before trial run, check the following points:
Installed Conditions:
By visual inspection , check that the product is level.
Model , make sure the product is tied down with anchor bolts.
Do not place heavy objects on the top of the product.
Ensure the piping does not apply load to the unit.
Power cord, and the ground should be connected firmly.
Drain tube should be connected correctly.
Make sure the piping for compressed air is connected correctly.
3-2 Operation
Start operation according to the procedure below.
Turn on the breaker of the main power supply. Then, turn on the illuminated ON/OFF switch.
The lamp will light up. Few minutes later, the cooling fan will rotate and hot air will be exhausted from
the ventilation grille.
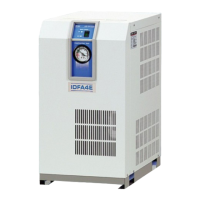
Location of the ventilation grille: Model: IDFA3E to 15E: Right Side Ventilation Grille
Open the IN/OUT side valve slowly. Make sure the bypass valve is completely closed. Confirm there
is no air leaks.
Depending on the condition of compressed air or ambient temperature, the cooling fan sometimes
alternates between start/stop at the beginning. Then, the refrigerant compressor will start and the
pointer of the evaporating temperature will indicate in the green zone. If the pointer indicates higher
than the green zone, refer to “Chapter 5 Troubleshooting.”
After running for a while, moisture will be discharging from the drain tube automatically.
Avoid frequent On/Off operation, which may cause problems.
The auto drain used for the product has a structure that closes the valve with air pressure
higher than 0.15MPa. Therefore, until the pressure increase, air will be emitting from the
drain outlet at the start of opening the “IN” valve. Keep in mind that sometimes the
pressure cannot increase due to under-sized air compressor.

 Loading...