ReguJapMaiflteflaflce
Safety interlock System Check
Service Interval: Every Fall & Spring
Check the function of the safety interlock system using
the test procedure found on page 13 of this manual, if
the tractor fails any of the tests, see your dealer.
Blade Brake Check
Service Interval: Every 100 Hours or Fall & Spring
Mower blades and mower drive belt should come to a
complete stop within five seconds after the electric PTO
switch is turned off.
1. With tractor in neutral, PTO disengaged and operator
in seat, start the engine.
2. Look over the left-hand footrest at the mower drive
belt. Engage the PTO and wait several seconds.
Disengage the PTO and check the amount of time it
takes for the mower drive belt to stop.
3. If mower drive belt does not stop within five seconds,
re-adjust the clutch or see your dealer.
PTO Clutch Adjustment Check
Service Interval: Every 250 Hrs
Check the PTO clutch adjustment after every 250 hours
of operation-or if the clutch starts slipping or will not
engage. Check and adjust the clutch using the
procedure outlined in the Adjustments section of this
manual.
Engine Maintenance
Refer to the engine owner's manual for all engine
maintenance procedures and recommendations.
Battery Maintenance
WARNING
When removing or installing battery cables,
disconnect the negative cable FIRST and reconnect
it LAST. If not done in this order, the positive
terminal can be shorted to the frame by a tool.
Cleaning the Battery and Cables
Service Interval: Every 100 Hours
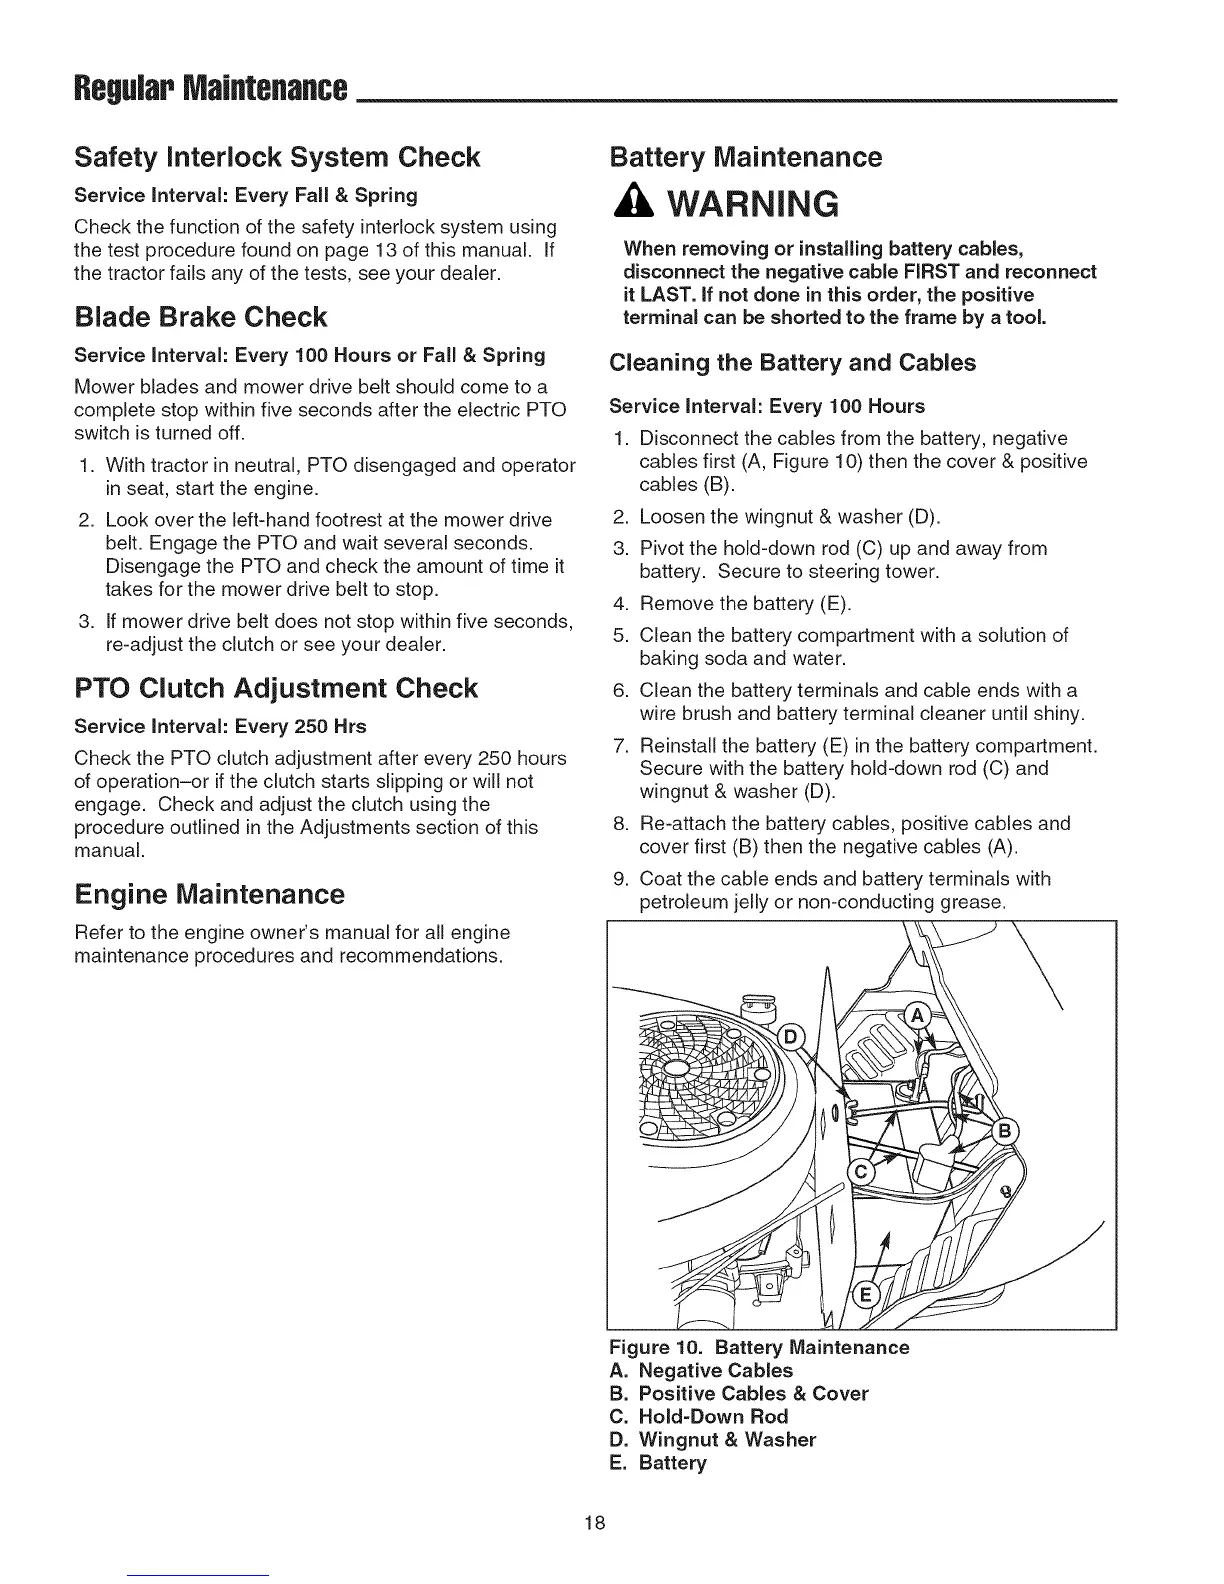
1. Disconnect the cables from the battery, negative
cables first (A, Figure 10) then the cover & positive
cables (B).
2. Loosen the wingnut & washer (D).
3. Pivot the hold-down rod (C) up and away from
battery. Secure to steering tower.
4. Remove the battery (E).
5. Clean the battery compartment with a solution of
baking soda and water.
6. Clean the battery terminals and cable ends with a
wire brush and battery terminal cleaner until shiny.
7. Reinstall the battery (E) in the battery compartment.
Secure with the battery hold-down rod (C) and
wingnut & washer (D).
8. Re-attach the battery cables, positive cables and
cover first (B) then the negative cables (A).
9. Coat the cable ends and battery terminals with
petroleum jelly or non-conducting grease.
Figure 10. Battery Maintenance
A. Negative Cables
B. Positive Cables & Cover
C. Hold-Down Rod
D. Wingnut & Washer
E. Battery
18

 Loading...