SA-WCT180
10
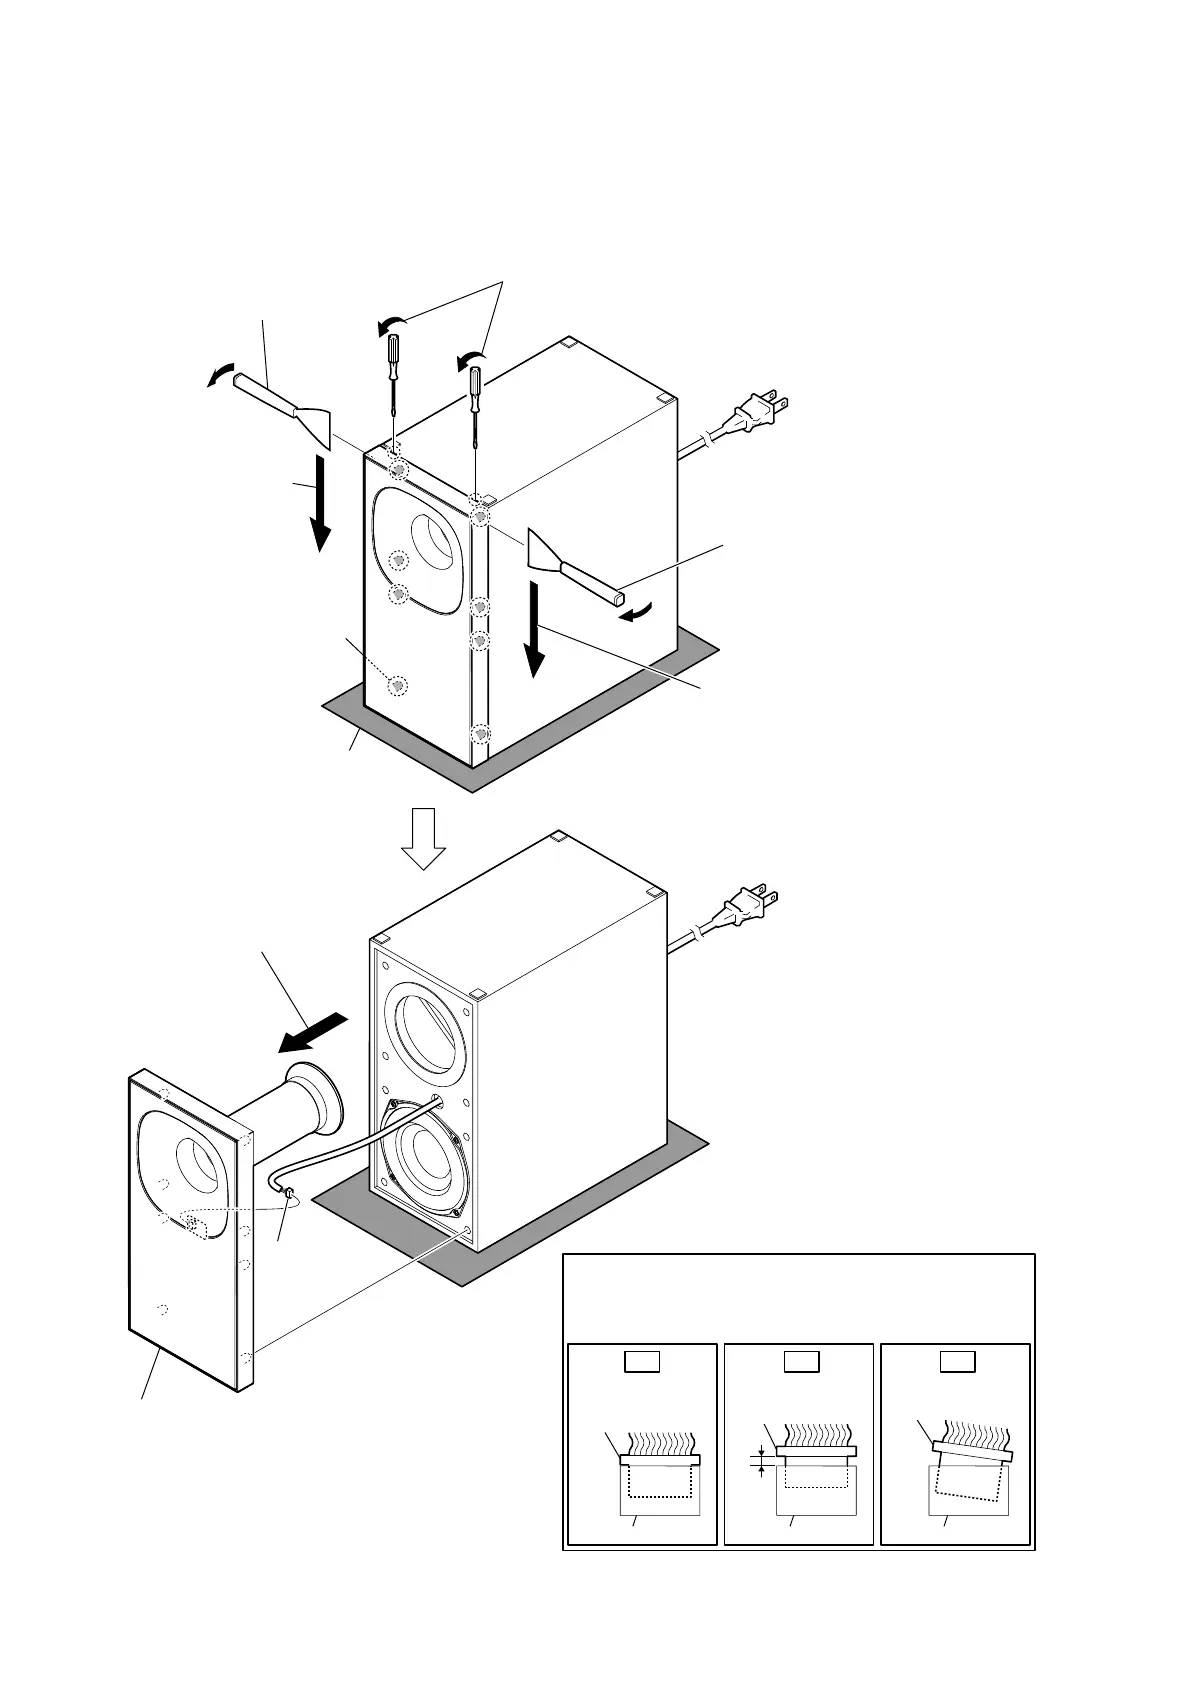
2-6. FRONT PANEL BLOCK
Insert only part way.Insert straight into
the interior.
connector
Insert at a slant.
connector
connector
connector
connector connector
OK NG NG
How to install the connector
Insert the connector straight into the interior.
There is a possibility that using this unit without the connector
correctly installed will damage it.
total eight bosses
1 Insert a flat-head screwdriver in
two slits of bottom of the unit, and
lift the front panel block a little.
6 front panel block
Note 3: When installing the front panel block,
remove the used bond and use a new
bond to fix the front panel block.
Note 1:
Please spread a sheet under
a unit not to injure cabinet.
4 Remove the front panel block
in the direction of the arrow.
5 LED board
connector
(XS6)
– Bottom view –
3 While moving the jig in the
direction of the arrow,
remove all bosses and the
front panel block.
2 Insert the jig into the space and slowly
remove the front panel block.
Note 2: When using a jig, please work
carefully so as not to damage
the front panel block and speaker
cabinet.
2 Insert the jig into the space and slowly
remove the front panel block.
Note 2: When using a jig, please work
carefully so as not to damage
the front panel block and speaker
cabinet.
3 While moving the jig in the
direction of the arrow,
remove all bosses and the
front panel block.
 Loading...