STIHL 009, 010, 011
10
2.3.2 Disassembly o
Chain Brake
2.3.2.1 Disassembly of
Chain Brake
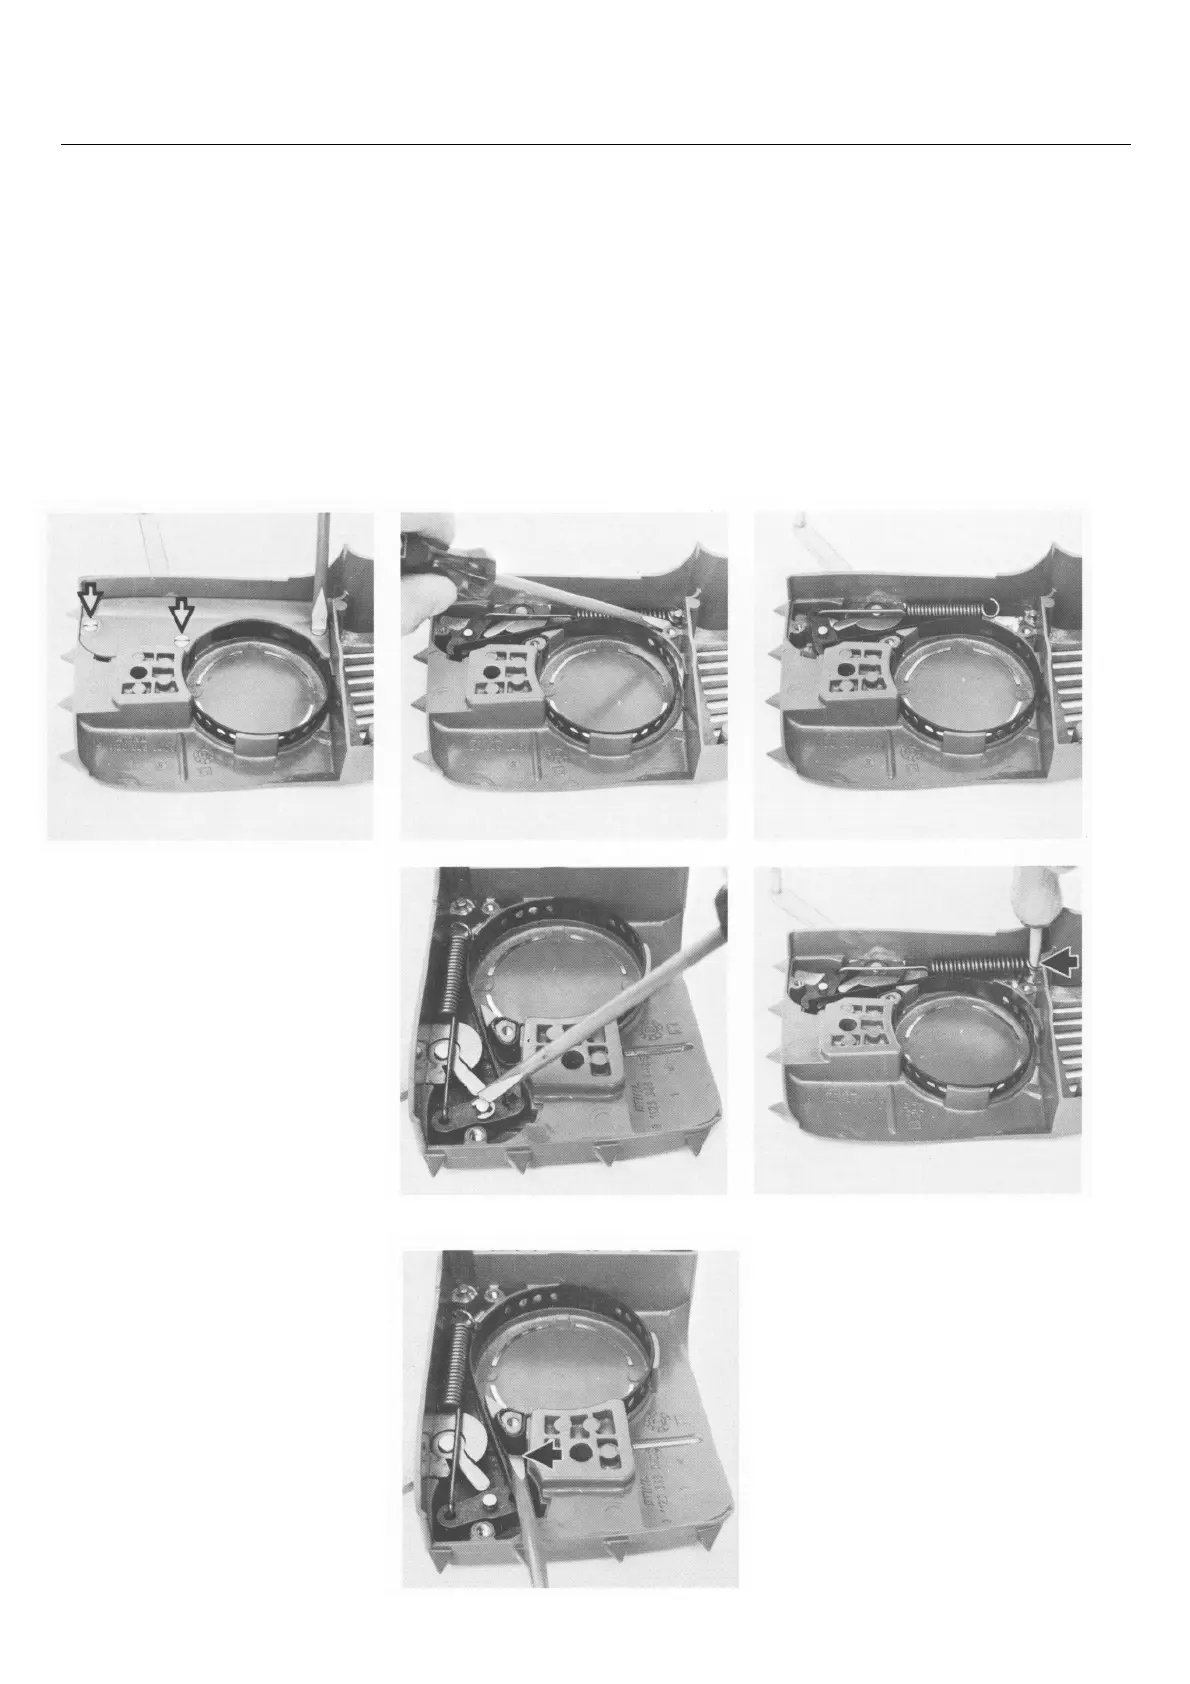
Top:
Detaching tension spring Top:
Brake band, brake lever and tension spring in
Center: position
Removing retaining washer
Bottom:
Bottom: Fitting tension spring with installing tool
Removing plastic cover Removing brake band 1117 890 0900
The chain brake components are inte-
grated in the chain sprocket cover. It
is therefore necessary to remove the
sprocket cover to gain access to the
brake components. After removing
the sprocket cover, engage the chain
brake, unscrew the plastic cover and
detach the tension spring from the pin
in the housing. Remove retaining
washer from brake lever pivot pin and
then prise brake lever together with
the brake band and the tension spring
out of their seats in the cover. The
relay lever and actuating lever cannot
be disassembled. If either one of
these levers is faulty the complete
chain sprocket cover (1120 640 1740)
must be replaced.
Check levers and brake band for
signs of wear. Renew damaged parts
and apply a little grease to the pivot
points before reassembly.
First engage brake band in the brake
lever. Then attach the tension spring
to the brake lever and install the pre-
assembled parts in the chain
sprocket cover.
Fit the retaining washer and use in-
stalling tool to attach tension spring
to the retaining pin. Finish off by
securing the plastic cover.
 Loading...