STIHL 009, 010, 011 15
3.6 Disassembly of Crank-
case - Removal of
Crankshaft
The ignition side of the crankcase still
contains the ignition, a vibration dam-
per, fuel line with pickup body as well
as a needle sleeve and the oil seal.
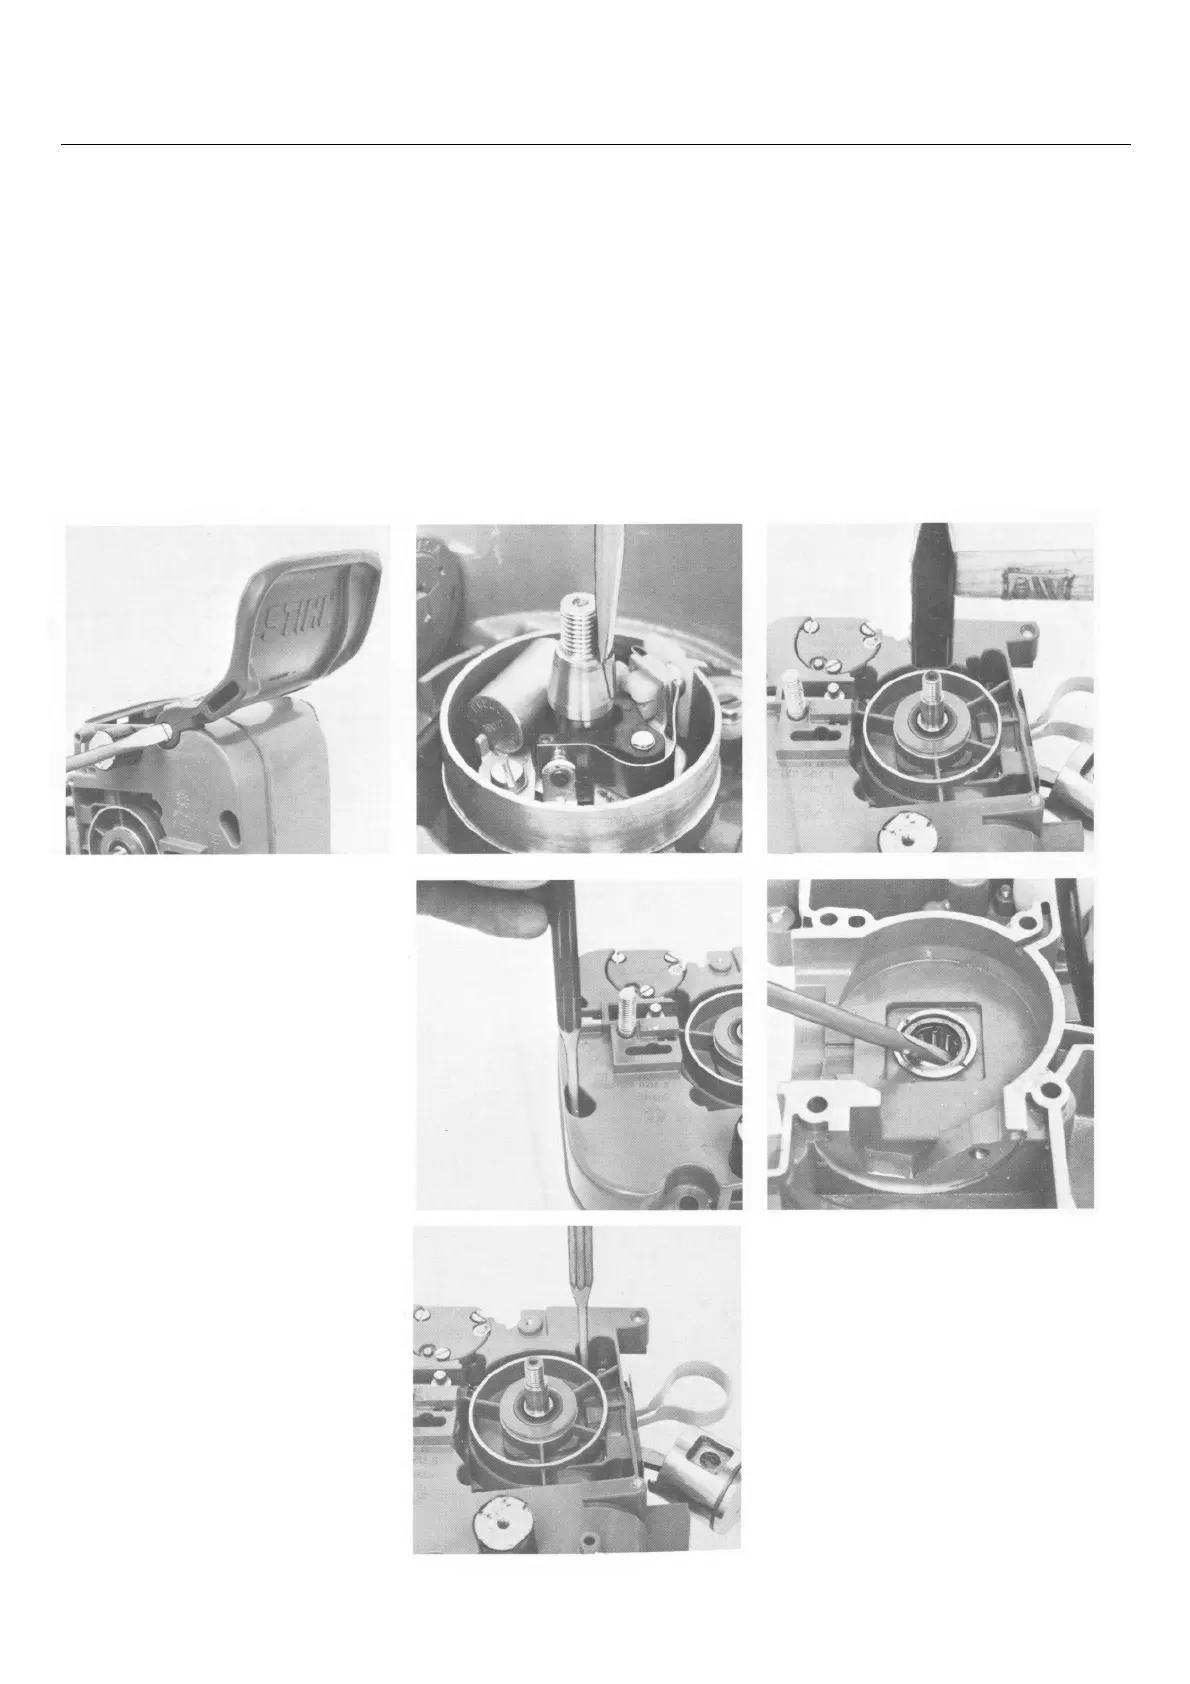
Use a screwdriver to knock the oil
seals out of their seats from the in-
side to the outside, but remove the
contact set first.
Top: Top:
Removing key Driving out the crankshaft
Center and bottom: Bottom:
Removing the hand guard Knocking back cylindrical pins Knocking out oil seal
To remove the crankshaft, first drain
the fuel and oil tanks. Then disas-
semble the rear handle and handle-
bar, fan housing, muffler (3.4), the
clutch (2.3.1), flywheel (4.4.4), car-
buretor (8.4) and hand guard. Re-
move cylinder and gasket and fit the
special clamp in position (3.4).
Remove key from crankshaft stub at
ignition side. Knock the two
cylindrical pins back into the ignition
side of the crankcase and then
unscrew the seven flat head screws
at the sprocket side. The two halves
of the crankcase can now be split by
tapping the sprocket end of the
crankshaft with a soft-nosed
hammer. The crankshaft should now
slide out of the bearing when thumb
pressure is applied.
The sprocket side of the crankcase
still contains the oil pump (7.4), the
chain tensioner, a vibration damper,
a needle sleeve and the oil seal.