STIHL 009, 010, 011
9
2.3 Repai
2.3.1 Disassembly and
Assembly of Clutch
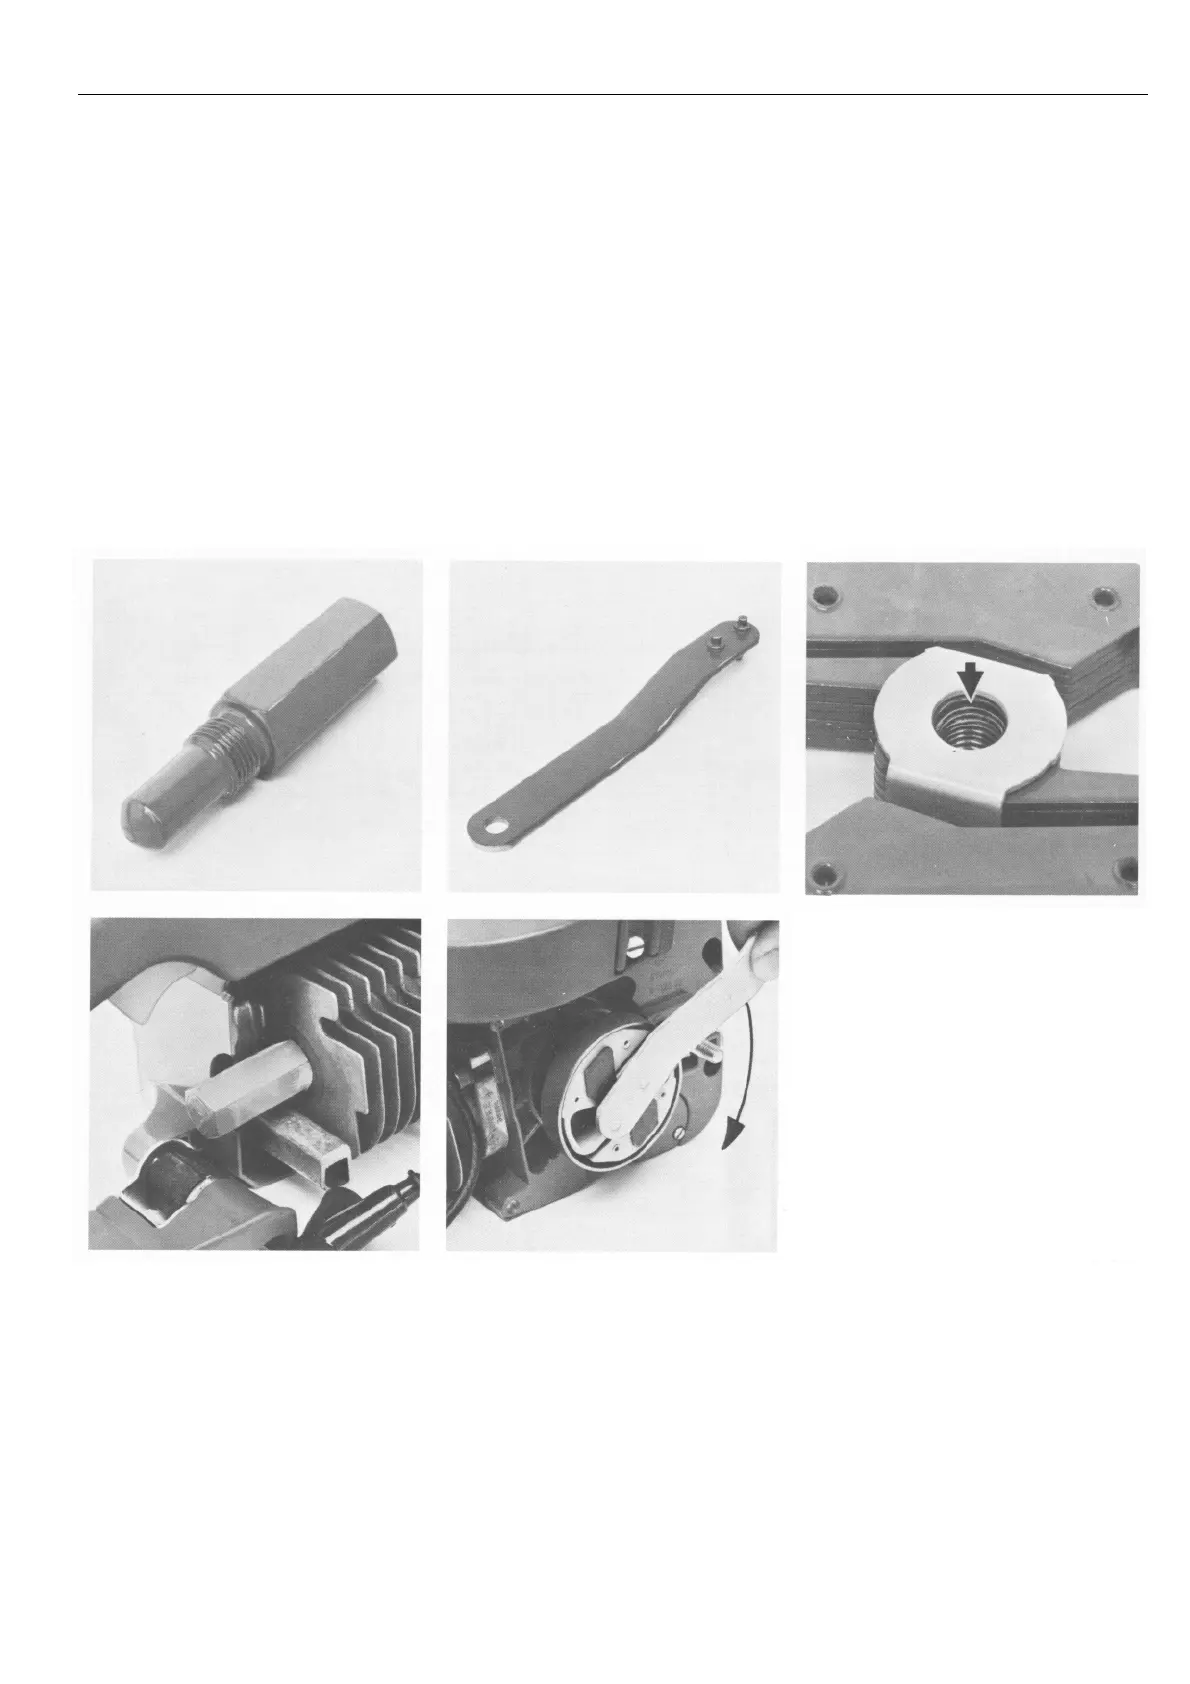
First remove the chain sprocket cover Caution: The clutch has a lefthand
and the cutting attachment. On Quick- thread - unscrew it clockwise!
stop models it is necessary to dis-
engage the chain brake so that the After unscrewing the clutch, remove the
brake band releases the clutch drum. chain sprocket, needle cage and thrust
washer from the crankshaft. Examine
Take out the spark plug and fit the clutch for signs of cracks or breaks.
locking screw in its place. Use the If hairline cracks are found in the
special wrench to turn the clutch and sprung part of the clutch, fit a new
the crankshaft clockwise until the clutch. The cranked U-plate should
piston head butts against the locking also be inspected for hairline cracks.
screw. Now use wrench to unscrew If any are found, fit a new Cranked
the clutch. U-plate. Wash needle cage, thrust
washer and stub of crankshaft with
clean gasoline. Replace needle cage
if it is fault
.
Lubricate needle cage, thrust washer
and stub of crankshaft with
antifriction bearing grease before
assembly. When refitting the clutch
make sure that the side on which the
thread is counterbored to a depth of
about 2 mm (0.08 in) faces the
crankcase. Tighten down clutch
with the wrench to a torque load of
30 Nm (3.0 kpm).
Top: Top:
Locking screw 1107 191 1200 Wrench 1113 890 3600
Bottom: Bottom:
Locking screw in position Unscrewing the clutch Counterbored side of clutch
 Loading...