0458-620-0121-A
15
English
6 Preparing the pressure washer for operation
Angled spray lance and angled nozzle
WARNING
■ An angled spray lance and the angled nozzle intensify the
lateral reactive forces. The reactive forces occurring may
cause the user to lose control of the spray attachment.
The user may be seriously injured and property may be
damaged.
► Attach only one spray lance extension.
► Hold the spray gun firmly with both hands.
6.1 Preparing the pressure washer for operation
The following steps must be carried out every time before
starting work:
► Make sure that the pressure washer, the high-pressure
hose, the hose coupling and the connecting cord are in a
safe condition, @ 4.6.
► Clean the pressure washer, @ 15.
► If using a water filter and the water filter is dirty: Clean the
water filter, @ 15.4.
► Place the pressure washer on a stable, flat surface so that
it cannot slip or topple over.
► Connect the high-pressure hose, @ 7.3.
► Attach the spray gun, @ 7.4.
► Attach the spray lance, @ 7.5.
► Attach the nozzle, @ 7.6.
► If using a detergent: Using detergents, @ 11.4.
► If using an accessory: Fit accessory, @ 5.1.
► Connect the pressure washer to a water source, @ 8.
► Connect the pressure washer to the power supply, @ 9.1.
► If it is not possible to carry out these steps: Do not use the
pressure washer. Consult a STIHL servicing dealer.
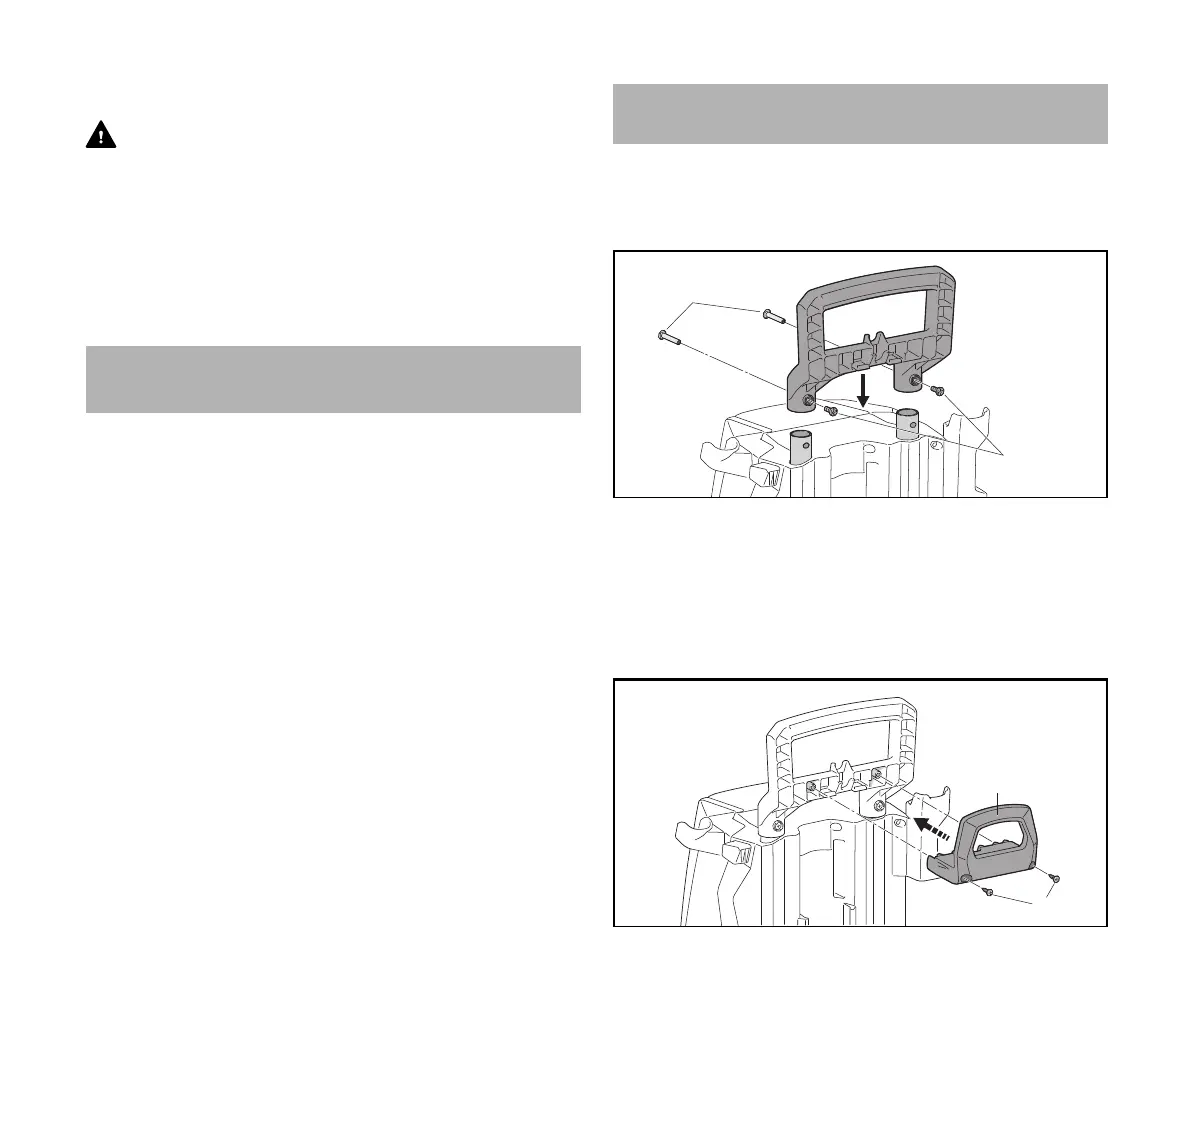
7.1 Assembling the pressure washer
Attaching the handle
► Push handle (1) onto the telescopic shafts (2).
► Push threaded sleeves (3) through the handle (1) into the
telescopic shafts (2).
► Insert screws (4) into the threaded sleeves (3) and tighten
up.
Attaching the hose bracket
► Push hose bracket (1) into the handle (2).
► Insert screws (3) into the handle (2) and tighten up.
6 Preparing the pressure washer for
operation
7 Assembling the pressure washer
0000-GXX-4342-A0
1
2
3

 Loading...