Getting Acquain
tedwithYourInstrument
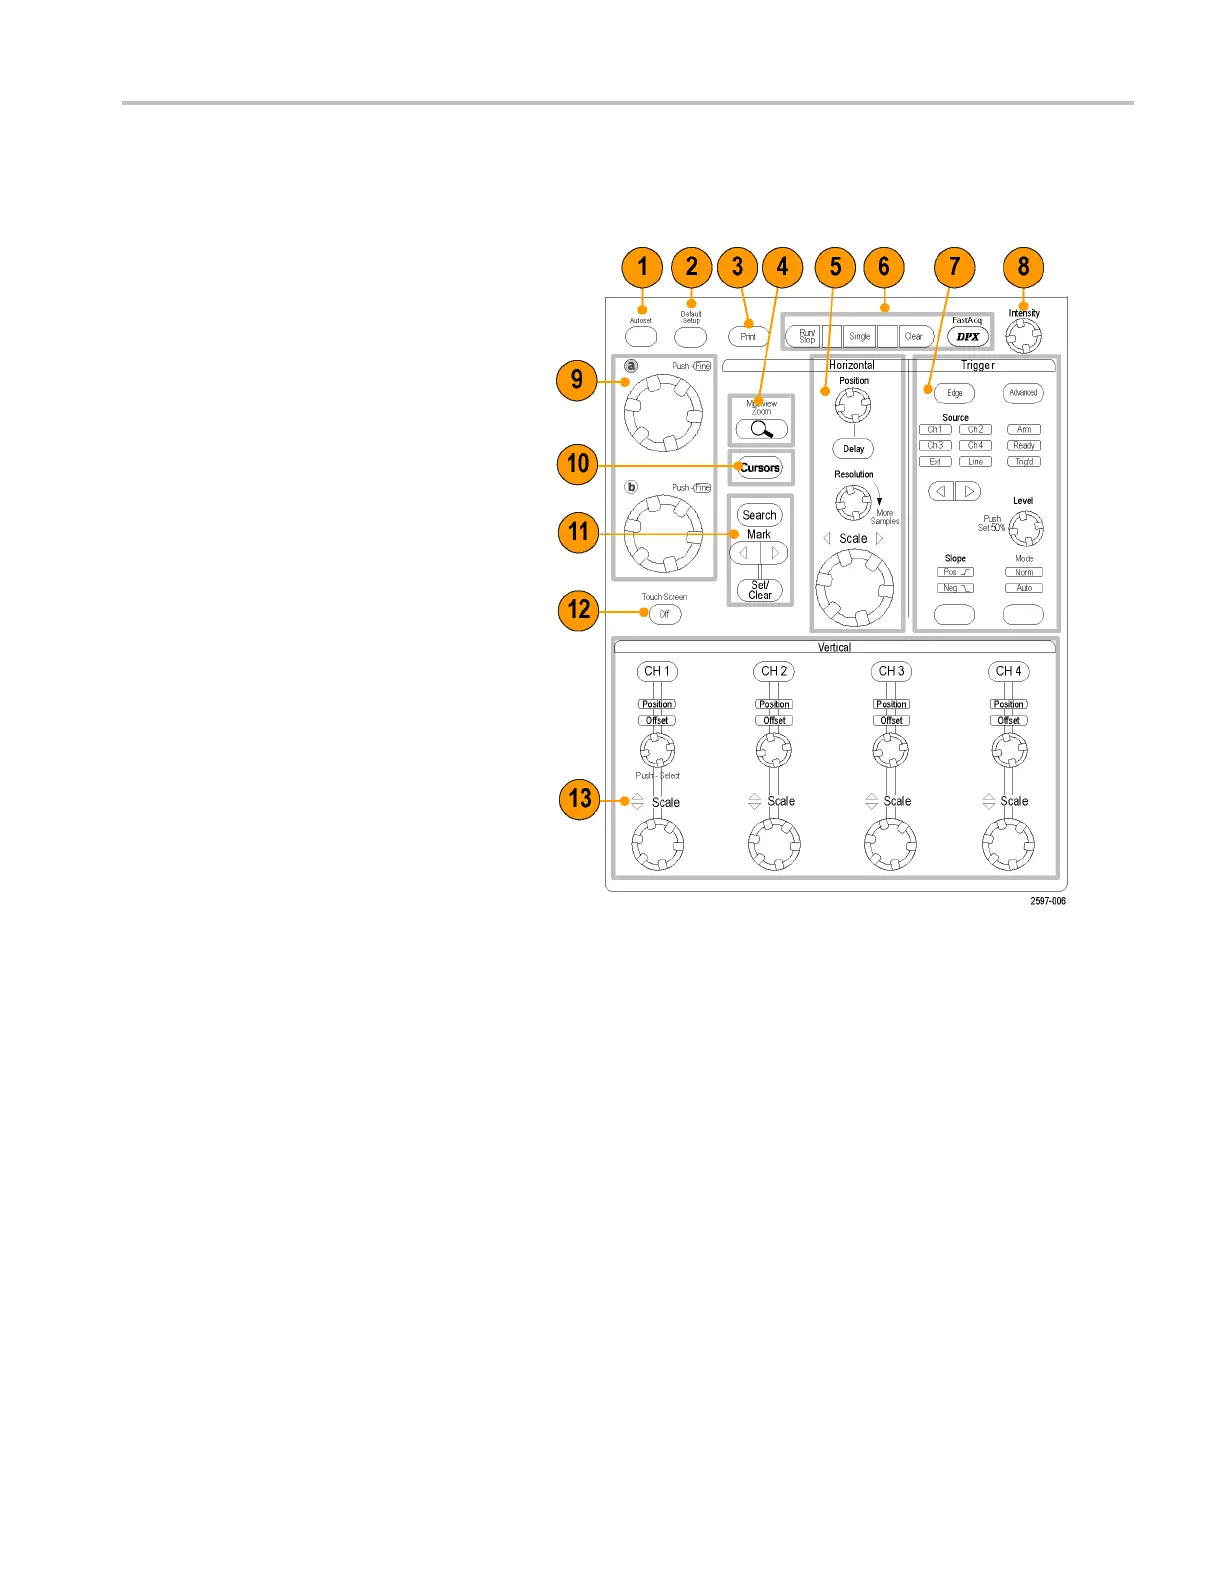
Control Panel
MSO70000/C, DSA70000 B/C, DPO70000B/C, and DPO7000
1. Push to automatically set up the vertical,
horizontal, and trigger controls based on
selected channels.
2. Push to return settings to default values.
3. Push to make a hard copy or save a
screen capture.
4. Push to turn on MultiView Zoom and add
a magnified graticule to the display.
5. Horizontally scale, position, delay, and
set record length (resolution) of all
waveforms.
6. Use to start and stop acquisition, start a
single acquisition sequence, clear data,
or start fast acquisitions.
7. Use to set the trigger parameters. Push
Advanced to display additional trigger
functions. The Arm, Ready, and Trig’D
lights show the acquisition status.
8. Turn to adjust waveform intensity.
9. Turn to adjust parameters selected from
the screen interface. Push to toggle
between normal and fine adjustment.
10. Push to turn cursors on or off.
11. Use to search and mark waveforms.
12. Push to turn the touch screen on and off.
13. Turn channel displays on and off.
Vertically scale, position, or offset the
waveform. Toggle between position and
offset.
On MSO70000 Series instruments, turn
on digital channels using the Digital
> Digital Setup menu. (See page 48,
Setting Up Digital Signal Input.)
MSO70000/C, DPO/DSA70000B/C, DPO7000, and MSO/DP O5000 Series U ser M anual 23
 Loading...

