The aluminum tape is only needed for instruments with a serial number below B020000 or below C040000.
About this task
Remove the rear chassis assembly from the front chassis assembly using the following steps.
Procedure
1. Make a note of the location and size of the aluminum tape pieces along the bottom edge that are taped across the joint between the
rear chassis and the front chassis, and across the ribbon cables.
2. Use a needle nose plier to carefully remove all the aluminum tape. Discard or recycle the removed aluminum tape pieces.
Warning: Do not use fingers to remove the aluminum tape. The tape is sharp and can cause injury
.
The aluminum tape is only needed for instruments with a serial number below B020000 or below C040000.
CAUTION: Be careful when removing tape from across cables to prevent damage. Pull the tape of
f parallel to (across) the
chassis surface; do not pull the tape off by pulling straight out from the chassis. Hold down the exposed cable when removing
the rest of the tape.
3. Use a screwdriver with a with T-10 Torx tip to remove the 18 screws securing the rear chassis to the front chassis. There are five
screws each along the top and bottom, and four screws on each side.
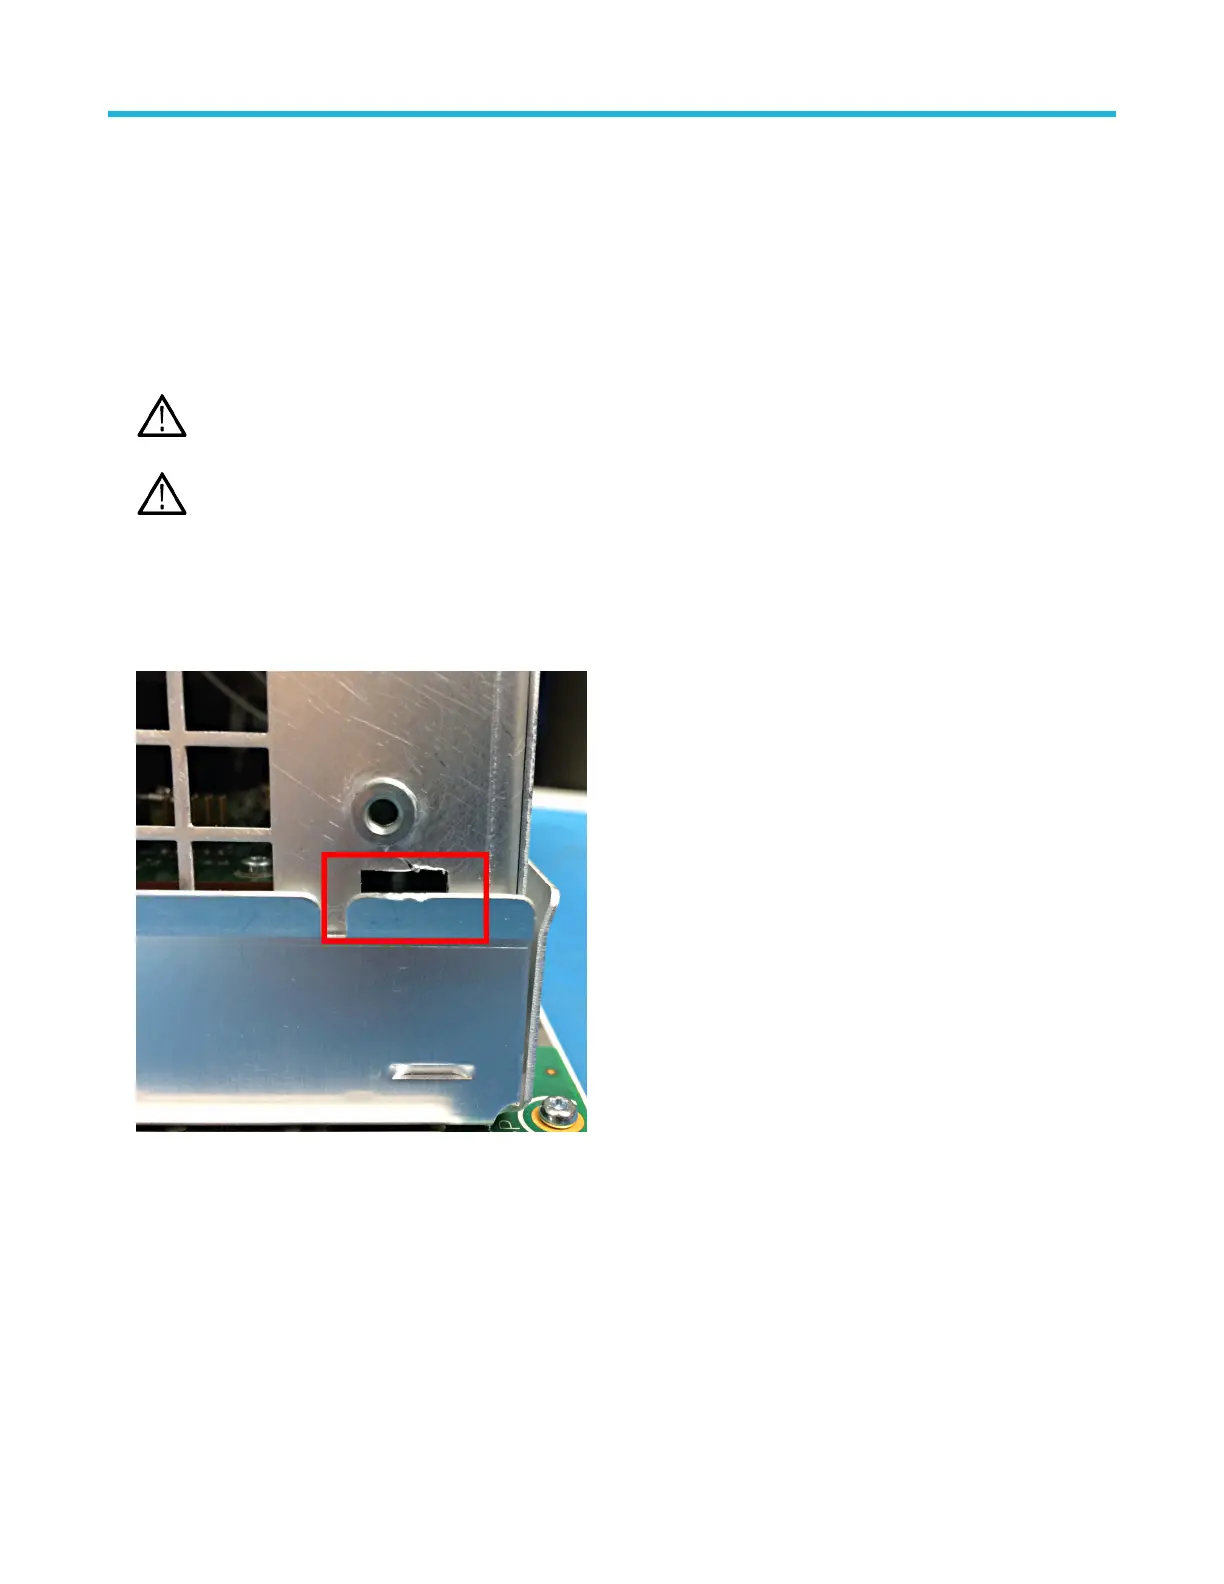
4. Insert a large flat blade screwdriver no more than 1/4 inch into a rectangular slot on the corner of the rear chassis (see following
image). Rotate the screwdriver to lift the corner of the rear chassis from the front chassis. Repeat on each corner. There may be a little
resistance from the front right corner of the bottom edge, where the rear chassis interconnects to the front chassis.
5. Lift the rear chassis of
f of the front chassis.
6. To reinstall, reverse the steps:
a) Align the rear chassis assembly with the front chassis, slide in, and push gently to seat the connectors.
b) Use a screwdriver with T-10 Torx tip to install the 18 chassis screws securing the rear chassis to the front chassis. Tighten to 0.65
N·m.
c) Use a cloth dampened with 75% isopropyl alcohol to clean the chassis area where the aluminum tape pieces will be installed
d) Install the new pre-cut aluminum tape (Tektronix part number 253-0582-XX) on the chassis at the positions noted in step
1 on page 21. The aluminum tape is only needed for instruments with a serial number below B020000 or below C040000. Install
the chassis joint pieces first, then the pieces from the flat cables to the chassis tape pieces.
Maintenance
5 Series MSO Service Manual MSO54, MSO56, MSO58 21
 Loading...


