Installation Instructions
WVR6UP, WVR70UP, and WVR7UP Upgrades
11
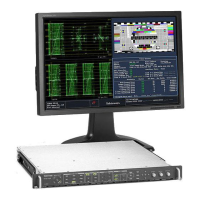
3. Inspect your instrument for an installed Audio board. If an Audio board is
installed, the AES BNC connectors are visible at the rear panel; instruments
without an Audio board have plug covers in place of the audio connectors.
Connectors present if an existing Audio
board is installed
4. If an Audio board is installed, perform the steps in the section titled Remove
Old Audio Board, on page 12 and then continue with Install Upgrade Audio
Board on page 13.
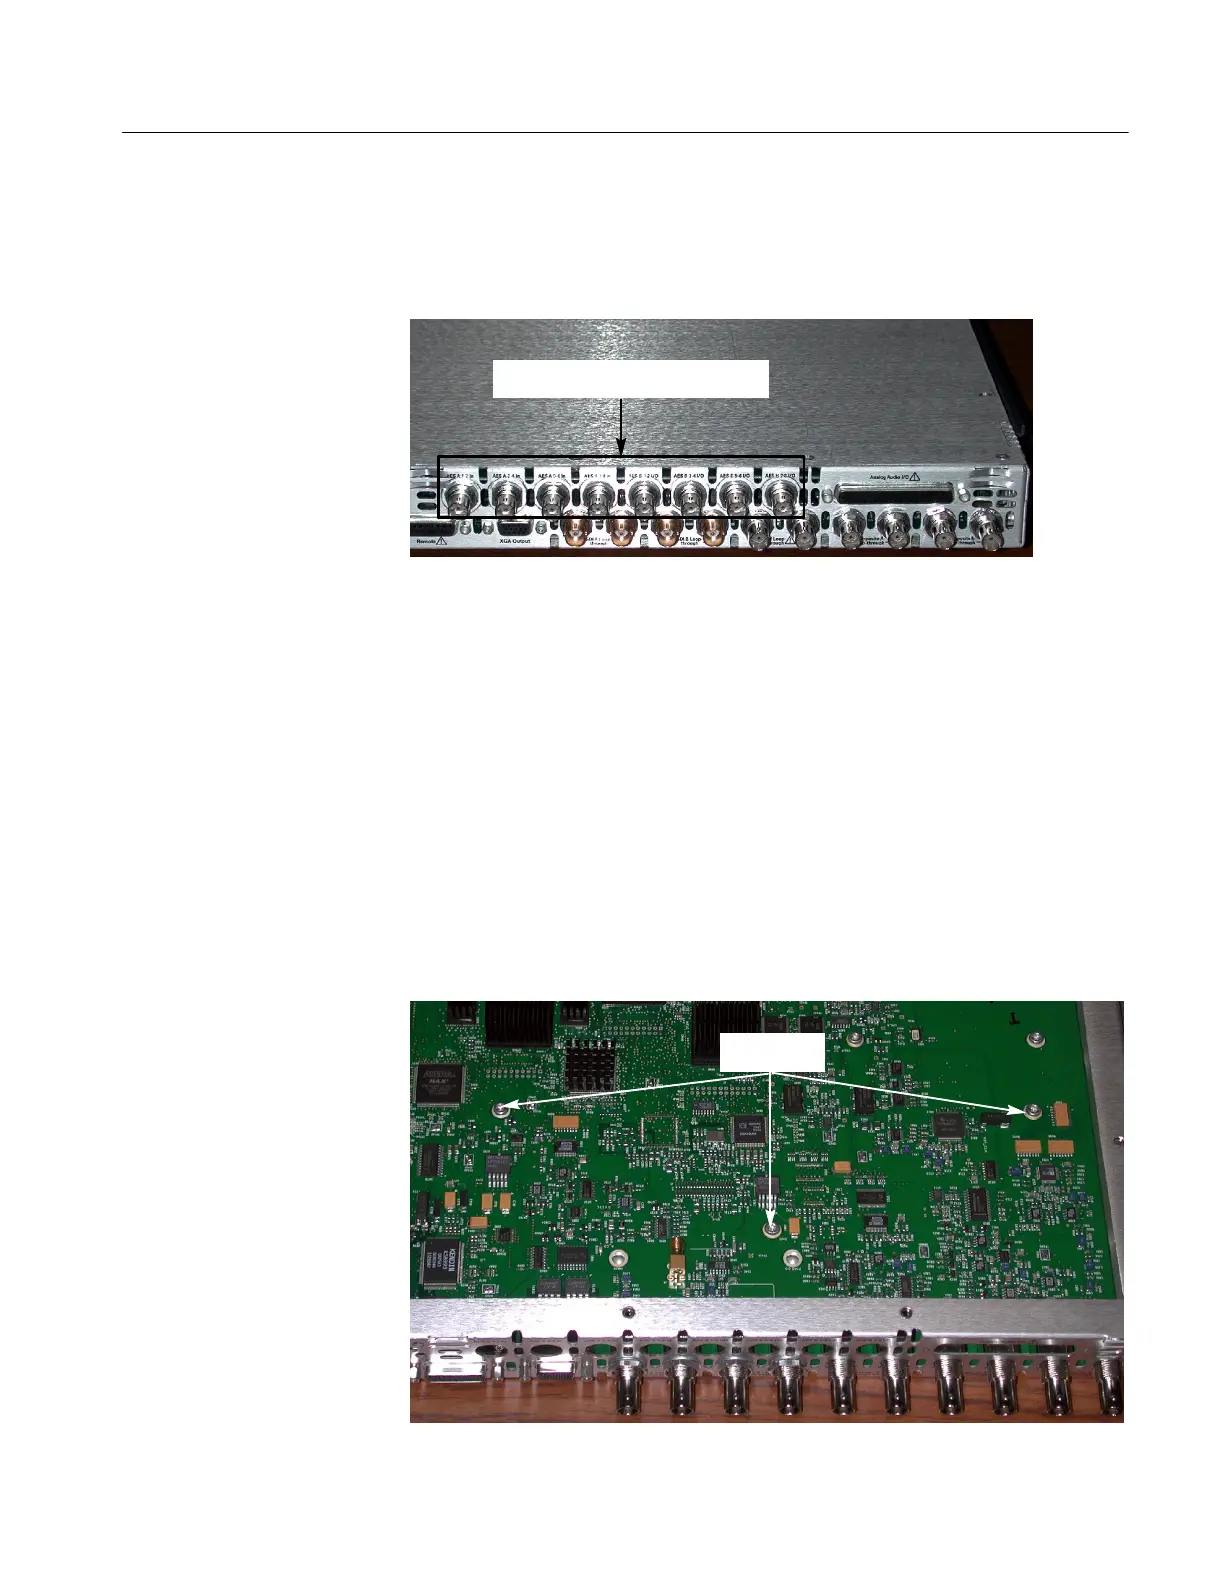
5. If your instrument does not have an Audio board installed, perform the
following steps:
a. Remove the eight plugs from the AES input holes on the rear panel.
Pinch and compress each plug from the inside while prying the plug out
from the outside of the rear panel. A flat-blade screwdriver may help pry
out the plug.
b. Remove the three Main board mounting screws as shown below.
c. Continue with Install Upgrade Audio Board on page 13.
Remove these
screws
 Loading...