Installation Instructions
12
WVR6UP, WVR70UP, and WVR7UP Upgrades
Perform the following steps to remove the existing Audio board in preparation
for installing the new Audio board.
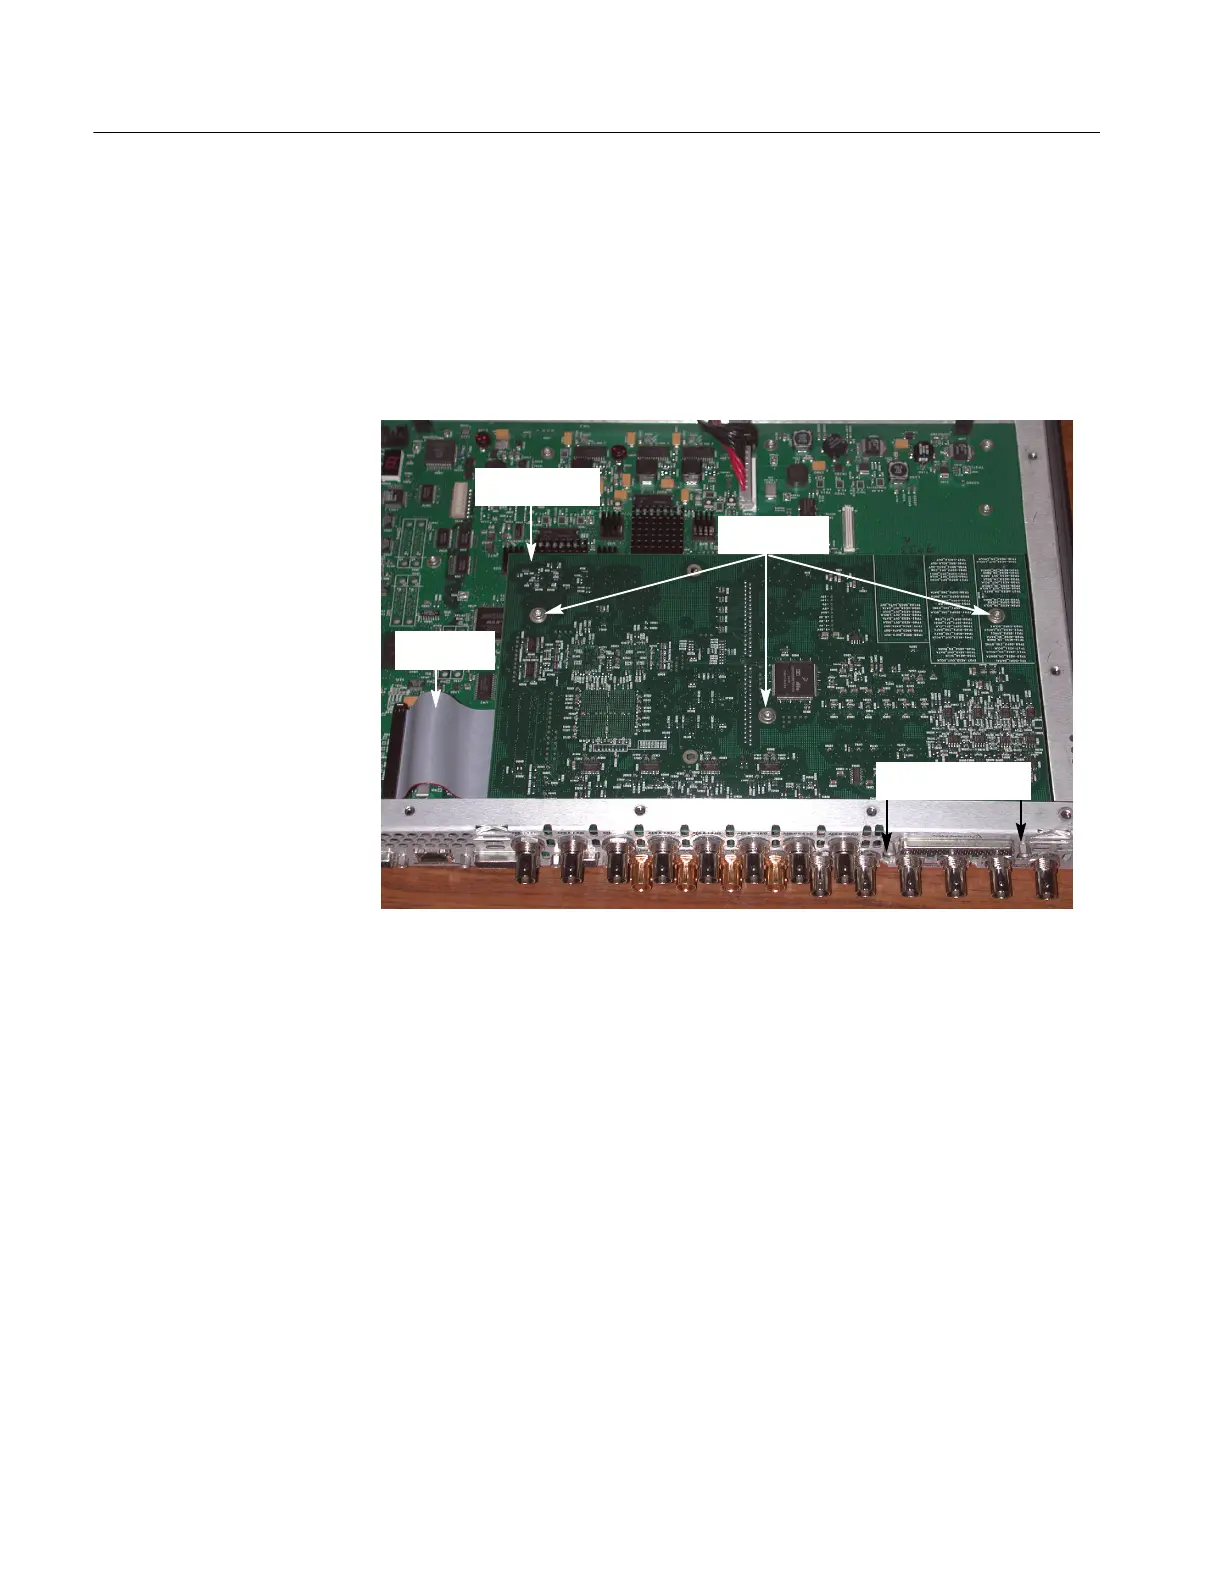
1. Unplug the cable from the Audio board at J750 on the Main board.
2. Remove the three screws (T-15) that secure the old Audio board to the three
mounting posts. Screw locations are shown below.
Unplug this
cable
Remove these
screws
Old Audio
Board
Remove these
retainer posts
3. Remove the nut and washers that secure the eight audio BNC connectors to
the rear panel.
4. If an analog audio connector is present, use a 3/16 in. nut driver to remove
the two retainer posts that secure it to the rear panel.
Remove Old Audio Board
 Loading...