OM3750 Rev. 5 11 January 2004
Page 6 of 24
Avoiding Vibration
All centrifuges have critical speeds at which vibration
occurs. As the speed increases beyond the critical speed,
vibration will cease. This inherent condition also occurs
during deceleration. An imbalanced load intensifies these
critical vibrations. You should avoid running the centrifuge
at or near its “critical speed” to avoid excessive vibration.
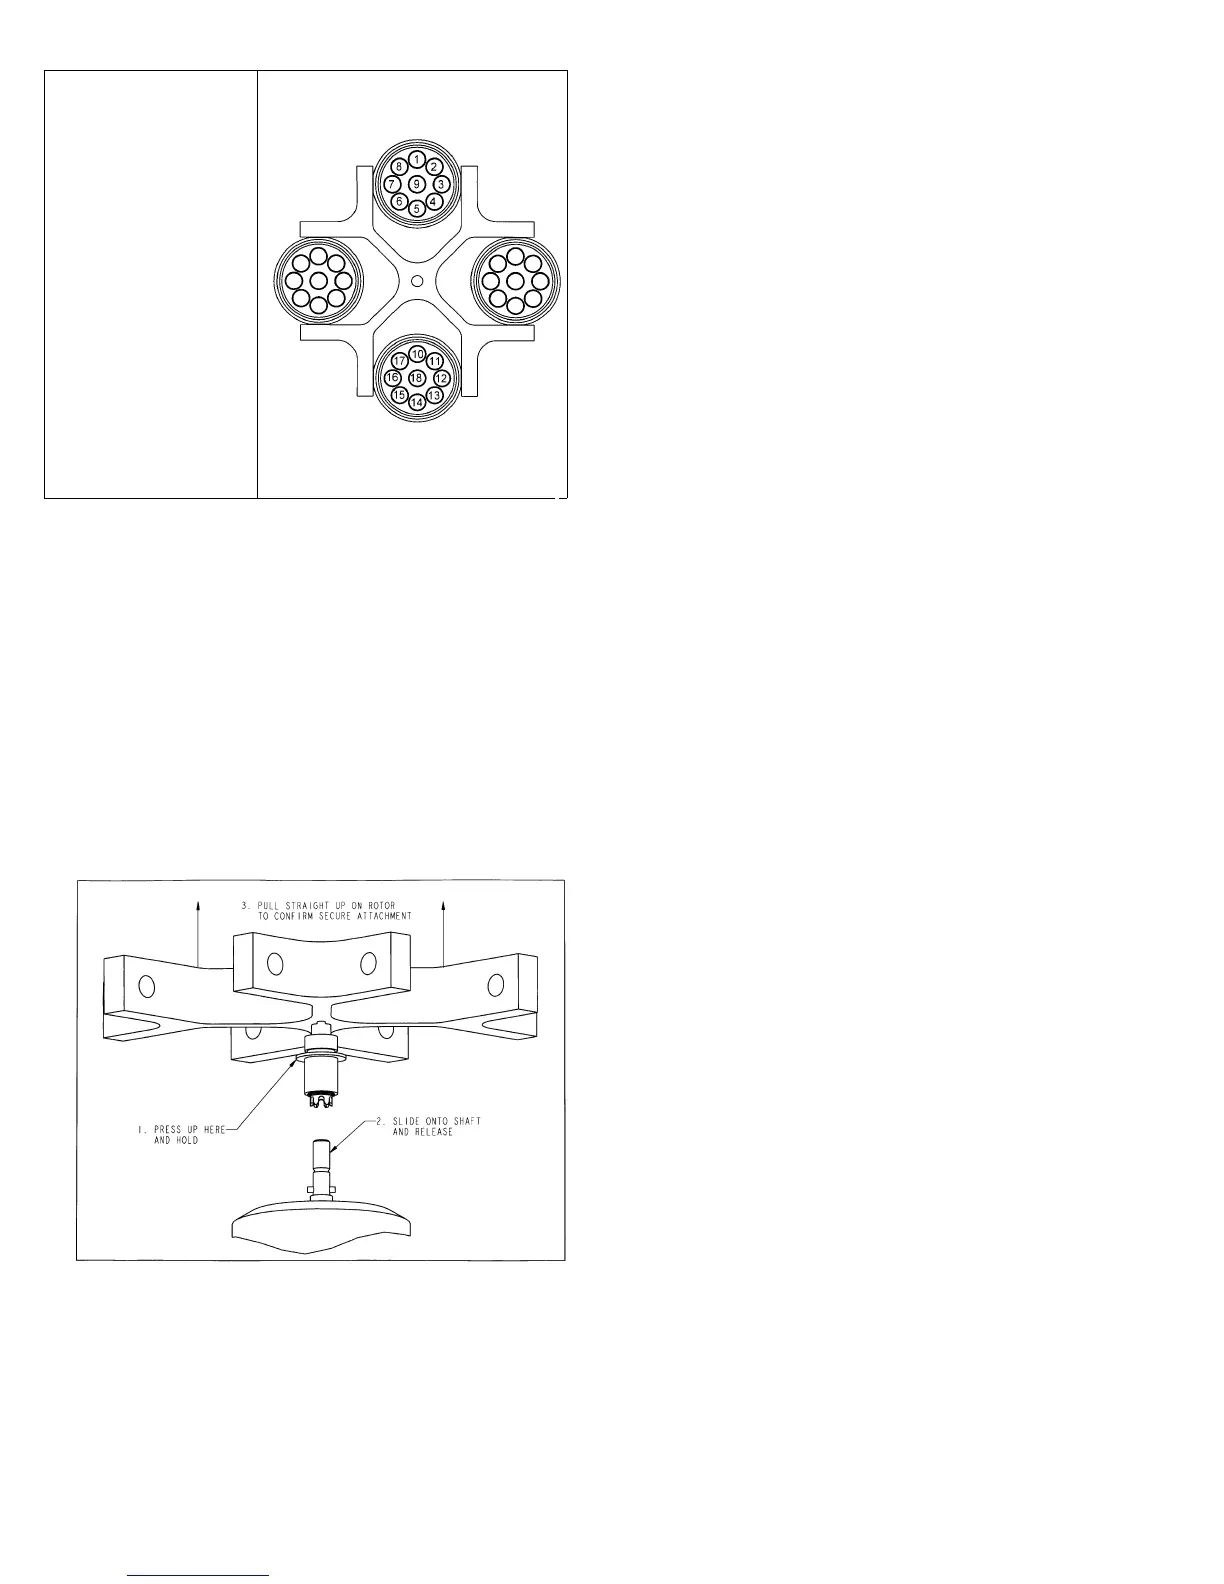
Rotor Installation
To install the rotor:
1. Press the disk (located on the underside of the rotor) to
the rotor.
2. Slide the rotor over the shaft, until it snaps into place.
Release the disk.
3. Pull the rotor straight up, to insure a positive lock.
Rotor Removal
To remove the 243 rotor:
1. Press the disk (located on the underside of the rotor) to
the rotor.
2. Lift the rotor straight up.
3. Release the disk.
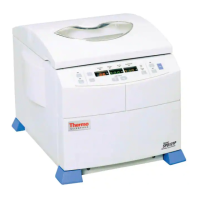
1. Load two tubes at
positions: 9 and
18.
2. Load four tubes at
positions:
1, 5 and 10, 14
or
7, 3 and 16, 12
3. Load six tubes at
positions:
1, 9, 5 and 14, 18,
10
or
7, 9, 3 and 12, 18,
16
4. Loading an odd
number of tubes is
not recommended.
Rotor Adapter
To install the shaft adapter for an existing rotor:
1. Press the adapter disk and slide the adapter over the
rotor shaft. Release the disk.
2. Pull the adapter straight up to insure a positive lock.
3. Align the rotor keyway with the key on the shaft
adapter and place the rotor onto the adapter.
4. Tighten the rotor locking nut (with the provided
wrench), until it tightly engages the rotor.
To remove existing rotors from the shaft adapter:
1. Remove any sample tubes, shields, buckets, and other
accessories, from the rotor.
2. Unscrew and remove the locking screw.
3. Grasp the rotor and rock it front-to-back, and side-to-
side.
4. Remove the rotor from the shaft.
3.2 Starting and Stopping a Run
The display above the Program key shows the unit’s
operating mode:
• blank The unit is in manual operation.
• 1-99 The unit is under control of the displayed
stored program number.
• C The unit is set to Rapid Condition, a special
program discussed in Section 3.4.
The rest of the display indicates the last parameters
selected.
Manual Operation
For manual operation:
1. Press the MANUAL key so that the program display is
blank.
2. Select the desired temperature (refrigerated system
only).
3. Select the speed/g-force, run time, acceleration mode,
and braking mode.
4 . P r e s s S T A R T t o s t a r t t h e s p i n .
The time display counts down, and displays the time
remaining in the current spin, during manual operation.
The specified run time begins when the START key is
pressed. Braking begins when the set time elapses. Run
time does not include braking time.
The spin will stop automatically at the end of the desired
interval.
IMPORTANT:
A run can be stopped at any time by pressing the STOP
key.
The settings can be changed during a manual run. These
changes affect the run in progress. If the time setting is
changed during a run the unit adjusts the count-down timer
to display the revised setting as the total time of the run. If
the new time selected is less than the elapsed time, the run
will end.
The unit’s mode (settings) cannot be changed during a
program mode spin.

 Loading...