ServicingtheBedbar
RemovingtheBedbar
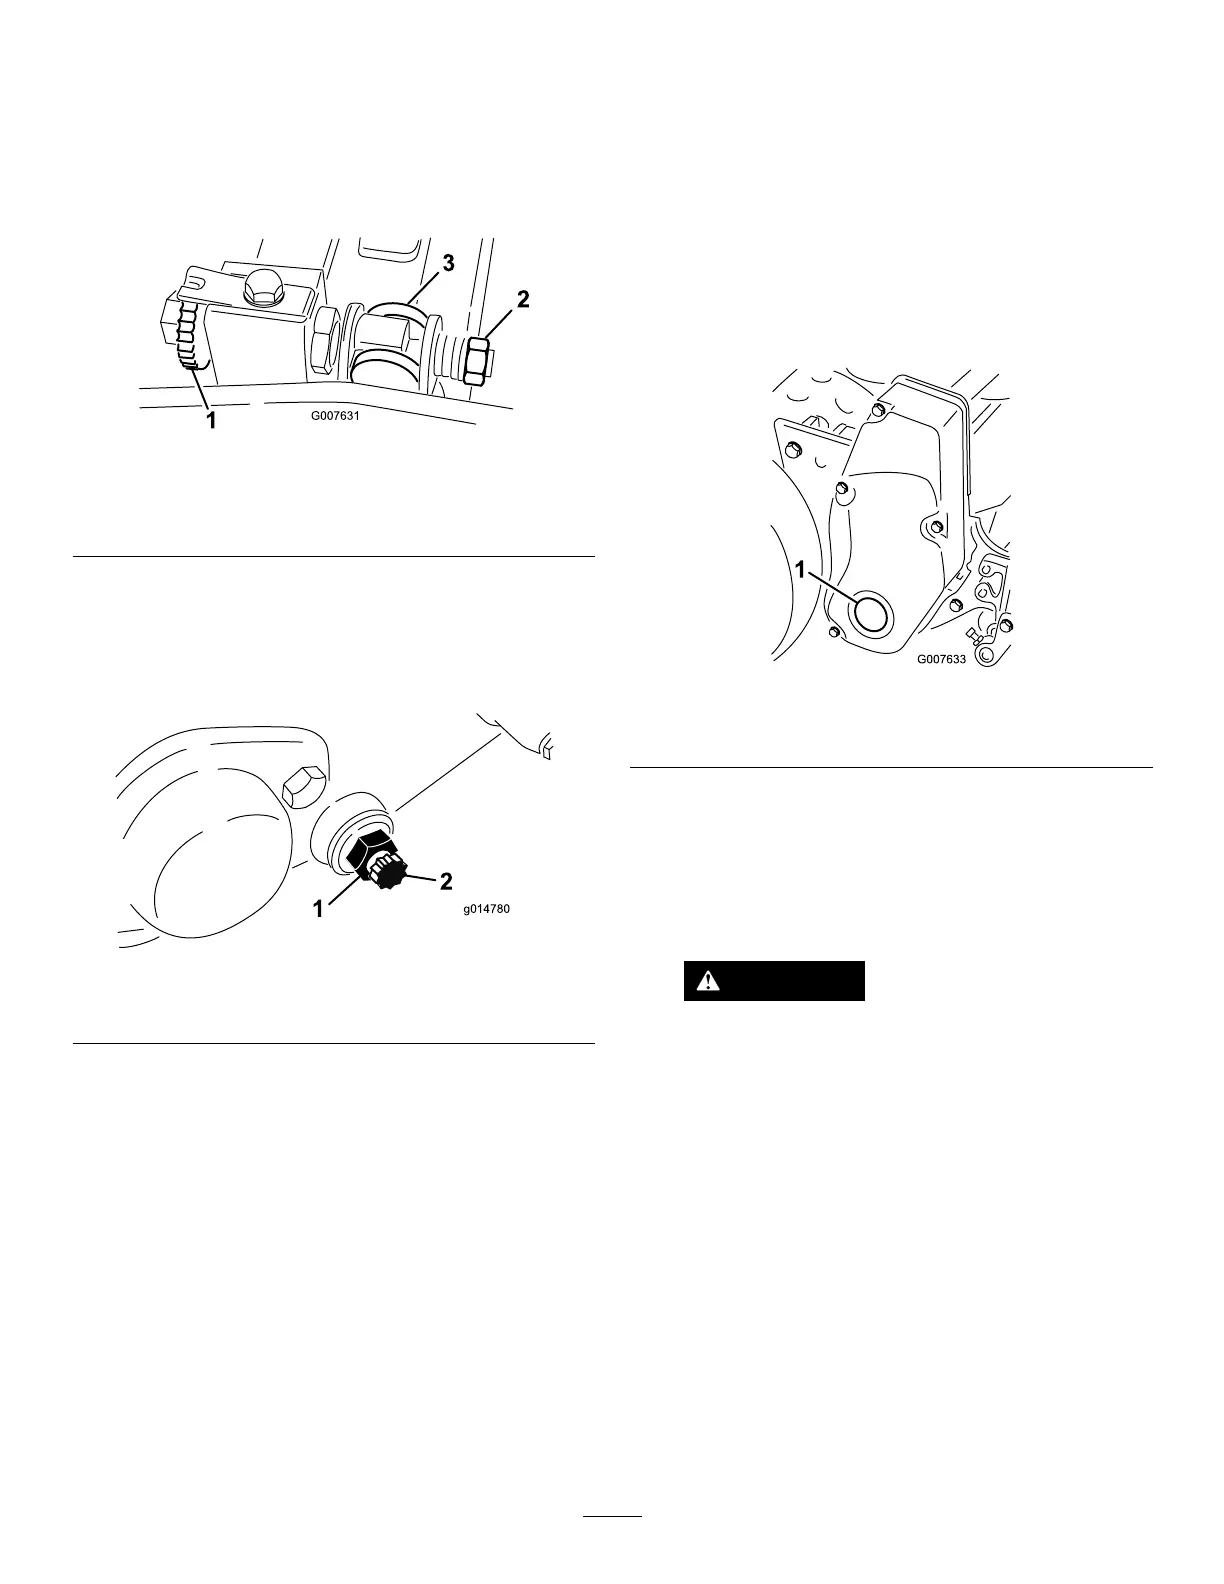
1.Turnthebedbar-adjusterscrew
counterclockwisetobackthebedknife
awayfromthereel(Figure56).
g007631
Figure56
1.Bedbar-adjustingscrew3.Bedbar
2.Spring-tensionnut
2.Backoutthespring-tensionnutuntilthewasher
isnolongertensionedagainstthebedbar
(Figure56).
3.Oneachsideofthemachine,loosenthejamnut
thatsecuresthebedbarbolt(Figure57).
g014780
Figure57
1.Jamnut2.Bedbarbolt
4.Removeeachbedbarboltallowingthebedbar
tobepulleddownwardandremovedfromthe
machine.Savethe2nylonand2stampedsteel
washersoneachendofthebedbar(Figure57).
InstallingtheBedbar
1.Installthebedbar,positioningthemountingears
betweenthewasherandthebedbaradjuster.
2.Securethebedbartoeachsideplatewiththe
bedbarbolts(jamnutsonthebolts)and8
washers.
Note:Positionanylonwasheroneachside
ofthesideplateboss.Placeasteelwasher
outsideeachofthenylonwashers.
3.Torquetheboltsto27to36N∙m(20to27ft-lb).
4.Tightenthejamnutsuntiltheoutsidethrust
washersjustrotatefreely.
5.Tightenthespring-tensionnutuntilthespringis
collapsed,thenbackitoff1/2turn.
6.Adjustthebedbar;refertoAdjustingthe
BedknifetotheReel(page36).
BacklappingtheReel
1.Removetheplugintherightreel-drivecover
(Figure58).
g007633
Figure58
1.Coverplug
2.Inserta1/2inch-driveextensionbar,connected
tothebacklappingmachine,intothesquarehole
inthecenterofthereelpulley.
3.BacklapaccordingtotheprocedureintheToro
SharpeningReelandRotaryMowersManual,
Form80-300PT .
DANGER
Contactwiththereelorothermoving
partscanresultinpersonalinjury.
•Stayawayfromthereelwhile
backlapping.
•Donotuseashort-handledpaint
brushforbacklapping.PartNo.
29-9100Handleassembly,completeor
asindividualparts,areavailablefrom
yourlocalauthorizedTorodistributor.
Note:Forabettercuttingedge,runale
acrossthefrontfaceofthebedknifewhenthe
lappingoperationiscompleted.Thisremoves
anyburrsorroughedgesthatmayhavebuilt
uponthecuttingedge.
4.Installthepluginthecoverwhenyoucomplete
thisprocedure.
39
 Loading...


