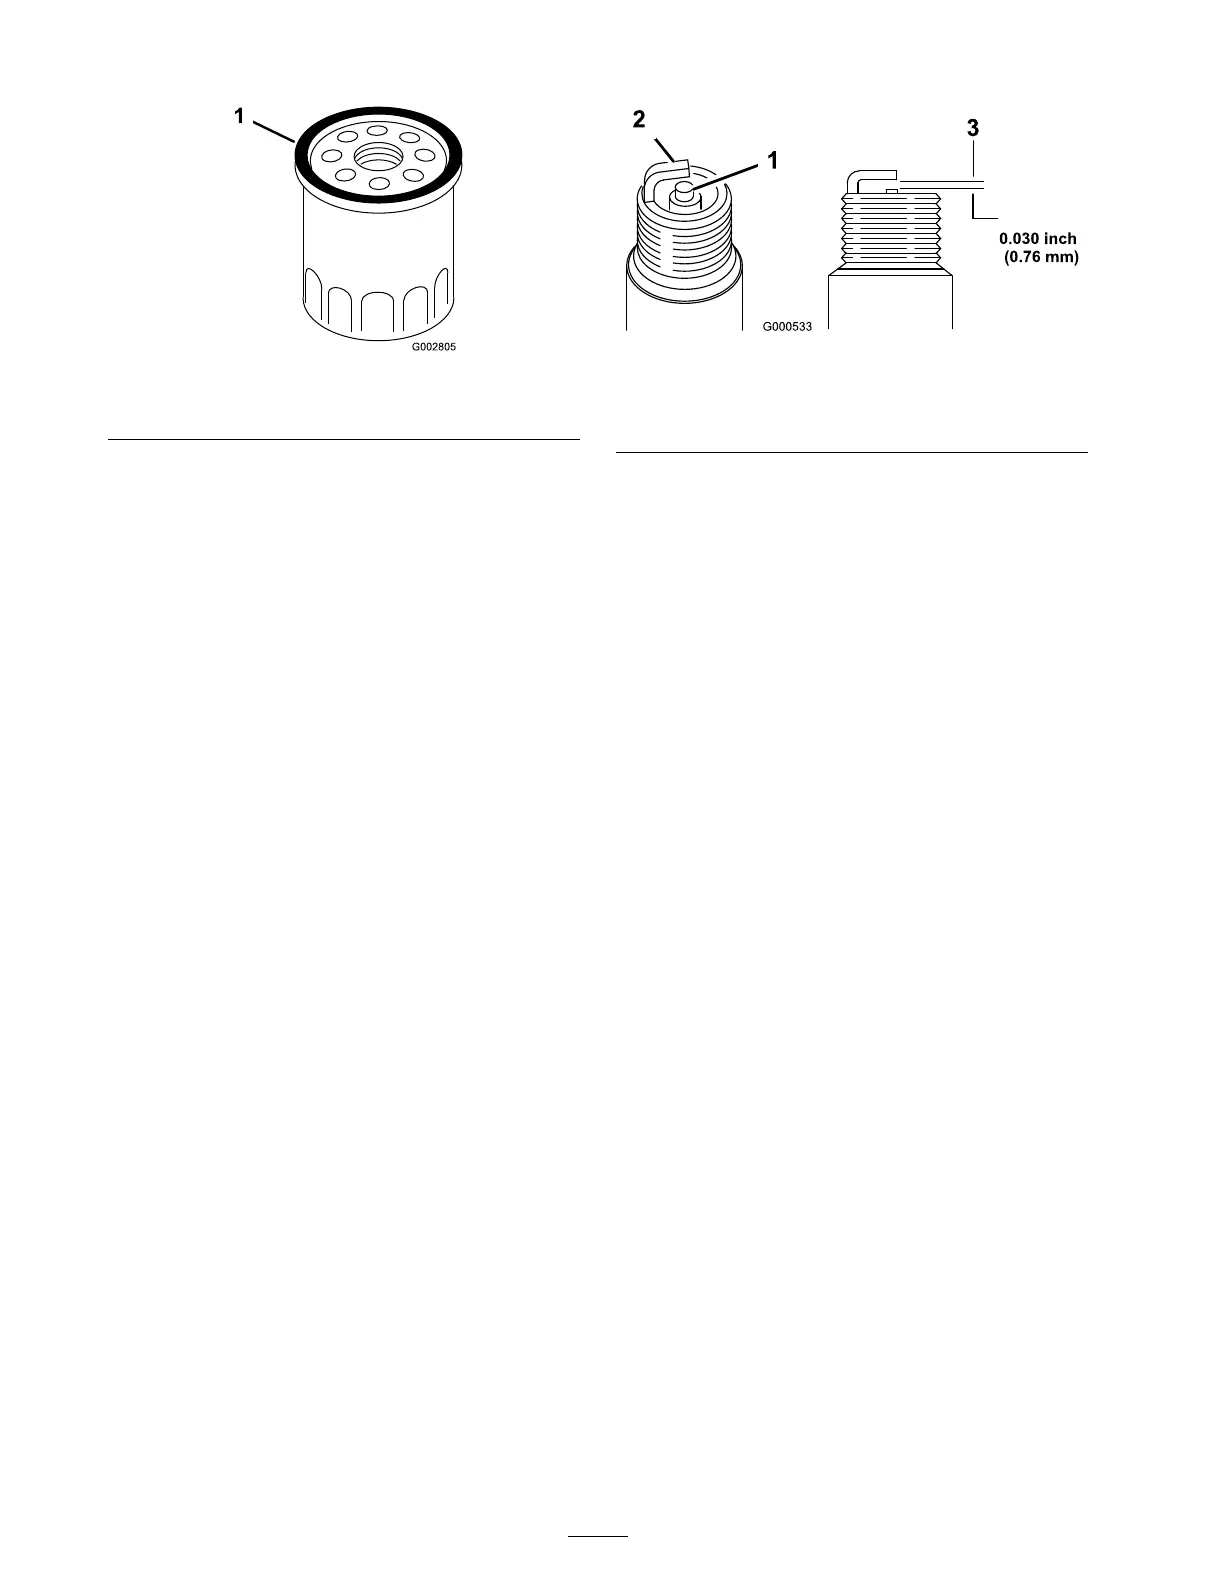
Figure 24
1. Gasket
8. Install the new filter and hand tighten it 2/3
tur n only .
9. Fill the crankcase to the Full line on the
dipstic k with fresh oil R efer to Filling the
Crankcase with Oil.
10. Connect the wire to the spark plug .
11. R un the engine for about 3 min utes .
12. Stop the engine , w ait for all mo ving par ts to
stop , and c hec k for oil leakag e around the filter .
13. Add oil to compensate for the oil in the oil
filter . R efer to Chec king the Engine Oil Lev el.
14. R ecycle the used oil filter according to local
codes .
Servicing the Spark Plug
Chec k the spark plug after ev er y 100 operating
hours . Use an NGK BPR5ES spark plug or
equi v alent.
1. Stop the engine and w ait for all mo ving par ts
to stop .
2. Disconnect the wire from the spark plug
( Figure 13 ).
3. Clean around the spark plug .
4. R emo v e the spark plug from the cylinder head.
Important: R eplace a crack ed, f ouled,
or dir ty spar k plug . Do not clean the
electr odes because g rit entering the
cylinder can dama ge the engine.
5. Set the g ap on the plug to 0.030 in. (0.76 mm)
( Figure 25 ).
Figure 25
1. Center electrode insulator
2. Side electrode
3. Air gap (not to scale)
6. Install the spark plug and the g ask et seal.
7. T or que the plug to 17 ft-lb (23 N ⋅ m).
8. Connect the wire to the spark plug .
Fuel System
Maintenance
Emptying the Fuel Tank and
Cleaning the Fuel Filter
T he fuel filter (screen) element is located inside
the fuel tank. Clean the fuel filter element ev er y
100 operating hours .
1. Stop the engine and w ait for it to cool do wn.
Important: Drain gasoline fr om a cold
engine onl y .
2. Disconnect the wire from the spark plug
( Figure 13 ).
3. Close the fuel v alv e ( Figure 23 ).
4. Disconnect the fuel line b y loosening the tube
clamp at the carburetor .
5. Open the fuel v alv e .
6. Drain the g asoline completely from the tank
and fuel line into an appro v ed fuel container .
7. R emo v e the fuel tank from the mo w er .
8. Close the fuel v alv e .
9. P our a small amount of fuel in the fuel tank,
mo v e the fuel around in the tank, and pour it
out into an appro v ed fuel container .
10. Install the fuel tank and fuel line; refer to
Installing the Fuel T ank and the Fuel Line .
22
 Loading...