33
Servicing the Air Cleaner
Check the air cleaner body for damage which could
possibly cause an air leak. Replace a damaged air cleaner
body.
Service the air cleaner filters when the air cleaner indicator
(Fig. 24) shows red or every 400 hours (more frequently in
extremely dusty or dirty conditions). Do not over-service
the air filter.
1
Figure 23
1. Air cleaner indicator
Be sure that the cover is sealing around the air cleaner
body.
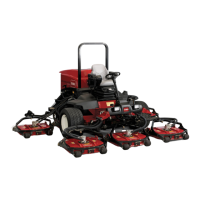
1. Pull the latch outward and rotate the air cleaner cover
counterclockwise. Remove the cover from the body
(Fig. 24). Clean the inside of the air cleaner cover.
2
1
Figure 24
1. Air cleaner latch 2. Air cleaner cover
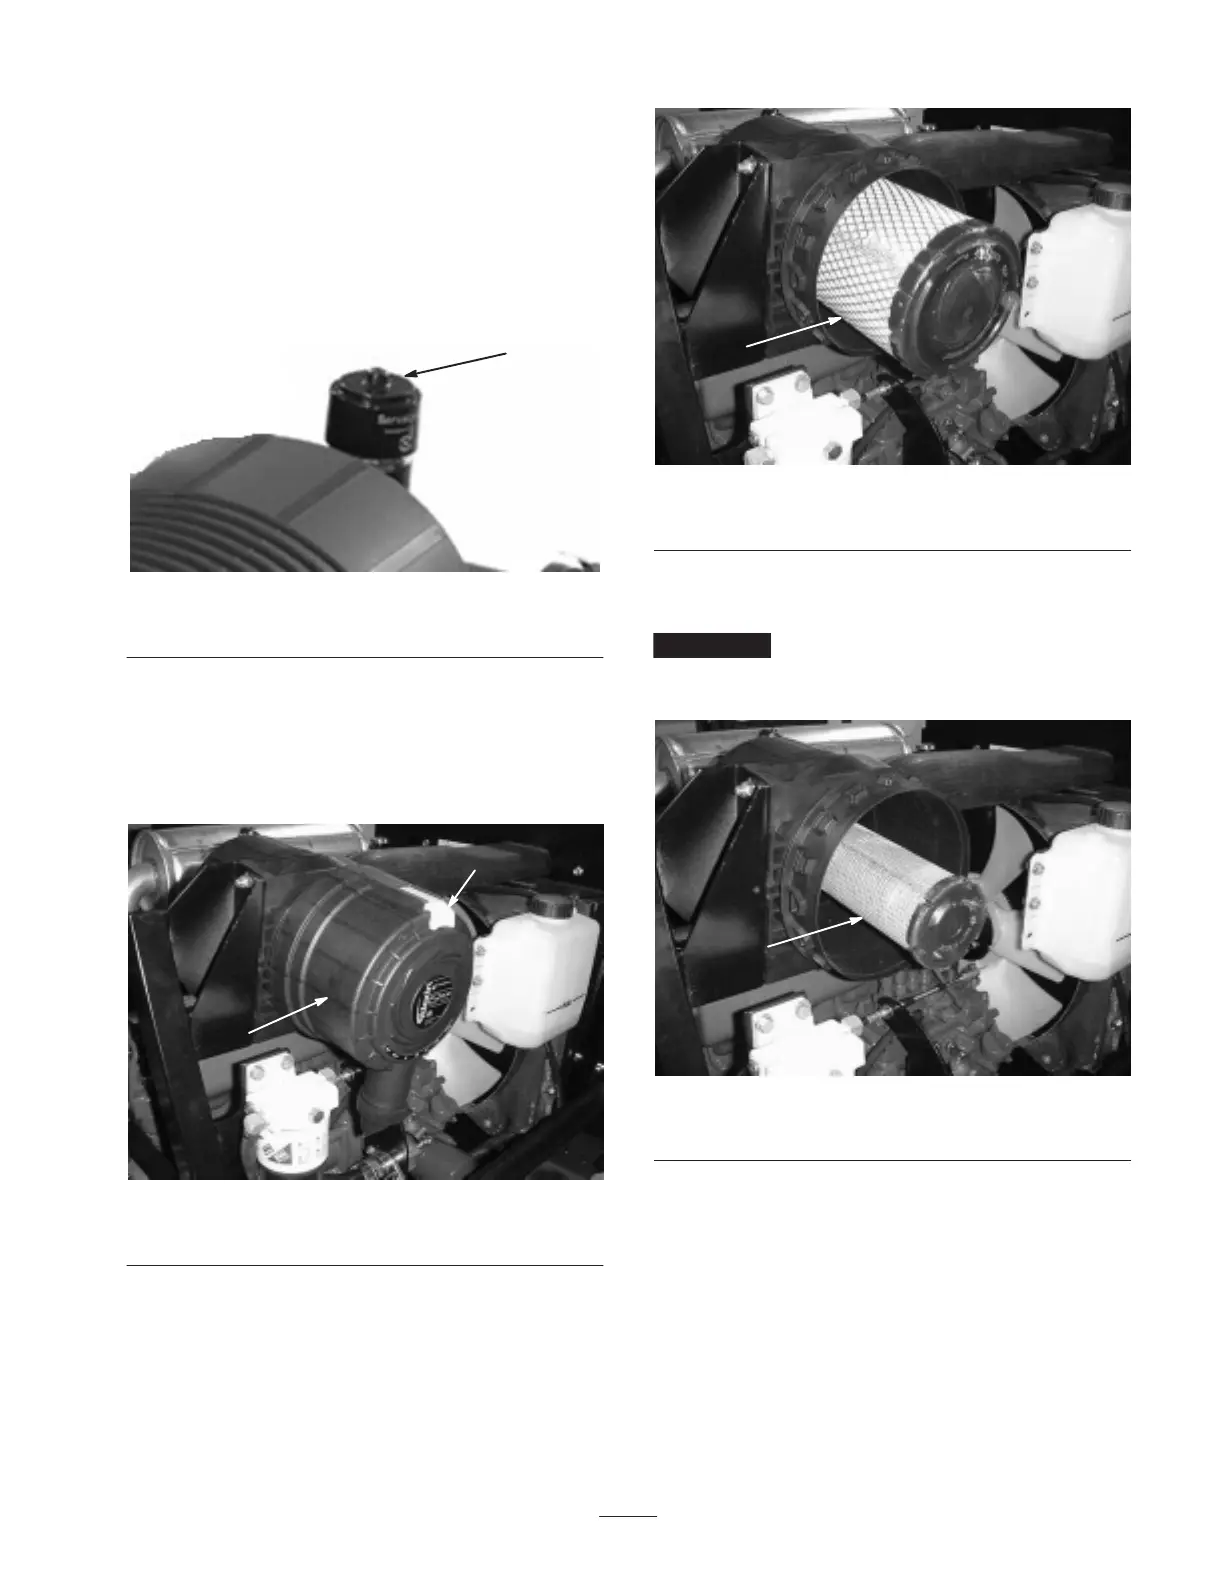
2. Gently slide the primary filter (Fig. 25) out of the air
cleaner body to reduce the amount of dust dislodged.
Avoid knocking the filter against the air cleaner body.
Do not remove the safety filter (Fig. 26).
1
Figure 25
1. Air cleaner primary filter
3. Inspect the primary filter and discard it if it is damaged.
Do not wash or reuse a damaged filter.
Important Never attempt to clean the safety filter
(Fig. 26). Replace the safety filter with a new one after
every three primary filter services.
1
Figure 26
1. Air cleaner safety filter
4. Cleaning the air filter:
A. Blow compressed air from the inside to the outside
of the dry filter element. To prevent damage to the
element, do not exceed 100 psi (689 kPa).
B. Keep the air hose nozzle at least 2 in. (51 mm) from
the filter and move the nozzle up and down while
rotating the filter element. Inspect the filter for holes
and tears by looking through it toward a bright light.

 Loading...