TowingtheMachine
WARNING
Towingthemachineathighspeedincreasesthe
riskofahitchmalfunctionandtirefailure.Higher
speedsalsoincreasethemomentumofthemachine
andbrakingdistance.Ifthemachinebecomes
detachedfromthetowvehicleathighspeed,it
couldcausedamagetoproperty,orinjuryordeath
tobystanders.
Donotexceed88km/h(55mph)whentowingthe
machine.Forpoorroadconditionsorinclement
weather,reducespeedaccordingly.
WARNING
Towingthemachinewithmaterialinthedrum
increasestheriskofahitchmalfunctionandtire
failure.Inaddition,materialcouldbounceoutof
thedrumandhitothervehiclesand/orpeople.
Materialinthedrumincreasestheweight,which
affectsmomentumandbrakingdistance.
Donottowthemachinewithmaterialinthedrum.
•ReviewandunderstandSafeOperatingPractices(page4).
•Testthebrakesofthetowvehiclebeforetowing.
•Avoidsuddenstartsandstopswhiletowingthemachine.
PreparingtoUsetheMachine
•Reviewallofthesafetydecalsonthemachine.
•Useahard-hat,hearingprotection,ashirtwithlong
sleevesthataretightatthewrists,tight-ttinggloves
withoutdrawstringsorloosecuffs,eyeprotection,and
adustmaskorrespirator.Ameshvisoralonedoes
notprovidesufcienteyeprotection;supplementwith
protectiveglasses.
•Ensurethatyouarefamiliarwithsafetyregulationsand
shutdownproceduresdescribedinthisOperator’sManual
andtheengineowner’smanual.
•Ensurethatallguardsareinplaceandingoodcondition.
•Ensurethatthepaddlesareinplaceandingood
condition.
•Forend-dumpmodels,lowerthefrontandrearstabilizer
legs.
•Checkthefuelandoillevelsoftheengine.
•Whenpreparingtomixmaterial:
1.Movethemachinetoaleveljob-sitesurface.
2.Removethemachinefromthetowvehicle.
3.Chockthefrontandbackofthetirestoprevent
themachinefrommoving.
4.Ensurethatthedrumisinthemixposition
(upright).
5.Ensurethatthedrumlatchisengagedandthatthe
drumdoesnotrotatetowardthedumpposition.
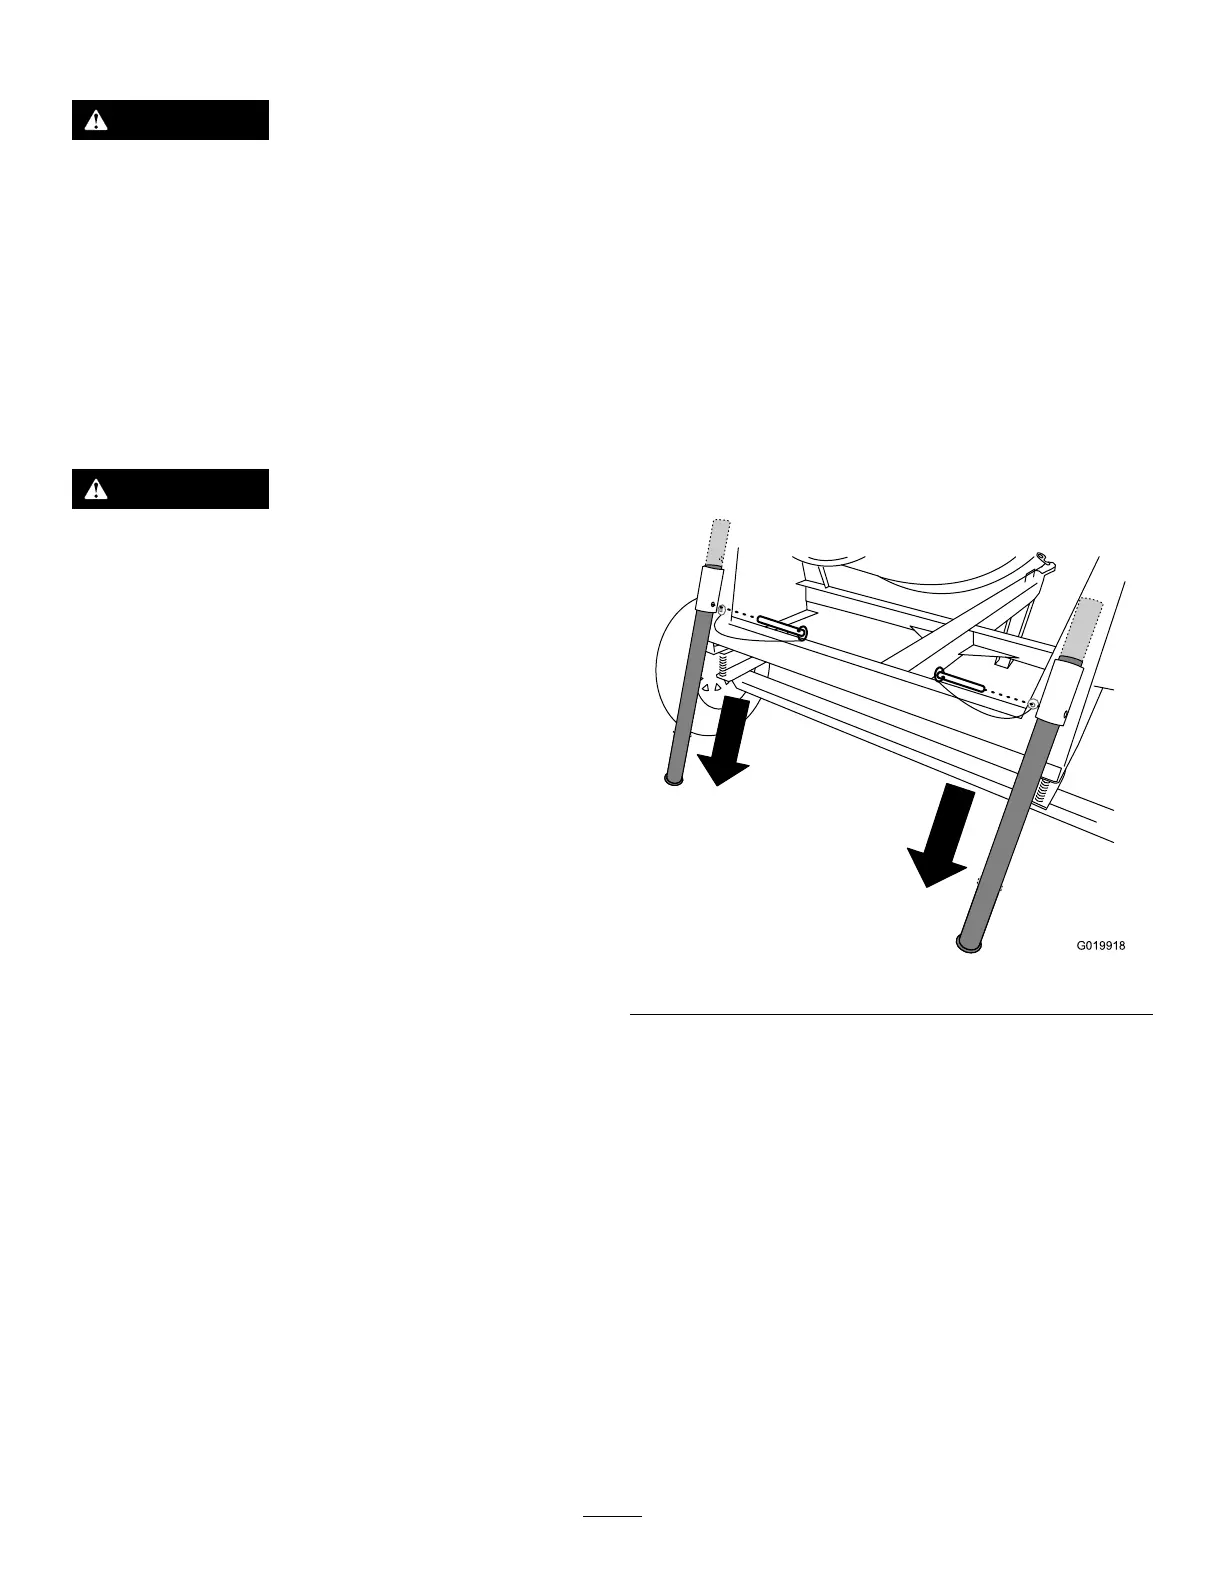
LoweringtheStabilizerLegs
End-DumpModelsOnly
End-dumpmodelshaveafrontstabilizerlegand2rear
stabilizerlegstokeepthemachinefromtippingforwardor
backwardduringoperation.Movethestabilizerlegsintothe
loweredpositionbeforeoperatingthemachine.
1.Pulltheclevispinoutfrom1stabilizerlegandthe
bracket(Figure29).
Figure29
2.Slidethestabilizerlegdowninthebracketandalign
thepinholeofthebracketwiththeupperholeinthe
stabilizerleg(Figure29).
3.Pushtheclevispinthroughtheholeinthebracketand
thestabilizerleg(Figure29).
4.Repeatsteps1through3fortheotherrearstabilizer
leg.
5.Liftupwardonthetonguetoprovideclearanceforthe
frontstabilizerleg.
6.Pulltheclevispinoutfromthefrontstabilizerlegand
thetongue(Figure30).
21
 Loading...