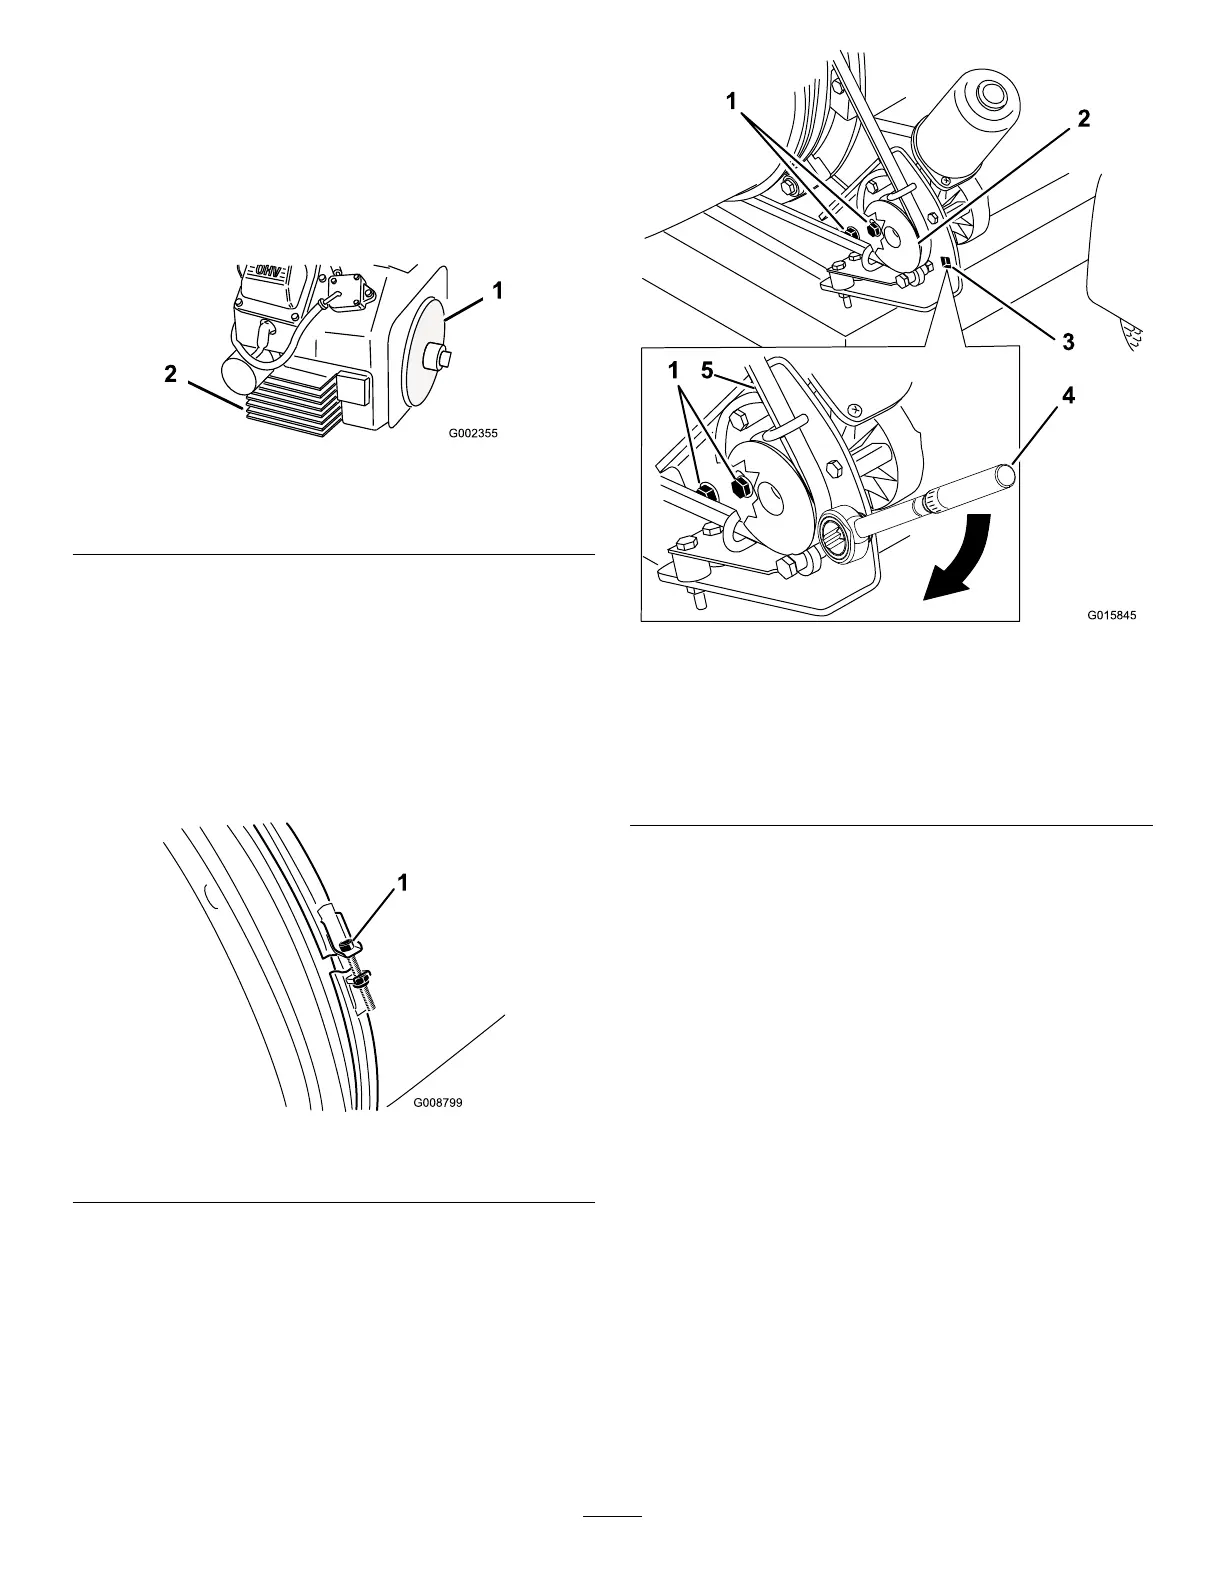
CleaningtheEngineScreen
andtheOilCooler
ServiceInterval:Beforeeachuseordaily
Beforeeachuse,checkandcleantheenginescreenand
oilcooler.Removeanybuildupofgrass,dirtorother
debrisfromtheoilcoolerandenginescreen(
Figure28).
Figure28
1.Enginescreen
2.Oilcooler
CheckingtheNozzleClamp
ServiceInterval:Beforeeachuseordaily
Checkthenozzleclamp(Figure29)dailytoassureitis
tight.Ifthenozzleisdraggedoverobstaclesorthrough
lowareasintheterrainitcouldbeknockedloosefrom
theclamp.Torquetheclampfastenersto45-50in-lb
(5.1-5.7N-m).
Figure29
1.Nozzleclamp
AdjustingtheBelt
ServiceInterval:Aftertherst8hours
Every50hours
Ifthebeltslipswhenchangingthedirectionofthe
nozzle,anadjustmenttothebeltisrequired.
1.Loosentheboltssecuringthepulleymounting
brackettotheblowerframe(Figure30).
Figure30
1.Mountingbolts4.Torquewrenchinpulley
mountingbracket[200
to230in-lb(22.6to26.0
N-m)]
2.Pulley5.Belt
3.Holefortorquewrench
2.Positionatorquewrenchintothepulleymounting
bracket(Figure30).
3.Pivotthepulleymountingbracketawayfromthe
nozzleuntilthetorquewrenchreads200to230in-lb
(22.6to26.0N-m)(Figure30).
4.Tightenthemountingbolts.
ElectricalMaintenance
Important:Beforeweldingonthemachine,
disconnectthecontrollerandthenegativecable
fromthebatterytopreventdamagetotheelectrical
system.
Fuse
A15ampin-linefuseisincorporatedintothemachines
wiring(Figure31).
24
 Loading...