Assembly
15
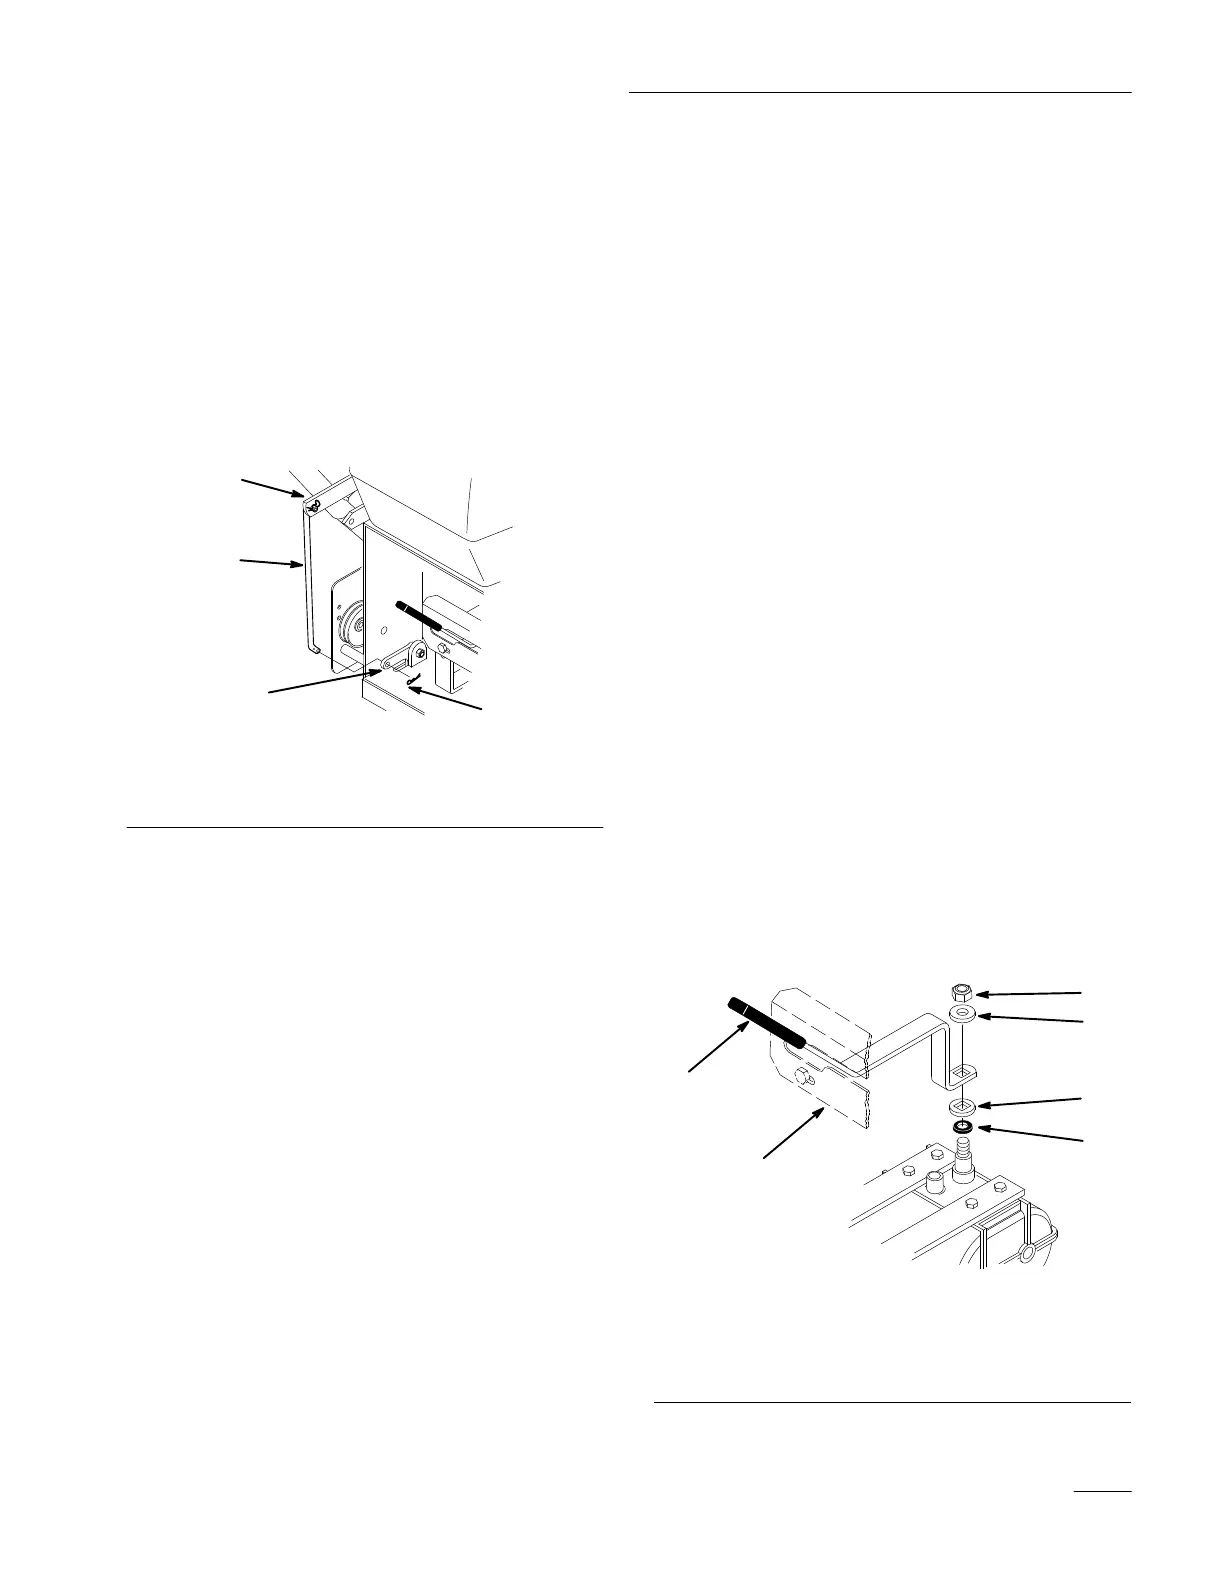
Install
Blade Control (PT
O)
Rod
1. Rotate blade control lever (PTO) vertical away
from left handle so rod drops down.
2. Remove hairpin cotters from bottom end of
blade control rod (PTO) (Fig. 8).
3. Secure blade control (PTO) rod through hole in
bellcrank with hairpin cotters (Fig. 8).
m–3783
Figure 8
1. Blade
control lever
2.
Blade control rod
3. Bellcrank
4.
Hairpin cotter
Install
Shift Lever
1. Remove the 3/8” locknut and spring disk washer
from the stud on top of the transmission.
Note: Do not remove rubber seal washer and
square hole washer from transmission
shaft.
2. Slide shift lever through control panel and align
mounting hole in lever with square on
transmission shaft. Secure lever to transmission
with previously removed spring washer and
locknut (Fig. 9).
3.
Replace the spring washer
,dish down, and
locknut (Fig. 8).
4. Torque nut to 35 ft. lbs. (47 Nm).
5. Shift lever to second gear and check alignment
of lever in slot of shifter plate. Clearance
between top of lever and the top of the slot
should be about equal to the clearance between
bottom of the lever and the bottom of the slot.
6. If clearance is not correct, remove lever and bend
it slightly to adjust.
Note: Do not bend lever while attached to
transmission shaft or damage may
occur.
m–3772
Figure 9
1. Shift
lever
2.
Control panel
3.
Rubber seal washer
4.
Square hole washer
5.
Spring washer
6.
Locknut 3/8
 Loading...