WARNING
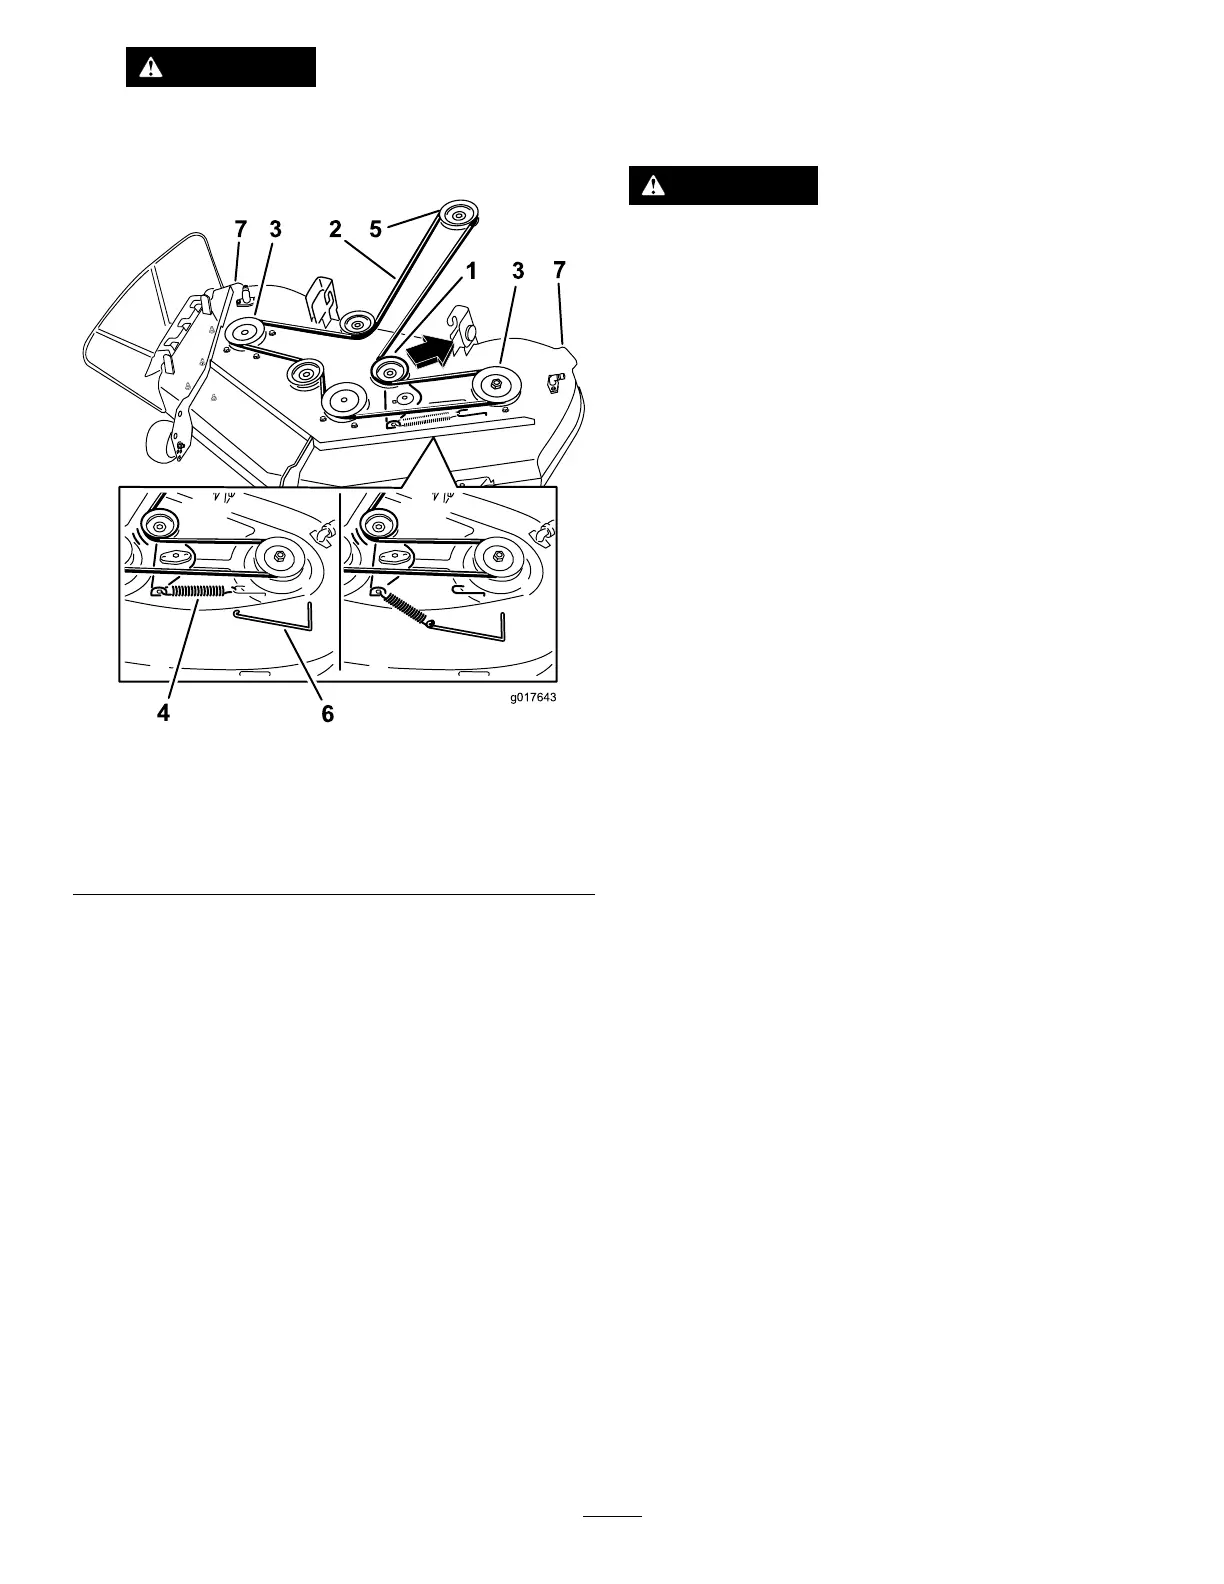
Thespringisundertensionwheninstalled
andcancausepersonalinjury.
Becarefulwhenremovingthebelt.
Figure60
1.Idlerpulley5.Enginepulley
2.Mowerbelt
6.Springremovaltoo
3.Outsidepulley
7.Mowerdeckhandles
4.Spring
5.Routethenewbeltaroundtheenginepulleyand
mowerpulleys(Figure60).
6.Usingaspringremovaltool,(Toropartno.92-5771),
installtheidlerspringoverthedeckhookandplacing
tensionontheidlerpulleyandmowerbelt(Figure60).
InstallingtheMower
1.Parkthemachineonalevelsurfaceanddisengagethe
blade-controlswitch.
2.Ensuretheparkingbrakeisengaged,stoptheengine,
removethekey,andwaitforallmovingpartstostop
beforeleavingtheoperatingposition.
3.Slidethemowerunderthemachine.
4.Lowertheheight-of-cutlevertothelowestposition.
5.Lifttherearofthemowerdeckandguidethehanger
bracketsovertherearliftrod(Figure59).
6.Attachthefrontsupportrodtothemowerdeckwith
theclevispinandhairpincotter(Figure58).
7.Installthemowerbeltontotheenginepulley;referto
ReplacingtheMowerBelt(page43).
ReplacingtheGrassDeector
ServiceInterval:Beforeeachuseordaily—Inspectthegrass
deectorfordamage.
WARNING
Anuncovereddischargeopeningcouldallowthe
lawnmowertothrowobjectsintheoperator’sor
bystander’sdirectionandresultinseriousinjury.
Also,contactwiththebladecouldoccur.
Neveroperatethelawnmowerunlessyouinstalla
mulchplate,dischargedeector,orgrasscollection
system.
Inspectthegrassdeectorfordamagebeforeeachuse.
Replaceanydamagedpartsbeforeuse.
1.Disengagethespringfromthenotchinthedeector
bracketandslidetherodoutoftheweldeddeck
brackets,spring,anddischargedeector(Figure61).
Removethedamagedorworndischargedeector.
44
 Loading...