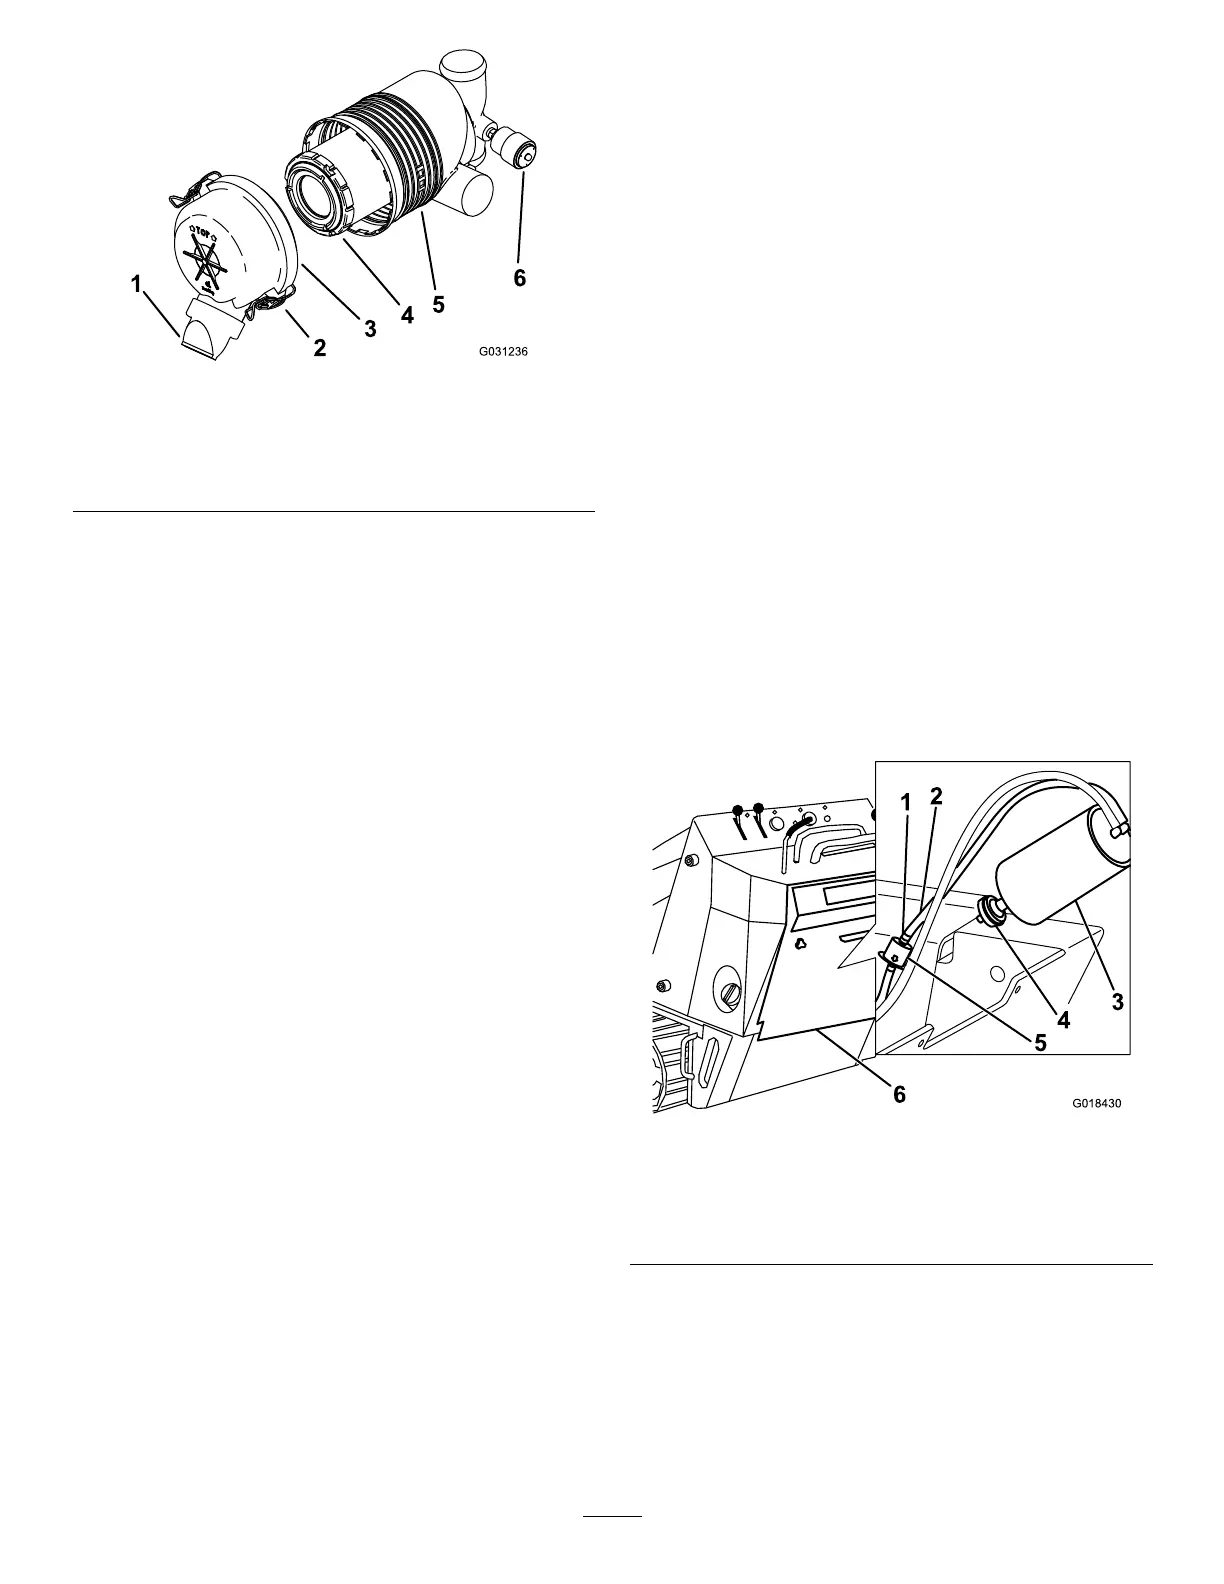
g031236
Figure32
1.Dustcap
4.Primarylter
2.Latch
5.Air-lterbody
3.Air-cleanercover
6.Serviceindicator
6.Squeezethedustcapsidestoopenitandknock
thedustout.
7.Cleantheinsideoftheair-cleanercoverwith
compressedairthatisunder205kPa(30psi).
Important:Donotusecompressedairon
theair-cleanerbody.
8.Checktheserviceindicator.
•Iftheserviceindicatorisclear,installthe
air-cleanercoverwiththedustcaporiented
downwardandsecurethelatches(Figure
32).
•Iftheserviceindicatorisred,replacethe
airlterasdescribedinReplacingtheFilter
(page27).
ReplacingtheFilter
Important:Topreventenginedamage,always
operatetheenginewiththeairlterandcover
installed.
1.Gentlyslidethelteroutoftheair-cleanerbody
(Figure32).
Note:Avoidknockingthelterintothesideof
thebody.
Important:Donotattempttocleanthelter.
2.Inspectthenewlterfortears,anoilylm,or
damagetotherubberseal.Lookintothelter
whileshiningabrightlightontheoutsideofthe
lter;holesinthelterappearasbrightspots.
Ifthelterisdamaged,donotuseit.
3.Carefullyinstallthelter(Figure32).
Note:Ensurethatthelterisfullyseated
bypushingontheouterrimofthelterwhile
installingit.
Important:Donotpressonthesoftinside
areaofthelter.
4.Installtheair-cleanercoverwiththedustcap
orienteddownwardandsecurethelatches
(Figure32).
5.Closethehood.
ServicingtheCarbon
Canister
ReplacingtheCarbon-CanisterAir
Filter
ServiceInterval:Every200hours—Replacethe
carbon-canisterairlter(Service
morefrequentlyifconditionsare
extremelydustyorsandy).
1.Parkthemachineonalevelsurface,engagethe
parkingbrake,andlowertheloaderarms.
2.Shutofftheengineandremovethekey.
3.Removetherear-accesscover.
4.Removeanddiscardthecarbon-canisterair
lter(Figure33).
g018430
Figure33
1.Hoseclamp
4.Airlter
2.Hosetocarboncanister
5.Purge-linelter
3.Carboncanister
6.Rearaccessdoor
5.Installanewlterontothecarboncanister
(Figure33).
6.Installtherear-accesscover.
27
 Loading...