EasyManuals Logo
Home>Toshiba>All in One Printer>e-STUDIO181

Toshiba e-STUDIO181 User Manual

Toshiba e-STUDIO181
110 pages
To Next Page IconTo Next Page
To Previous Page IconTo Previous Page
Page #100 background imageLoading...
Page #100 background image
6 MAINTENANCE AND INSPECTION
98 Daily Inspection
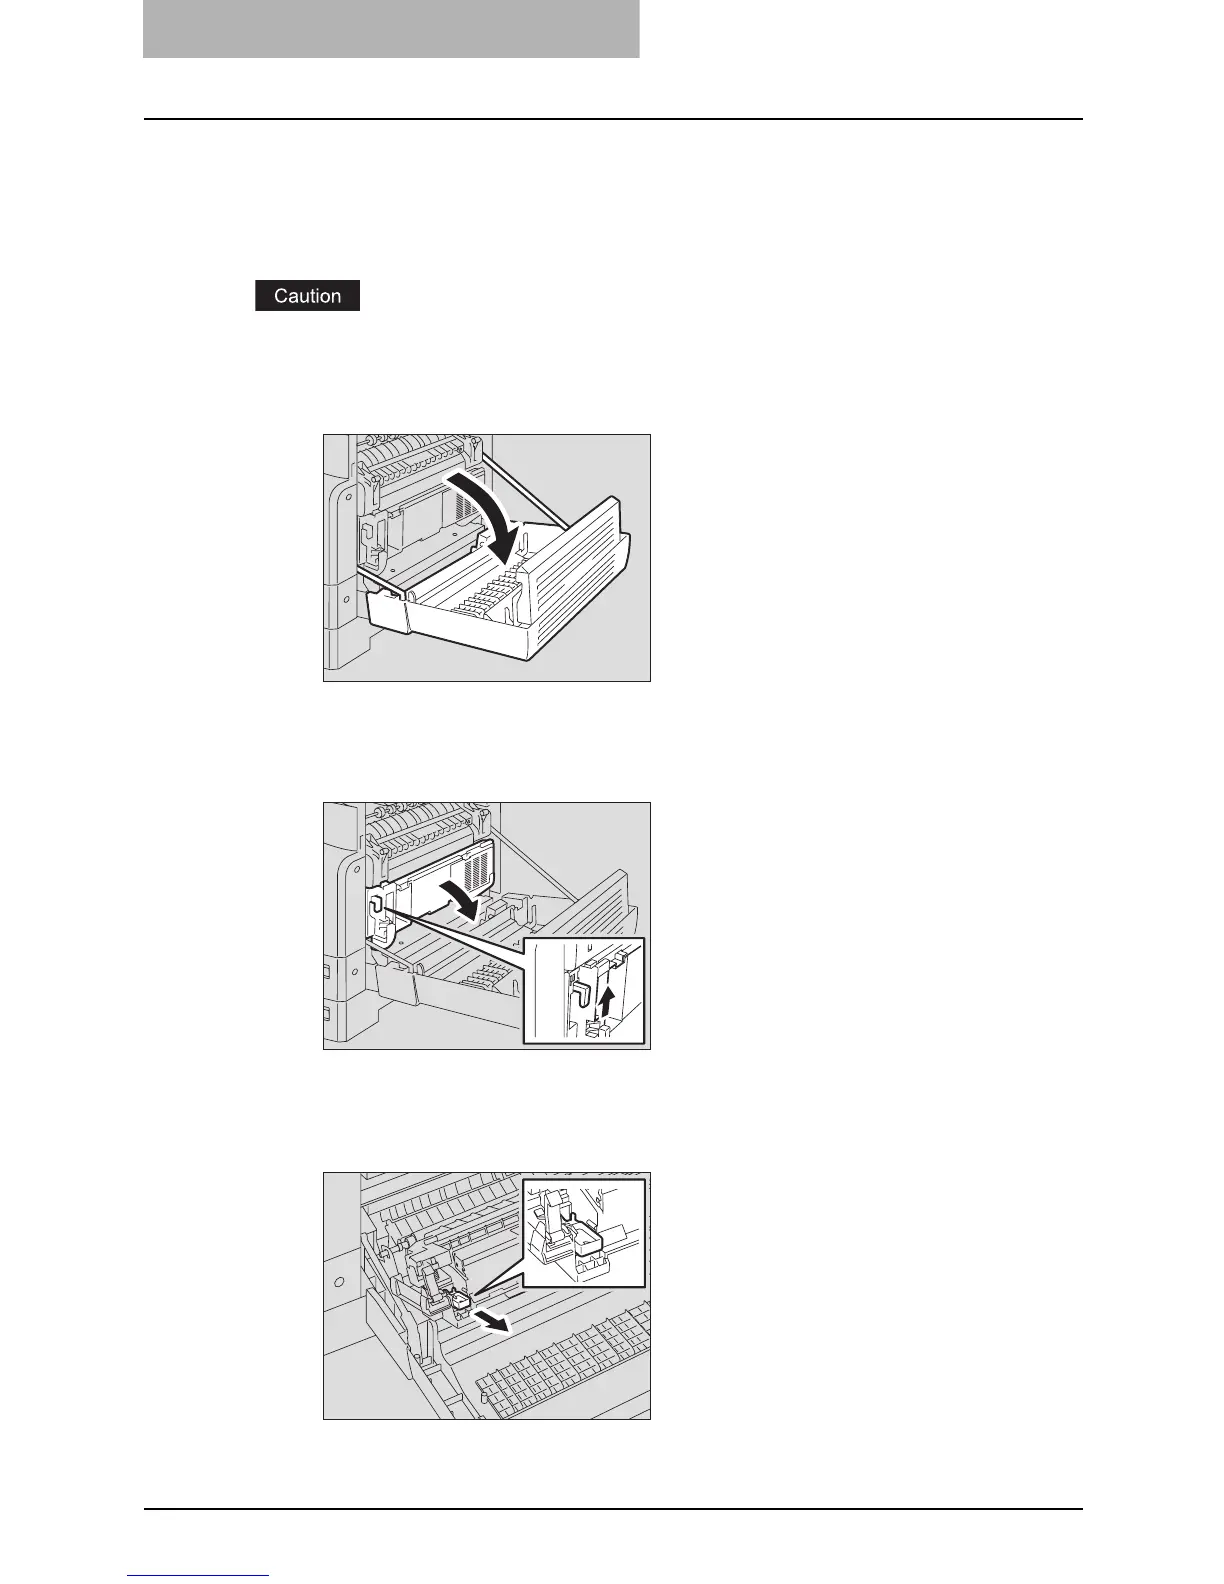
Cleaning transfer charger
When the transfer charger wire is dirty, white steaks or unevenness of the density may appear
on copied images, or the density of the whole image may be lowered. Clean the transfer charger
wire following the procedure below.
Be careful not to let your fingers be caught between the equipment and the side cover.
This could injure you.
1
Open the side cover.
2
Pull the transfer unit toward you carefully to lay it down while hold-
ing up the green lever.
3
Remove the transfer charger cleaner from the front pocket of the
transfer unit.

Table of Contents

Other manuals for Toshiba e-STUDIO181

Questions and Answers:

Question and Answer IconNeed help?

Do you have a question about the Toshiba e-STUDIO181 and is the answer not in the manual?

Toshiba e-STUDIO181 Specifications

General IconGeneral
BrandToshiba
Modele-STUDIO181
CategoryAll in One Printer
LanguageEnglish

Related product manuals