Faxing from Applications 51
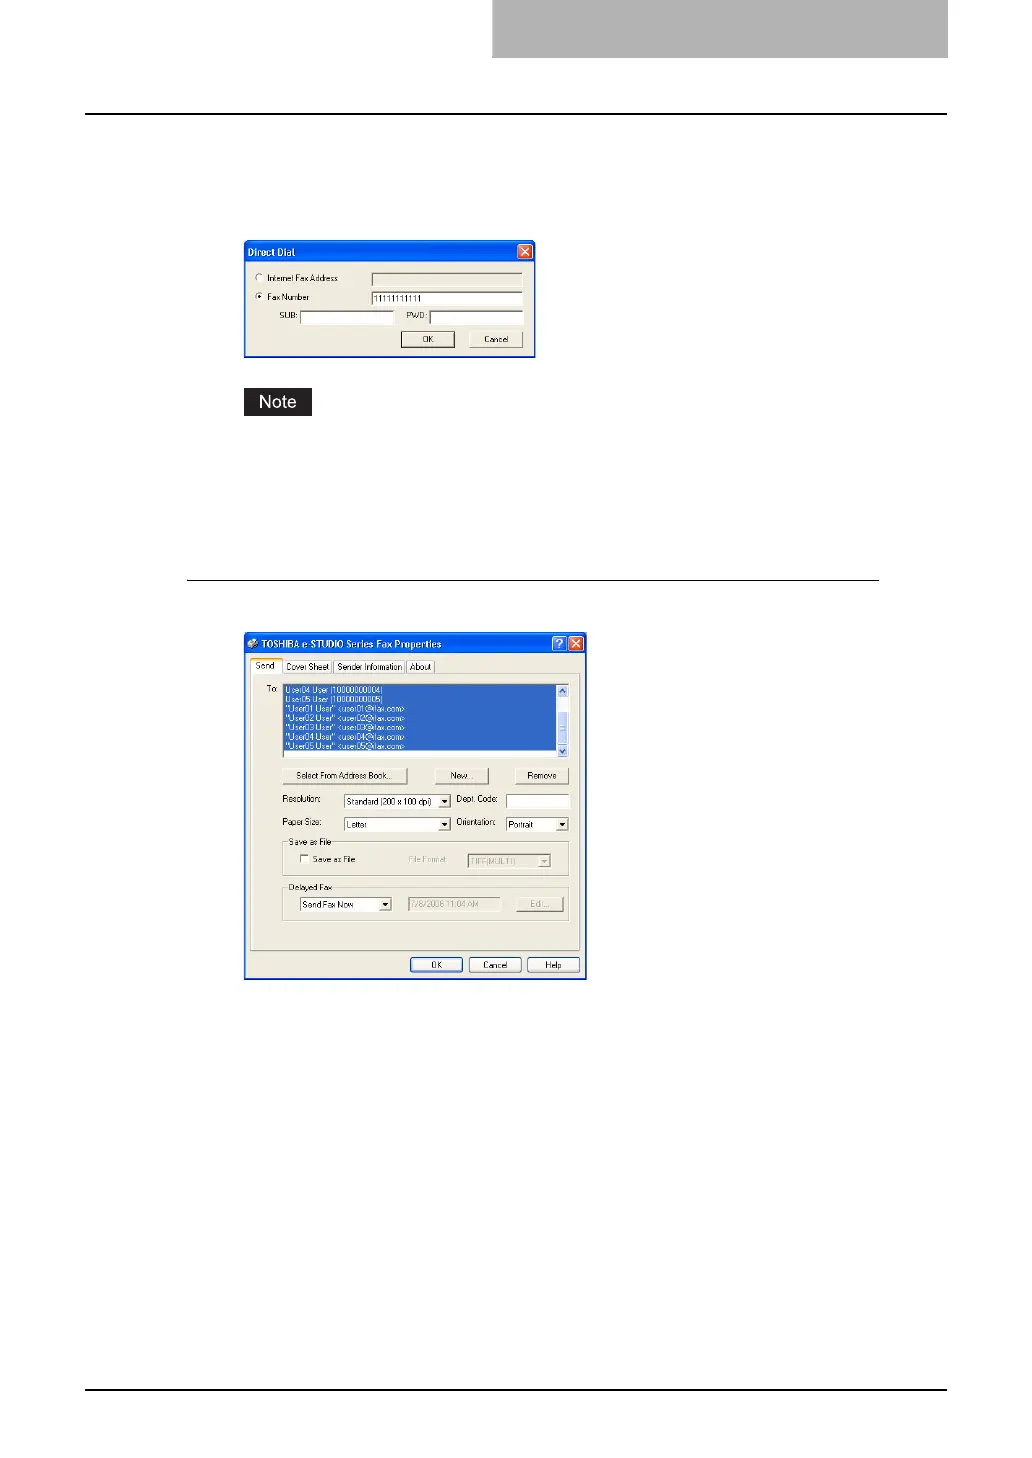
To add a fax number as a recipient, select “Fax Number” and enter
the fax number in the right field. In addition, if you specify a Sub
address, enter the Sub address in the “SUB” field, and security
password for the Sub address in the “PWD” field if required.
You can send to a fax number only when the optional Fax unit is installed.
3
Click [OK].
y Entered recipient is added to the “To” list.
Removing recipients
1
Select a recipient that you want to delete from the “To” list.
2
Click [Remove].
y The selected recipient is deleted from the “To” list.
How to Setup
There are several ways to set the N/W-Fax driver options. Also, how the settings effect varies
depending on the way you set the options.
Setting Initial Values of N/W-Fax Driver Options
Setting the N/W-Fax options by displaying the N/W-Fax driver properties from the Printers folder
within the Windows Start menu will establish the initial values of the options.

 Loading...