14 15
Preparation
Using the Product for the First Time
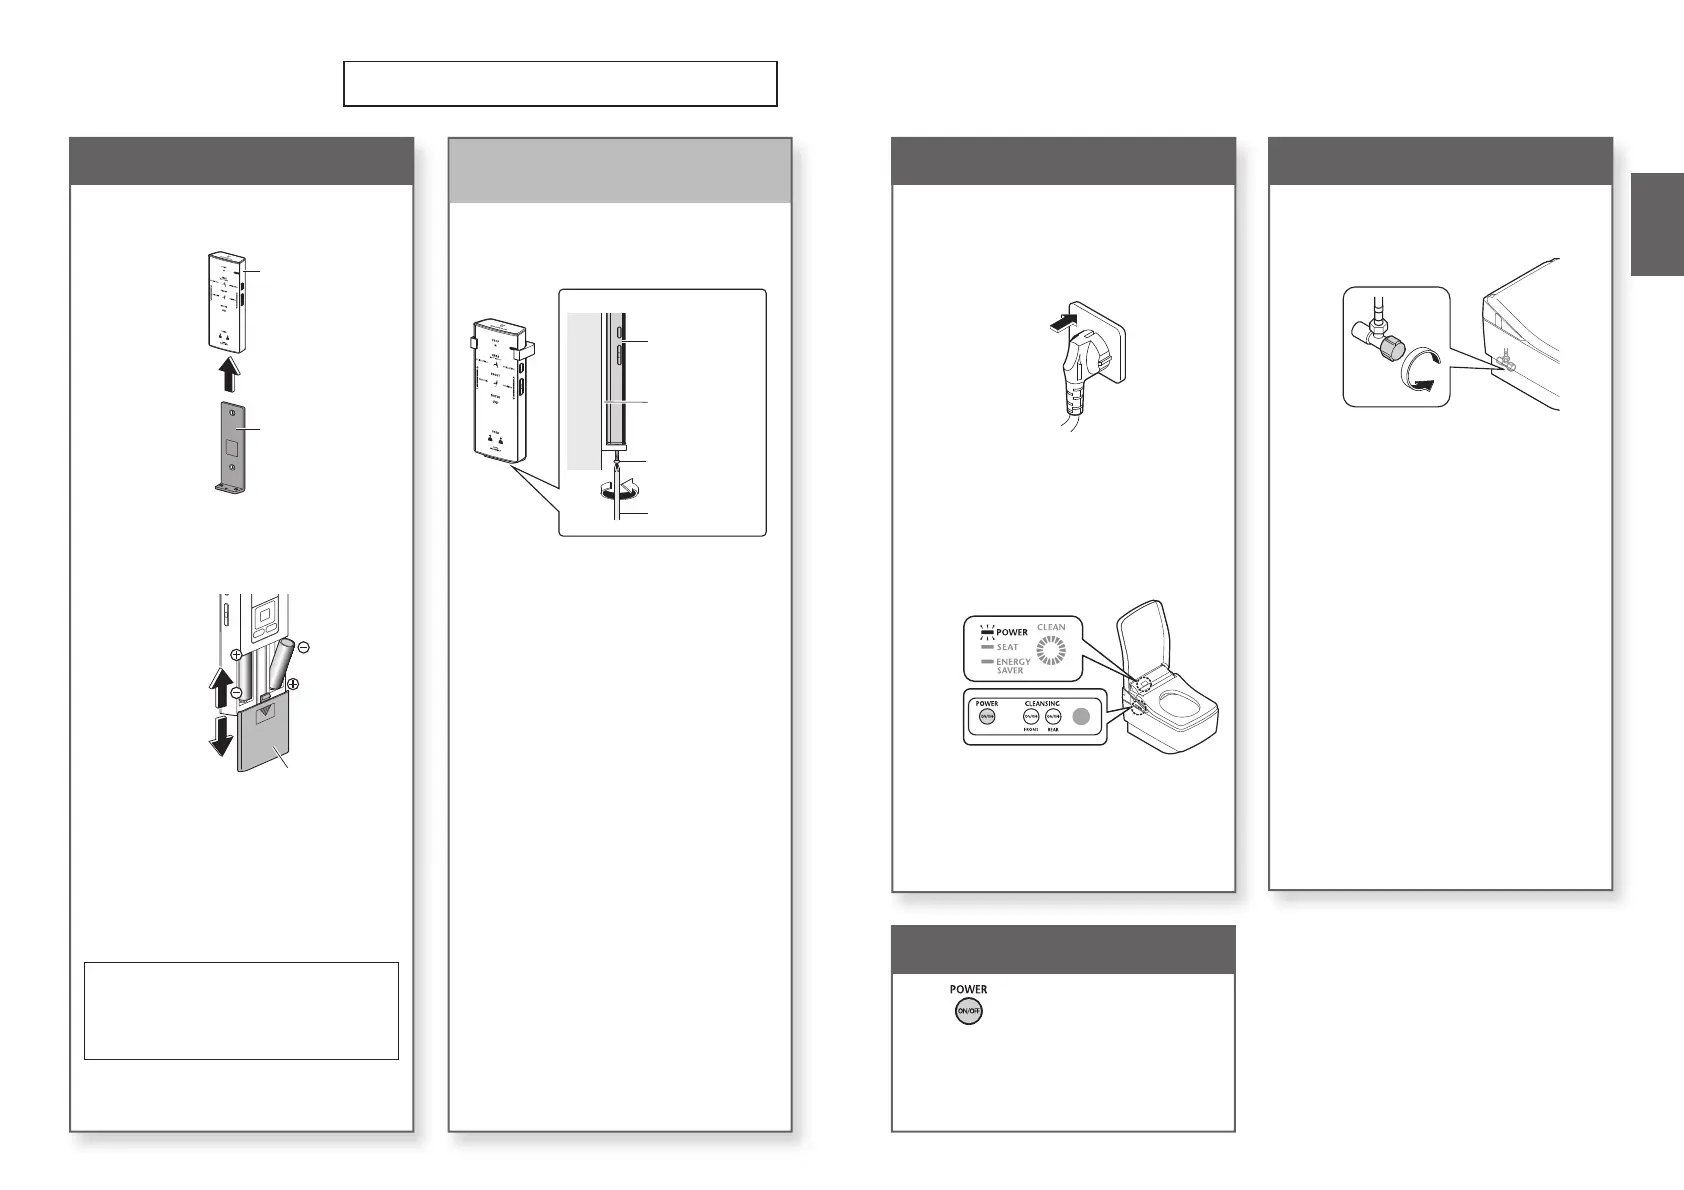
If the remote control is secured
(for anti theft)
1
Remove the screw from the
remote control fi xture.
Phillips screwdriver
Screw
Hanger
Wall
Remote control
(View from side)
2
Remove the remote control
from the hanger.
■ To secure the remote control again
Tighten the screw.
(Overtightening may cause damage to parts
such as the hanger)
1.Insert the battery
1
Remove the remote control
from the hanger.
Remote control
Hanger
2
Open the battery cover and
insert two AA batteries.
Battery cover
Close
Open
●
When batteries are properly inserted,
temperature levels appear on the display of
the remote control (back side).
●
The display goes out when no button on the
remote control is pressed for 5 minutes or
more.
3
Mount the remote control in
the hanger.
■ About the batteries
•
Use dry cell, alkaline batteries.
•
Be sure to follow "Safety Precautions" to prevent
the batteries from rupturing or leaking fl uid.
(Pages 8, 10)
2.Turn on the power
1
Insert the power plug.
Switch the breaker on the
distribution board to ON.
(Concealed power connection type)
•
The wand extends and then retracts.
2
Check that the POWER LED
on the main display is lit up.
•
If it does not light up, press [POWER ON/
OFF] to light it up.
To turn the power "OFF"
Press [POWER ON/OFF] to
turn the power off.
•
The POWER LED goes off.
3.Open the shutoff valve
1
Fully open the shutoff valve.
Introduction
 Loading...