31
Installation
Front / Trim
Remote Control Handset Wall Holder
The remote control kit for this fireplace comes complete
with a wall-mounted holder. This holder is not required
in all installations but is provided as an optional feature
for those customers who wish to mount the remote
handset to the wall.
To install the holder to the wall, find a
convenient location and use the hardware
provided with the kit.
IMPORTANT: The location of the remote
control handset is important to assure
proper temperature regulation. To obtain a
constant temperature, we recommend that
the handset should be between 3 and 15 feet
away from the appliance but not directly
above it. We also advise that the handset
should be located away from any other heat
source and not in direct sunlight as this may
affect the temperature sensor located in the
remote handset.
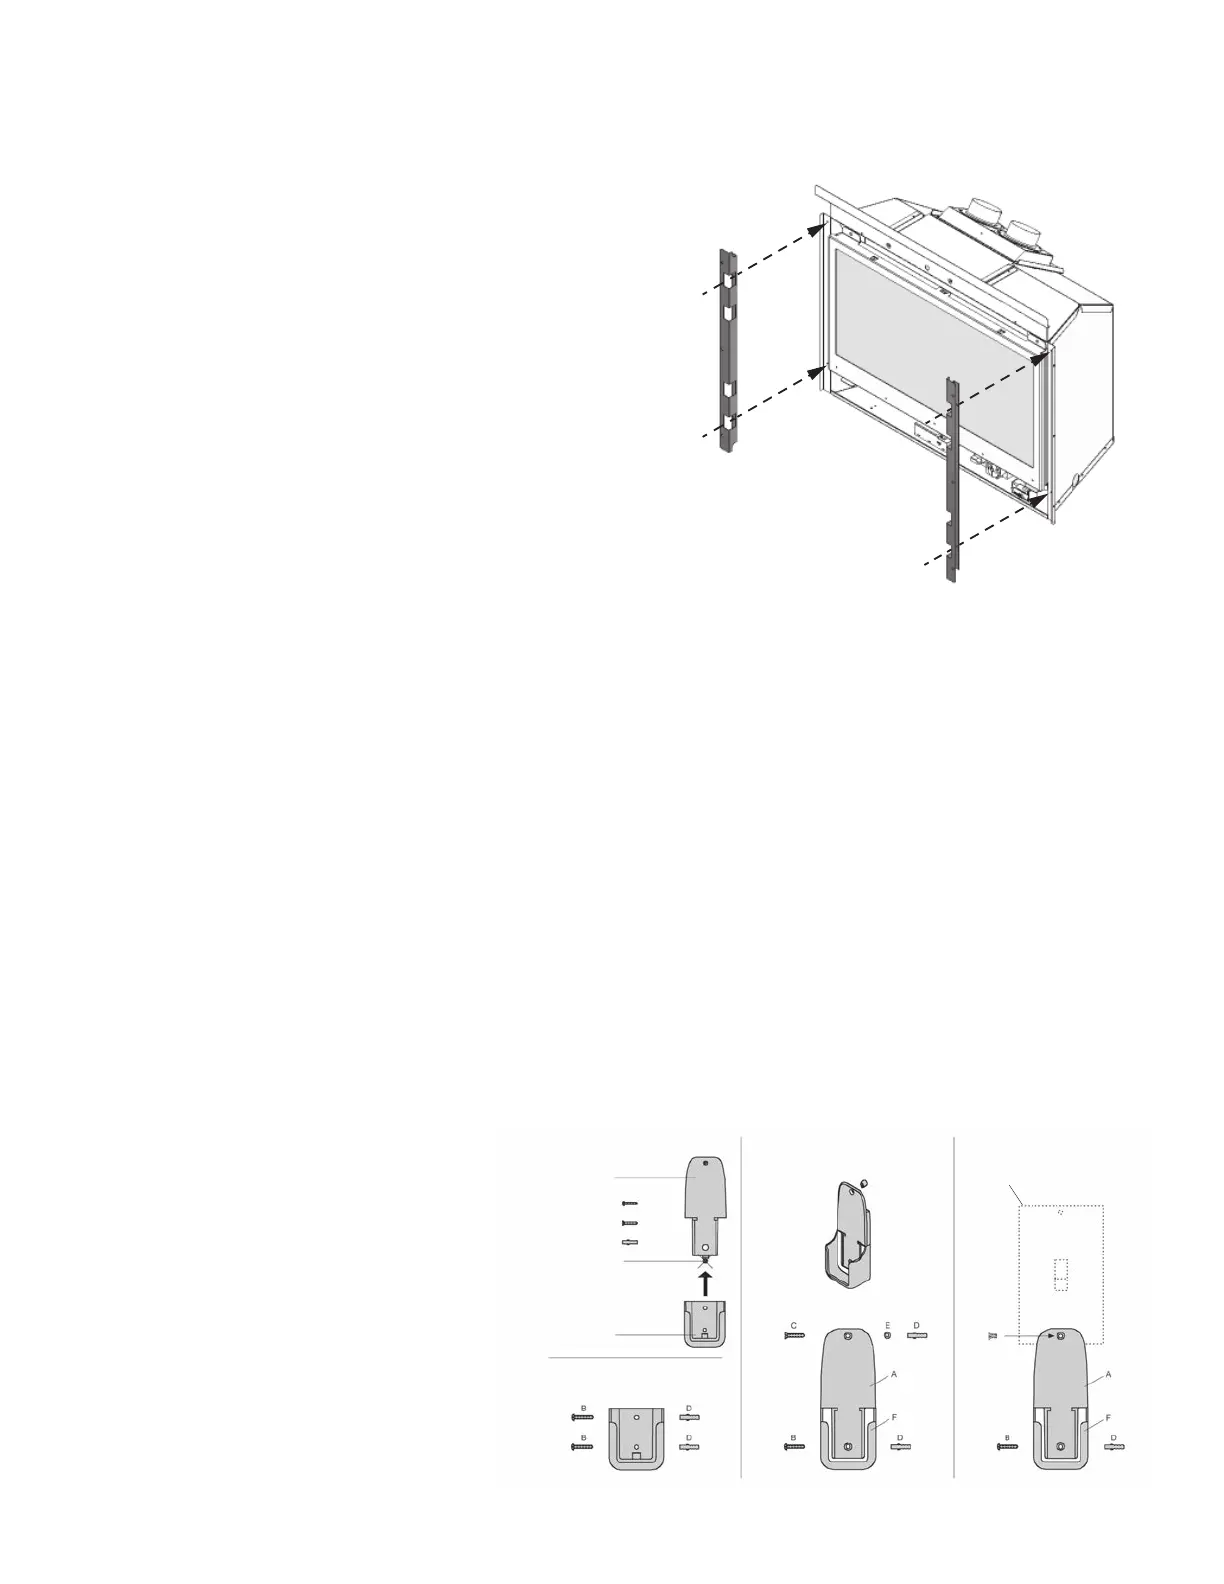
Contents
1 Wall Bracket A
2 Screws B
1 Screw C
2 Wall Anchor D
1 Spacer E
(detach before
assembly)
1 Wall Bracket F
Switch Plate
Alternative 1
Alternative 2
Alternative 3
Front, Trim and Barrier Screen
Install the front and trim chosen by the customer for
their fireplace. Install as well the barrier screen which is
provided with the front.
Show the customer remove the front and also how to
access the controls when the front is installed.
Follow the instructions provided with the front and trim
and leave those instructions behind for the customer’s
further reference.
Sides Shrouds
The side shouds are required to install the front and
trim on the appliance. They are supplied with the
appliance.
Secure them to the appliance outer case as indicated
(2 screws/side).
Note that some backing or finishing plates may have to
be installed before the side shrouds—see instructions
packed with the plates/trim/front for all details.

 Loading...