Installation Manual –Page 8 / 13
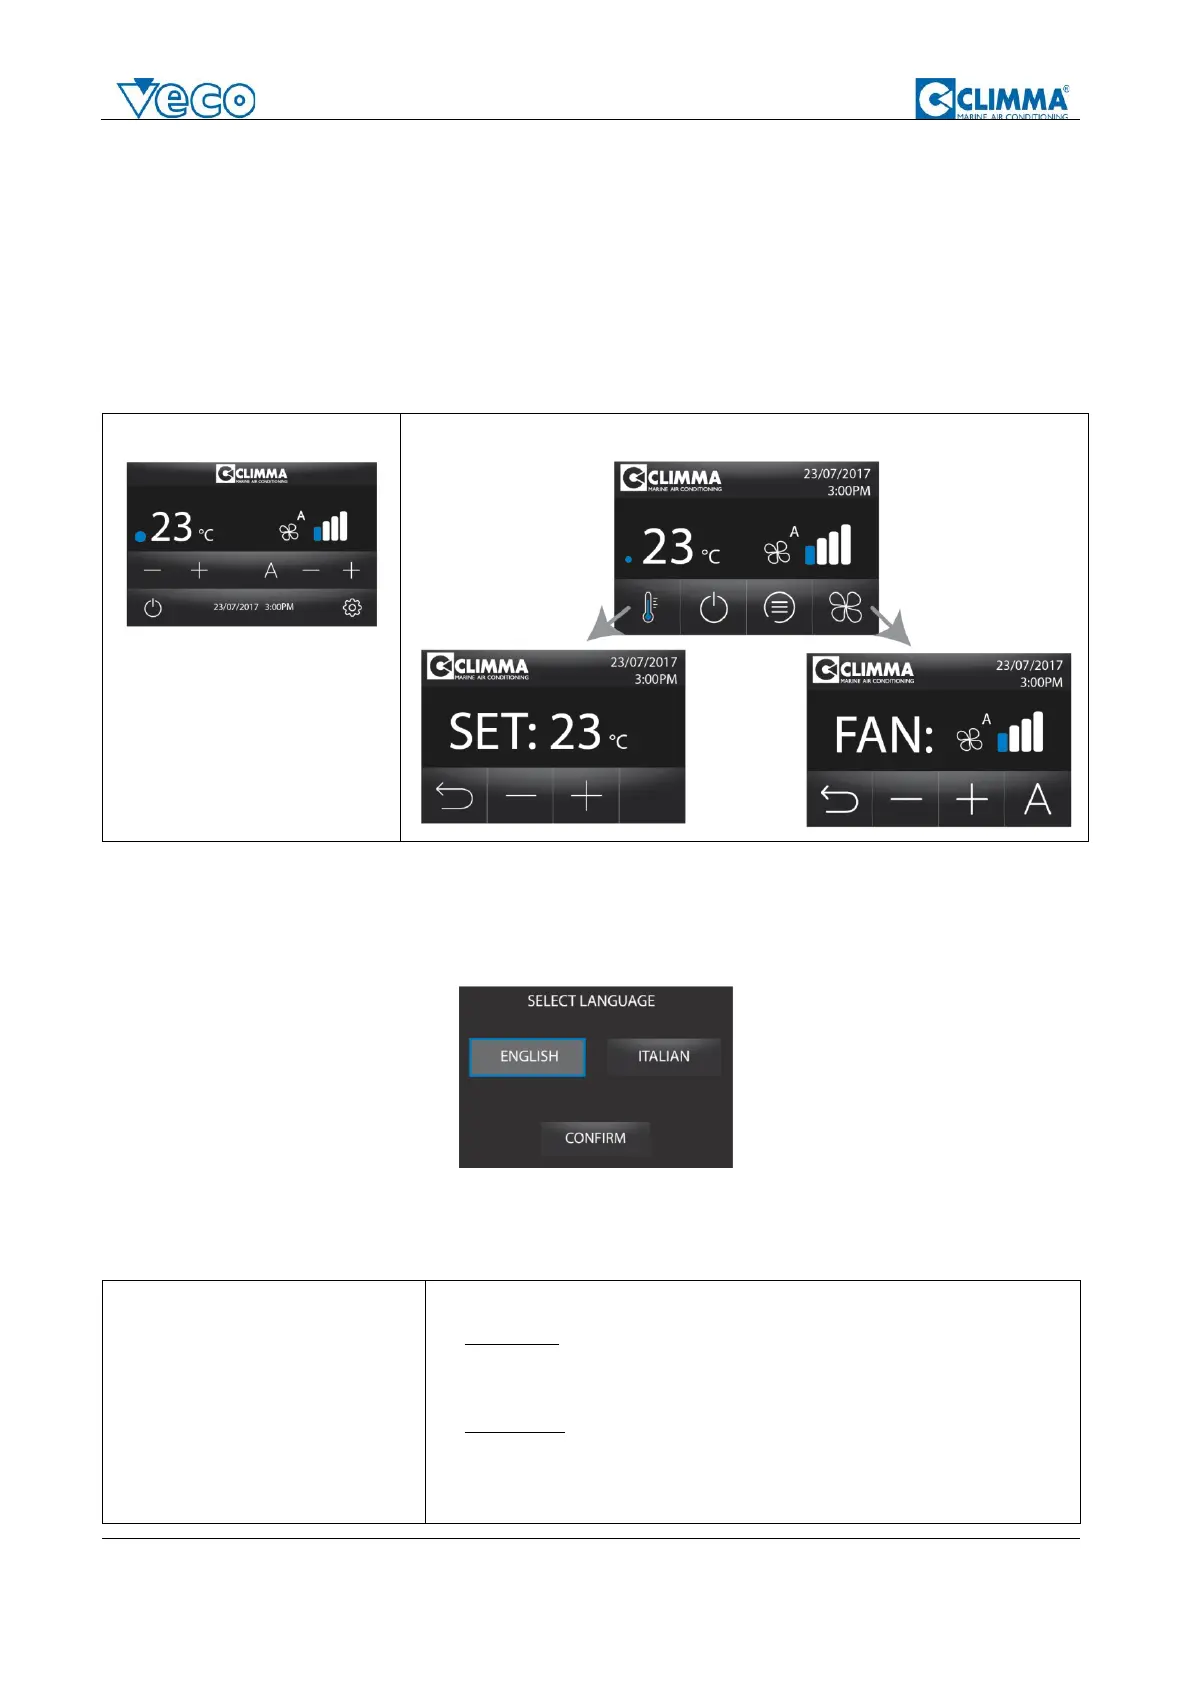
(10) The small spot allows you to better understand the unit:
• No spot means unit is OFF
• Blue spot: unit runs in cool mode
• Red spot: unit runs in heat mode
• Blinking blue spot: unit cannot run as water temperature is too hot
• Blinking red spot: unit cannot run as water temperature is too cold
The Climma C-Touch display has 2 interfaces available as main screen, both with the same
functionalities.
2.2. Initial settings at first start-up
At the fist startup, the C-Touch display has to be set depending on the system it needs to control.
At first startup, please select the language (it may be changed also later on from the Main Menù):
The display will automatically recognize if it’s connected to a Compact or a Fancoil unit, but the
type of Compact/Fancoil needs to be selected; select the right model and press Confirm.
(the setting can be also changed again later from the Menu)
• PR1 – EH Select this if your Compact unit has an electrical
heating; you can recognize this from the unit Code, as it
contains an EH (e.g. MC5K3EHU “Compact 5 EH 230V/1/50”)
• PR2 – CO Select this if your Compact unit is a “cool only”
model; you can recognize this from the unit Code, as it
contains an CO (e.g. MC12EFCOU “Compact 12 CO
230V/1/50”)
 Loading...