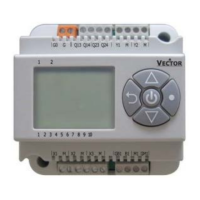
TCI-C-Universal Controller
Doc: 70-00-0123, Date: 20091020 © Vector Controls GmbH Page 7
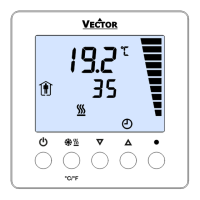
Accessing advanced settings
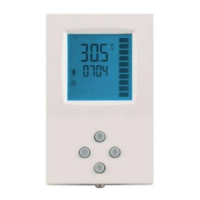
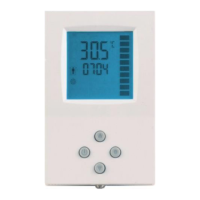
Pressing the option button for more than three seconds will start the advanced setup menu. The large LCD digits display
SEL. The advanced setup menu Clock setup, Time schedules, Heat / Cool change for 2 pipe systems. The menu may be
left by pressing the POWER key or by not pressing a key for more than 2 minutes.
• Heat / Cool change. H-C is displayed in the small LCD. Currently active symbol for heating or cooling show
below. Pressing the OPTION key again toggles Heating – Cooling mode.
Access to Heat/Cool change may be disabled with UP03
Clock and time schedule operations for Deluxe Version only:
• Clock Setup. The current time is displayed in the small digits. Pressing the RIGHT button will enter the clock
setup. The minutes are blinking and may be changed with the UP/DOWN keys. Pressing RIGHT button saves the
minutes and steps to the hours. The hours are blinking. Pressing the RIGHT key again will step to the weekday.
DAY1-7 is displayed. Day 1 stands for the first working day (Monday) of a 5-day working week. (See schedule).
Select the day according to current weekday. Pressing RIGHT key again saves the settings and moves back to
the SELECT menu.
• Time Schedules: press the option key while Pro is displayed in the small digits.
In the first step the time schedule may be enabled or disabled. To activate time schedules press the RIGHT
button while Pro is displayed and OFF in the lower digits. OFF is now blinking. Press the UP button to change to
ON. Press RIGHT again to save the change. Now press the UP key to step through the switching time settings.
Pr 01 is now shown in the large digits, while the number 01 is blinking. Select switching time by using UP/DOWN
keys. There are a total of 8 switching times available. Enter the switching time by pressing the RIGHT button. A
switching time is defined in 4 steps. The bar indicator on the right side shows programming progress:
1. Select switching time 00:00 to 23:45 in 15-minute steps;
press OPTION to continue.
2. Select weekday(s) = A list of 7 triangles is displayed. The selected day is blinking. Select the day with LEFT
or RIGHT key. Activate the switching time for that day by pressing the UP key, de-activate the day by
pressing the DOWN key. Repeatedly press the option key to go to the next level.
3. Select function of the time program. There are the following possibilities:
0 = no = switching time is not active
1 = OP = change operation mode of controller: ON, OFF, Eco
2 = L1 = change setpoint of loop 1
3 = L2 = change setpoint of loop 2
4 = d1 = change status of do1: (Output must be in manual mode: ON, OFF)
5 = d2 = change status of do2: (Output must be in manual mode: ON, OFF)
6 = A1 = change setpoint of ao1: (Output must be in manual mode: 0…100%)
7 = A2 = change setpoint of ao2: (Output must be in manual mode: 0…100%)
4. Depending on the last step, select operation mode to be switched to after this switching time,
setpoint of control loops or analog outputs or binary outputs. Outputs must be set in manual mode in order
to be controlled by time schedule!
Access to time schedules may be disabled with UP04
 Loading...