2-11
2 Vac Sensor Installation Epoxy Sealing Vac System Field Wiring Connections
Epoxy Sealing Vac System Field Wiring Connections
1. Tie wrap the loose cable pairs into a bundle going from the Vac Sensor housing to the containment sump
junction box(es).
2. Get necessary cord grip bushings from the kits - one for each Vac Sensor, Vac Float, and the Tank interstitial
sensor cable that will enter the junction box(es) in the containment sump. Loosen the cord grips and screw
each one into a junction box port.
3. Push the first Vac Sensor/Vac Float cable pair into adjacent cord grips (keep the pairs together as the two
cables will typically be wired to one cable going to the TLS Console). Make sure all of the cables to the
console are tagged (e.g., Tank 1 product line, Tank 1 vapor line) to facilitate TLS setup.
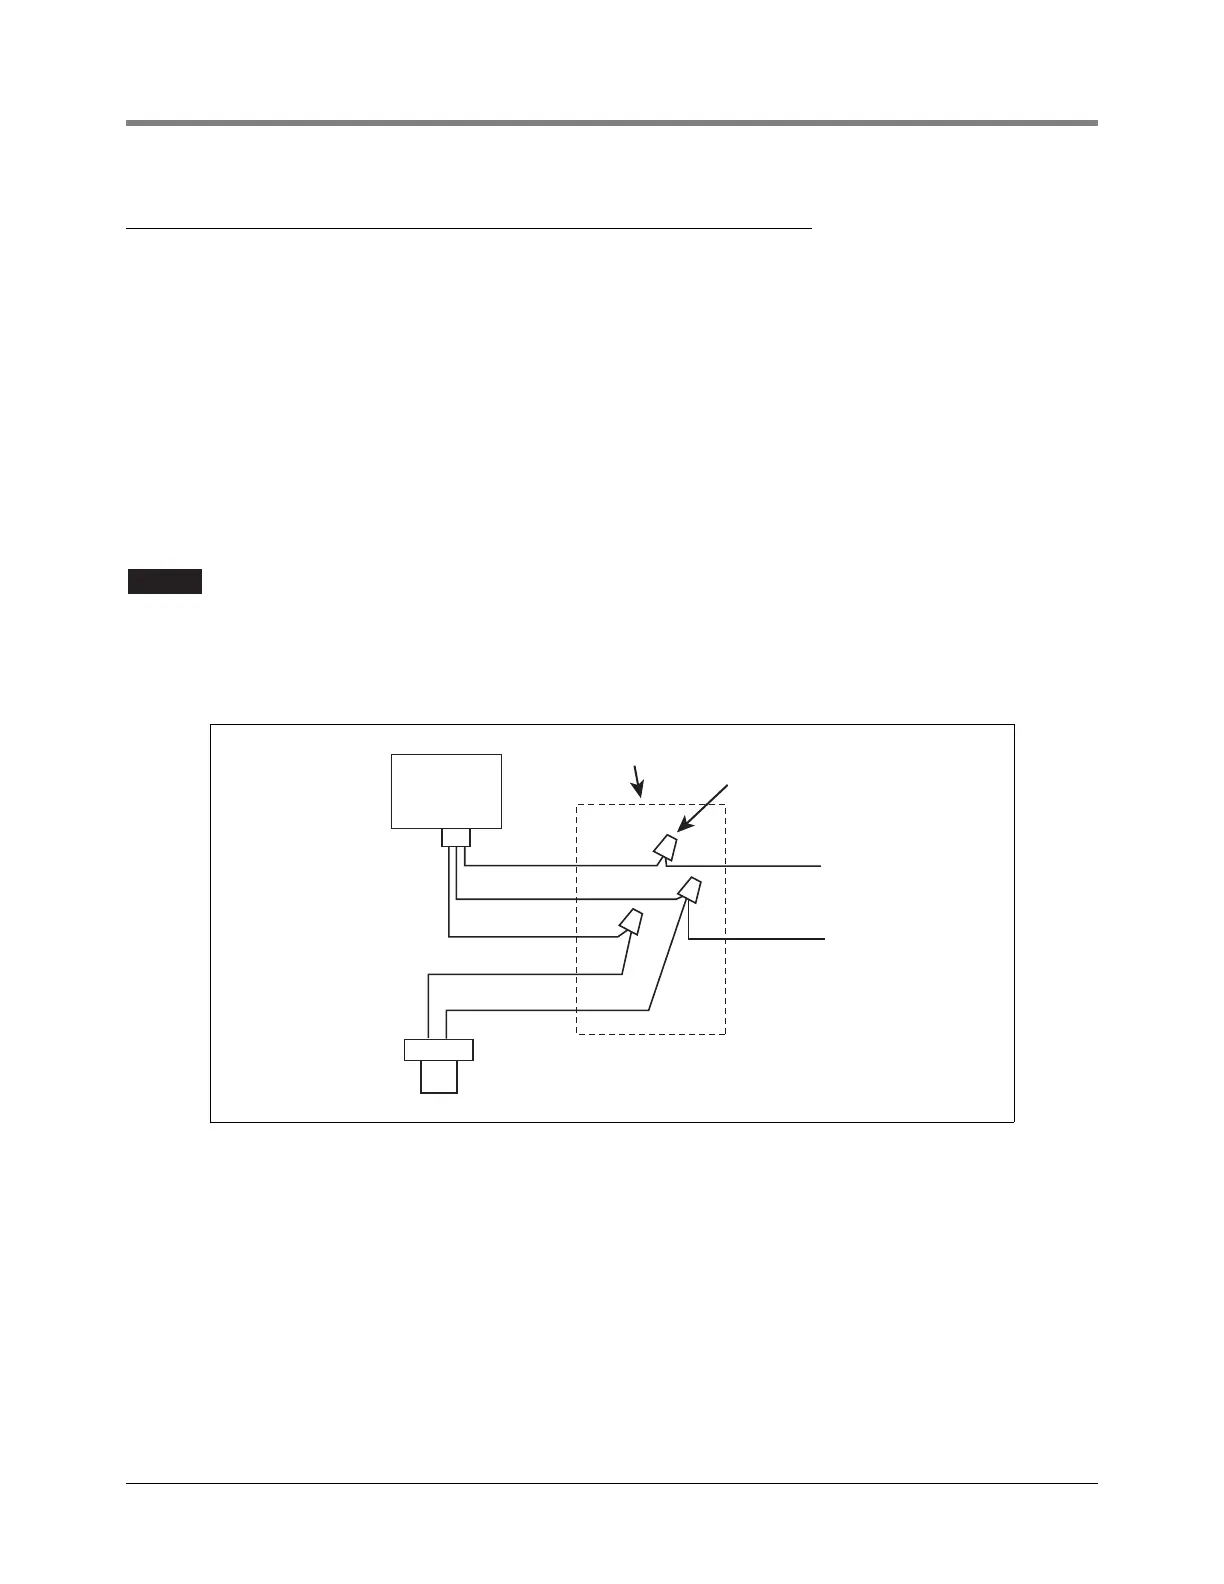
4. Strip back the leads of one of the cables from the TLS Console 3/8” (10mm). Strip back the leads of the Vac
Sensor/Vac Float pairs 3/8”. Using wire nuts from the kits attach the wires as per the diagram in Figure 2-14.
the
The Vac Sensor cable has three wires and the Vac Float cable has two wires.
5. Seal wire nuts with epoxy sealant following the instructions in Figure 2-15.
6. Connect the remaining Vac Sensor/Vac Float pairs and the Vac Sensor/Tank Float pair as discussed above,
sealing each set of wires in epoxy sealant packs.
Figure 2-14.- Field Wiring Connections
Black (-)
Vac
Sensor
Epoxy sealant pack
Vac Float or tank
interstitial sensor
Black
Black
White (+)
To I.S. Sensor
Connection(s)
White
Red
Red
Wire nut (3)

 Loading...