D-302754 31
4.15 ENABLING/DISABLING PARTITIONS
This menu allows you to enable/disable Partition Mode.
Partitioning allows you to divide the system into a
maximum of three independently controllable areas. Each
area can be armed / disarmed separately.
When the partition feature is disabled, zones, user codes
and features will operate the same as in a regular
PowerMaxComplete unit. When partition is enabled, menu
displays are changed to incorporate the partition feature.
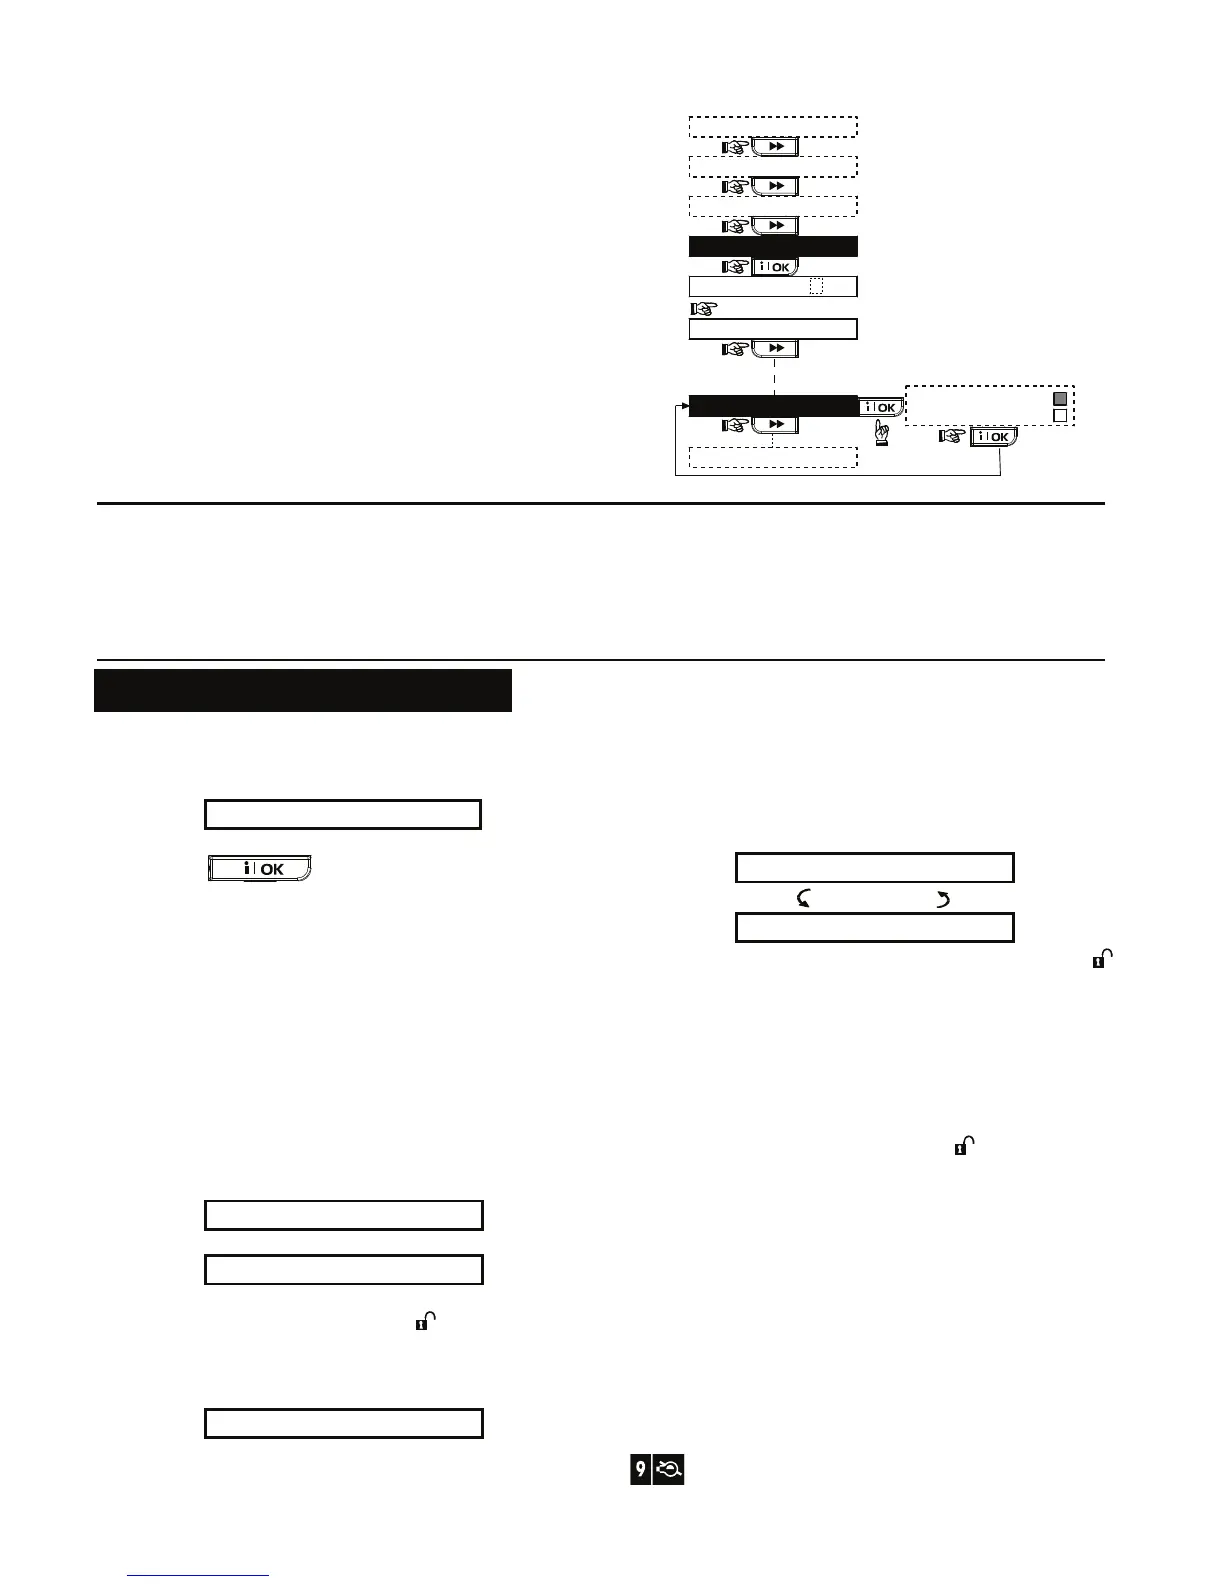
15. PARTITIONING
USER SETTINGS
ENTER CODE
1. NEW INSTL CODE
INSTALLER MODE
[inst. code]
<OK> TO EXIT
enable
disable
WALK TEST
READY 00:00
(First display)
Figure 4.15 – Partitioning
4.16 WALK-TEST
This mode (see Figure 4.1a) provides you with the means
to conduct a periodic test, via the walk-test menu, at least
once a week and after an alarm event.
When you are instructed to perform "walk test", walk
throughout the site to check the detectors / sensors. When a
detector/sensor is triggered into alarm, its name, number
and the alarm reception level should be indicated (for
example, "Bathroom", "Z19 strong") and the buzzer should
sound according to the alarm reception level (1 of 3).
5. TESTING PROCEDURES
5.1 Preparations
Make sure all windows and doors are closed and all zones
are secured (undisturbed).
READY HH:MM
If the display is "NOT READY”, query the control panel by
pressing the
button repeatedly. The source(s)
of the problem(s) will be displayed and read aloud. Take the
necessary measures to eliminate the problem(s) before
testing the system (see next paragraph).
5.2 Diagnostic Test
To verify proper function of all detectors in the system, a
comprehensive diagnostic test is required. To perform this
test, refer to Figure 4.10.
5.3 Keyfob Transmitter Test
Initiate transmission from each transmitter enrolled as a
keyfob unit (according to the list in Table B2, Appendix B).
Use each transmitter to arm the control panel AWAY and
immediately disarm it. Upon pressing the keyfob unit’s
AWAY key, the ARM indicator should light.
ARMING AWAY
PLEASE EXIT NOW
The exit delay beeps will begin.
Press the keyfob unit’s DISARM (
) key. The ARM
indicator should extinguish, the announcement “Disarm,
ready to arm" should be heard and the display should
revert to:
READY HH:MM
Test the AUX button in each keyfob in accordance with the
information noted in Table B2, Appendix B. Verify that the
AUX button performs its duty as programmed.
If the AUX (
@) button is defined as “STATUS”, system
status should be displayed and announced upon
pressing the button.
If the AUX (
@) button is defined as “INSTANT”, press
the AWAY button and then the AUX button. The
response should be:
ARMING INSTANT
(alternating)
PLEASE EXIT NOW
and the exit delay beeps will start. Press the DISARM ( )
key immediately to disarm.
If the AUX (
@) button is programmed as “PGM” and
permitted to activate the PGM output, pressing (
@)
should activate the device wired to the PGM output.
If the
AUX (@) button is defined as "skip exit delay",
press the AWAY button and while you hear the exit
beeps press the AUX button – the exit beeps will be
stopped immediately and the system will be armed
AWAY. Press the DISARM key
( ) immediately to
disarm the system.
5.4 PGM output ON/OFF Test
Go over the table in Appendix C column by column. If, for
instance, the “BY ARM AWAY” column has an “X” marked,
then arm AWAY the system and verify that the appliance
that is connected to PGM output is actually activated upon
AWAY arming.
Continue in the same manner in the following columns,
always creating the state or event that will activate the
appliance that is connected to PGM output. Verify that it is
activated as programmed.
IMPORTANT! Before testing “BY TIMER” and “BY ZONE”,
make sure that these forms of control are permitted - click
repeatedly and verify that the display shows:
 Loading...