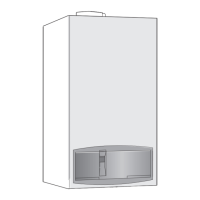
1 0. Installation
1 0.1.
The
standard
flue
length
is
1 OOmm- 1
OOOmm
.
The
extend·
ed
flue
length
is
1001
- 2000mm.
One
extension only may be
used.
The
flue
must be installed as specified
in
BS
5440 : Part 1 .
Note:
Components and instructions are supplied with the stan·
dard
flue
kit to
allow
the
flue
assembly to be fitted
from
inside the
building.
1
0.2.
GENERAL
PREPARATION
Check
that the appliance carton contain
s:
-
Installers instruction pack
Users
information pack
Side
flue
template
Appliance with mounting plate and manifold assembly
Appliance casing bottom panel
Carefully
remove the appliance
from
the package and lay
it
on its
back.
Unscrew
the gas and water connections
joining
the appliance
to
the
wall
mounting plate and mani
fol
d assembly at the bottom
of
the appliance.
Raise
the bottom
of
the appliance and
pull
out the
wall
mounting
plate and manifold assembly
from
the appliance.
Check
that the gas and water valves
are
closed.
See
Fig
.
21.
Check
tnat the position chosen
for
the appliance
is
in
accordance
with the instructions
given
in
Sections 4 and
5.
Hold
the
wall
mounting plate
to
the
wall
onto
which
the appliance
is
to be
fitted.
Check
that the plate
is
horizontal and
vertical
where
indicated.
See
Fig
.
11
.
Mark
the position
of
the six appliance
fixing
holes and the
posi-
tion
of
the
flue
on the
wall(s).
Rear
Flue
-
Mark
from
the
wall
mounting plate.
See
Fig.
11
.
Side
Flue
-
Mark
the horizontal
line
of
the top
of
the casing and
extend along the
wall
and mark the position
of
the
flue
hole
using
the side template.
See
Fig.
11.
Drill
the
six
appliance
fixing
holes
60mm deep
for
the
No
.
12
plugs
supplied.
Drill
the
flue
hole
at 125mm diameter
(150mm
dia.
for
internal
fit
-
ting)
ensuring that it
is
horizontal through the
wall.
Fix
the sealing gasket, (supplied with the appliance), evenly
around the
flue
opening
in
the mounting plate at the side
facing
the
wall.
Plug
the holes and
fix
the appliance mounting plate and
manifold
assembly checking that the assembly
is
horizontal bef
ore
tight-
ening the
screws.
Notches on the
manifold
assembly indicate the centre
lines
of
the
valves.
'Transfer
these marks to the
wall
to aid the alignment of the pipe-
work.
Remove
the gas cock and
fit
the appropriate connector fitting.
Refit
the
cock.
If
pre-plumbing the
pipework,
then loosen the
valve
locknuts and
arrange the pipework so that there can be some slight vertical
movement of the valves when connected
to
the pipework.
Suitably restrain the pipework after connecting the appliance.
Pre-plumbing
is
not advised
if
movement
is
not available.
Pipework
running
up
the back
of
the appliance must be arranged
to pass to one side of the air/
flue
duct when a rear
flue
connec-
tion
is
made.
See
Fig
.
11
.
Pipework
can only run horizontally outside the
limits
of
the
appli·
ance casing.
It
is
important that the pipes are not
fixed
using
clips
which space them away
from
the
wall.
12
The
gas and water pipes may
now
be connected to the
manifold.
Before
the appliance
is
fitted
to the
wall,
thoroughly
fl
ush the cen·
tral heating system and the mains water supply pipe.
Lift
the
appliance onto the mounting plate.
Remove
the two appliance
support brackets.
Tighten
the
co
nne
ctio
ns at the
manifold.
1 0.3. FIXING
THE
APPLIANCE
Remove
the cabinet front panel
from
the appliance by pu
ll
ing
it
away
from
the
clips
at the bottom of t
he
casing and
lift
ing
it
off
the top supports.
Remove the inner casing cover and the inner
co
ver panel by
removing the eight
screws.
See
Fig
.
22.
Fix
the air duct clamp assembly
(packed
in
the installer
pack)
to
the appropriate
openi~g
as
follows
.
See
Fig
.
17.
Pull
off
the
fan
suction tubes and unplug the electrical connection
from
the
fan
at the
3-p
in connector block.
See
F
ig
.
15
.
Unscrew
and
remove
the
fan
fixing
screw.
Slide
the
fan
out of the appliance.
To
fit
the air duct assemb
ly
to the rear opening, carefully
slide
the
outer part of the clamp assembly down behind the appliance and
hold
it
in
position
while
placing the inner flanged section
on
the
inside
of
the inner casing.
Align
the screw holes and
loosel
y
fix
the
screws.
See
Fig.
1
7.
If
a side
flue
connection is to be made, remove the appropriate
sealing plate assembly.
See
Fig
.
16.
Fit the
air
duct clamp assem-
bly as described with the outer section
fixed
against the white
cabinet casing.
Fit
the
sealing
plate assembly
(previ
ously
moved
from
the
side
flue
opening)
to the rear
flue
opening and tighten the screws.
Carefully
flex
the
silicon
rubber sealing ring
to
achieve
an
undis-
torted
ring
.
Fit
the
ring
into the
groove
in
the air duct clamp assembly.
Tig
hten
the screws so that the
ri
ng
is
held evenly but not distorted or
compressed.
Do
not
fully
tighten
the
screws
at this stage.
See
Fig
.
17.
If
it
is
necessary,
(bec
ause
of
accessibility problems) to
fit
the
flue
duct assembly
from
inside the building, then it should be done
now
.
Internal
fitting of the
flue
Cut
and assemble the ducts and the terminal. Section 10.4.
Fit
the
sealing gasket to the terminal and set
in
the channel.
Slide
the
flue
centring
ring
,
available
from
Worcester
Hea
t System
s,
onto the
air
du
ct
and t
ig
hten the clamp. See
Fig
. 14a.
Loop
a strong cord
around the terminal
from
inside the
flue
duct leaving enough
ex·
posed to
grip.
Lubricate
the gasket and push the assembly through the
wal
l.
Lift
t
he
appliance onto the wallplate ensuring that it
is
prope
rly
ente
red
on
to
the top supports.
Remove
the transit bracket
s.
Hold
t
he
bottom
of
the appliance a
littl
e
off
the
wall
so
that the
con-
nections can be aligned and entered. Ensure that the
valve
cocks
face
downwards.
Fully
tight
en
the gas and
wa
ter connections and
the
valve
locknuts.
Alw
ays
support the appliance pipework when
tightening.
Pass
a 15mm
pipe
through the
manifold
plate
ai'td
con-
nect it to the
relief
valve
discharge
compression
fitting
.
Ens
ure
that
any discharge does not
fall
onto electrical components or where
it m
ig
ht be a hazard to the
user.
See
Fig
. 28.
Carefully
pull
back the assembly, using the cord,
so
that the air
duct
is
drawn into the clamping ring and
fix.
See Section 1 0.4.
Remove
the cord
Fit
the casing bottom panel using the screws supplied.
The
panel
and screws are packed
separatel
y.
See
Fig.
23
.
1 0.4. AIR AND
FLUE
DUCT
ASSEMBLY
Op
en the package/ s conta
inin
g the ductwork and check the
con-
tents against the pa
cking
list/
s.
Remo
ve
all
t
he
pac
ki
ng
from
the
ducts and terminal assembly.
The
standard
flue
kit accommodates a
flue
assembly of up to 1
metre
in
length.
See
Fig
. 14
for
the assembly arrangements.
Overall Duct Lengths,
1.0
- 1 .2 metres
The
air and
flue
ducts must be shortened before assembly and
final
cutting to length.
 Loading...