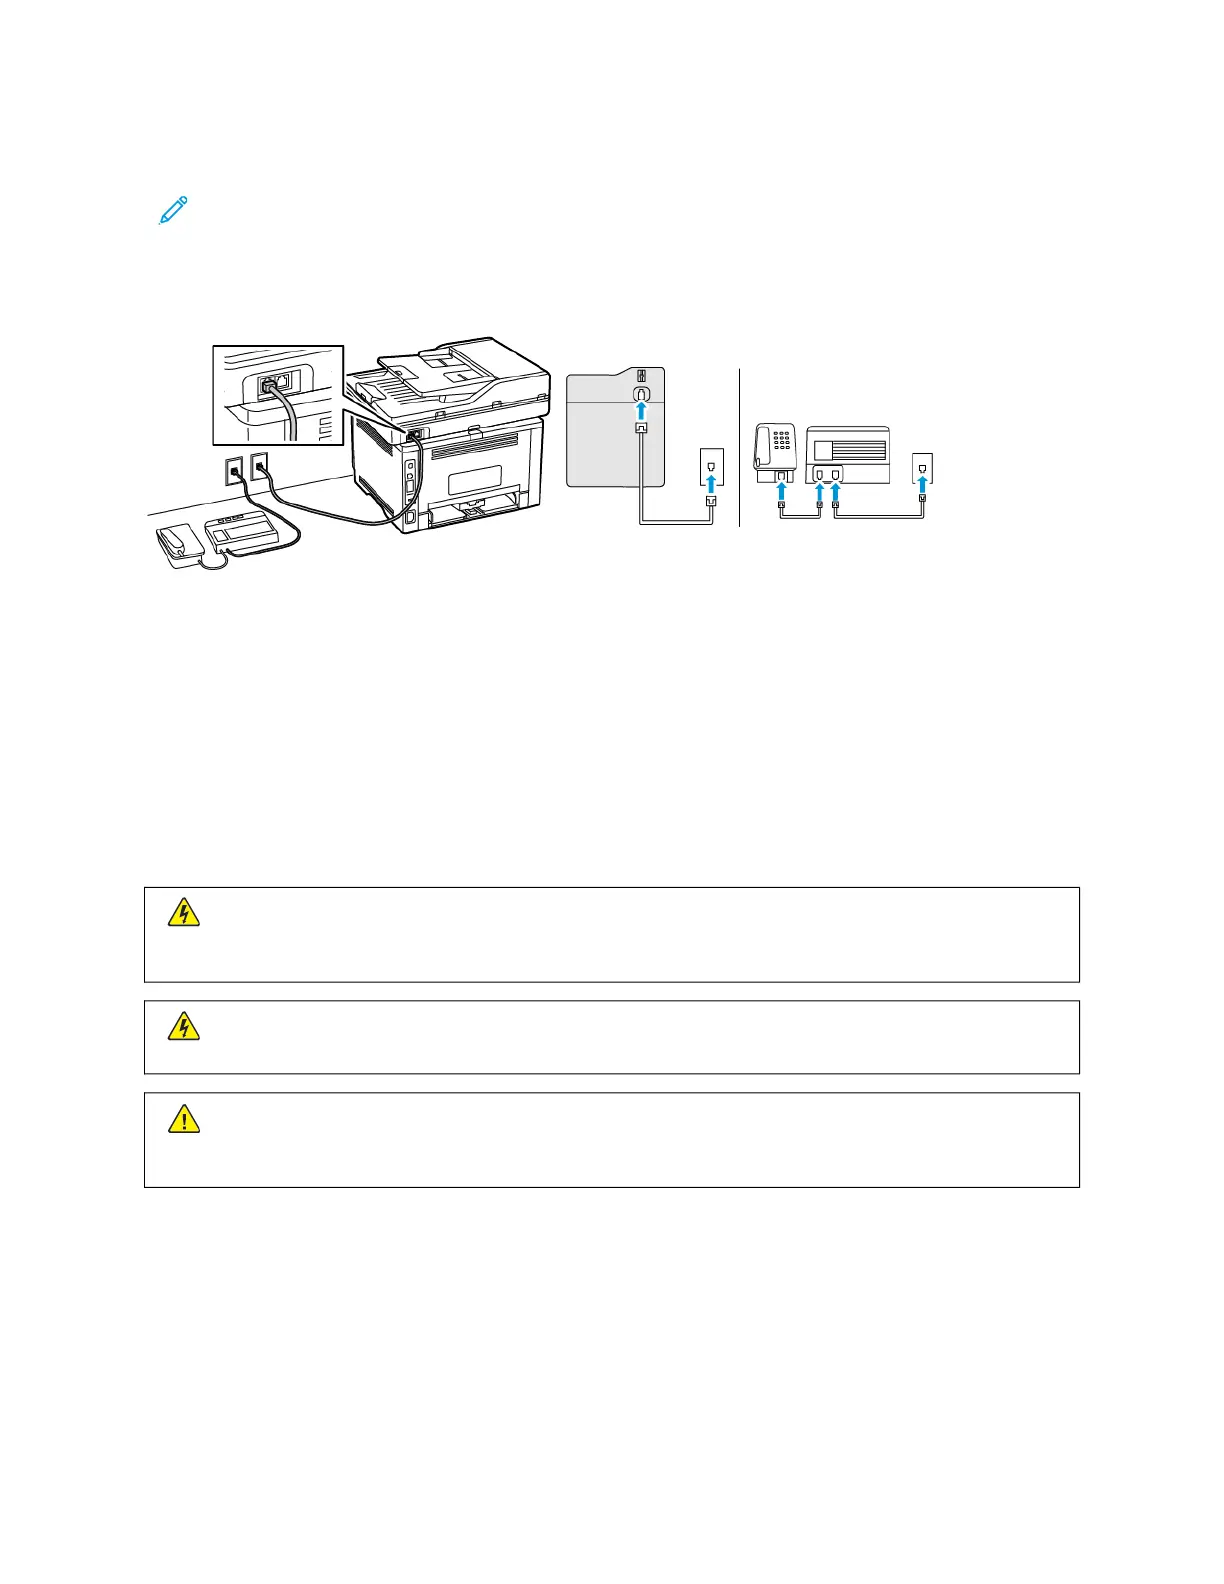
Setup 2: Printer is sharing the line with an answering machine
Note: If you subscribe to a distinctive ring service, then make sure that you set the correct ring pattern for
the printer. Otherwise, the printer does not receive faxes even if you have set it to receive faxes
automatically.
CCoonnnneecctteedd ttoo ddiiffffeerreenntt wwaallll jjaacckkss
1. Connect one end of the telephone cable to the line port of the printer.
2. Connect the other end of the cable to an active analog wall jack.
• If you have only one telephone number on your line, then set the printer to receive faxes automatically.
• Set the printer to pick up calls two rings after the answering machine. For example, if the answering machine
picks up calls after four rings, then set the printer Rings to Answer setting to 66.
SETTING UP FAX IN COUNTRIES OR REGIONS WITH DIFFERENT TELEPHONE WALL JACKS AND
PLUGS
CCAAUUTTIIOONN——SSHHOOCCKK HHAAZZAARRDD:: To avoid the risk of electrical shock, do not set up this product or make
any electrical or cabling connections, such as the power cord, fax feature, or telephone, during a lightning
storm.
CCAAUUTTIIOONN——SSHHOOCCKK HHAAZZAARRDD:: To avoid the risk of electrical shock, do not use the fax feature during a
lightning storm.
WWaarrnniinngg:: To reduce the risk of fire, use only a 26 AWG or larger telecommunications (RJ-11) cord when
connecting this product to the public switched telephone network. For users in Australia, the cord must be
approved by the Australian Communications and Media Authority.
The standard wall jack adopted by most countries or regions is RJ11. If the wall jack or equipment in your facility is
not compatible with this type of connection, then use a telephone adapter. An adapter for your country or region
may not come with your printer, and you may need to purchase it separately.
There may be an adapter plug installed in the telephone port of the printer. Do not remove the adapter plug from
the telephone port of the printer if you are connecting to a serial or cascaded telephone system.
Xerox
®
B305/B315 Multifunction Printer User Guide 49
Set up, Install, and Configure

 Loading...


