12 www.xilinx.com Getting Started with the VC707 Evaluation Kit
UG848 (v1.4.1) October 14, 2015
Chapter 1: Getting Started with the Virtex-7 FPGA VC707 Evaluation Kit
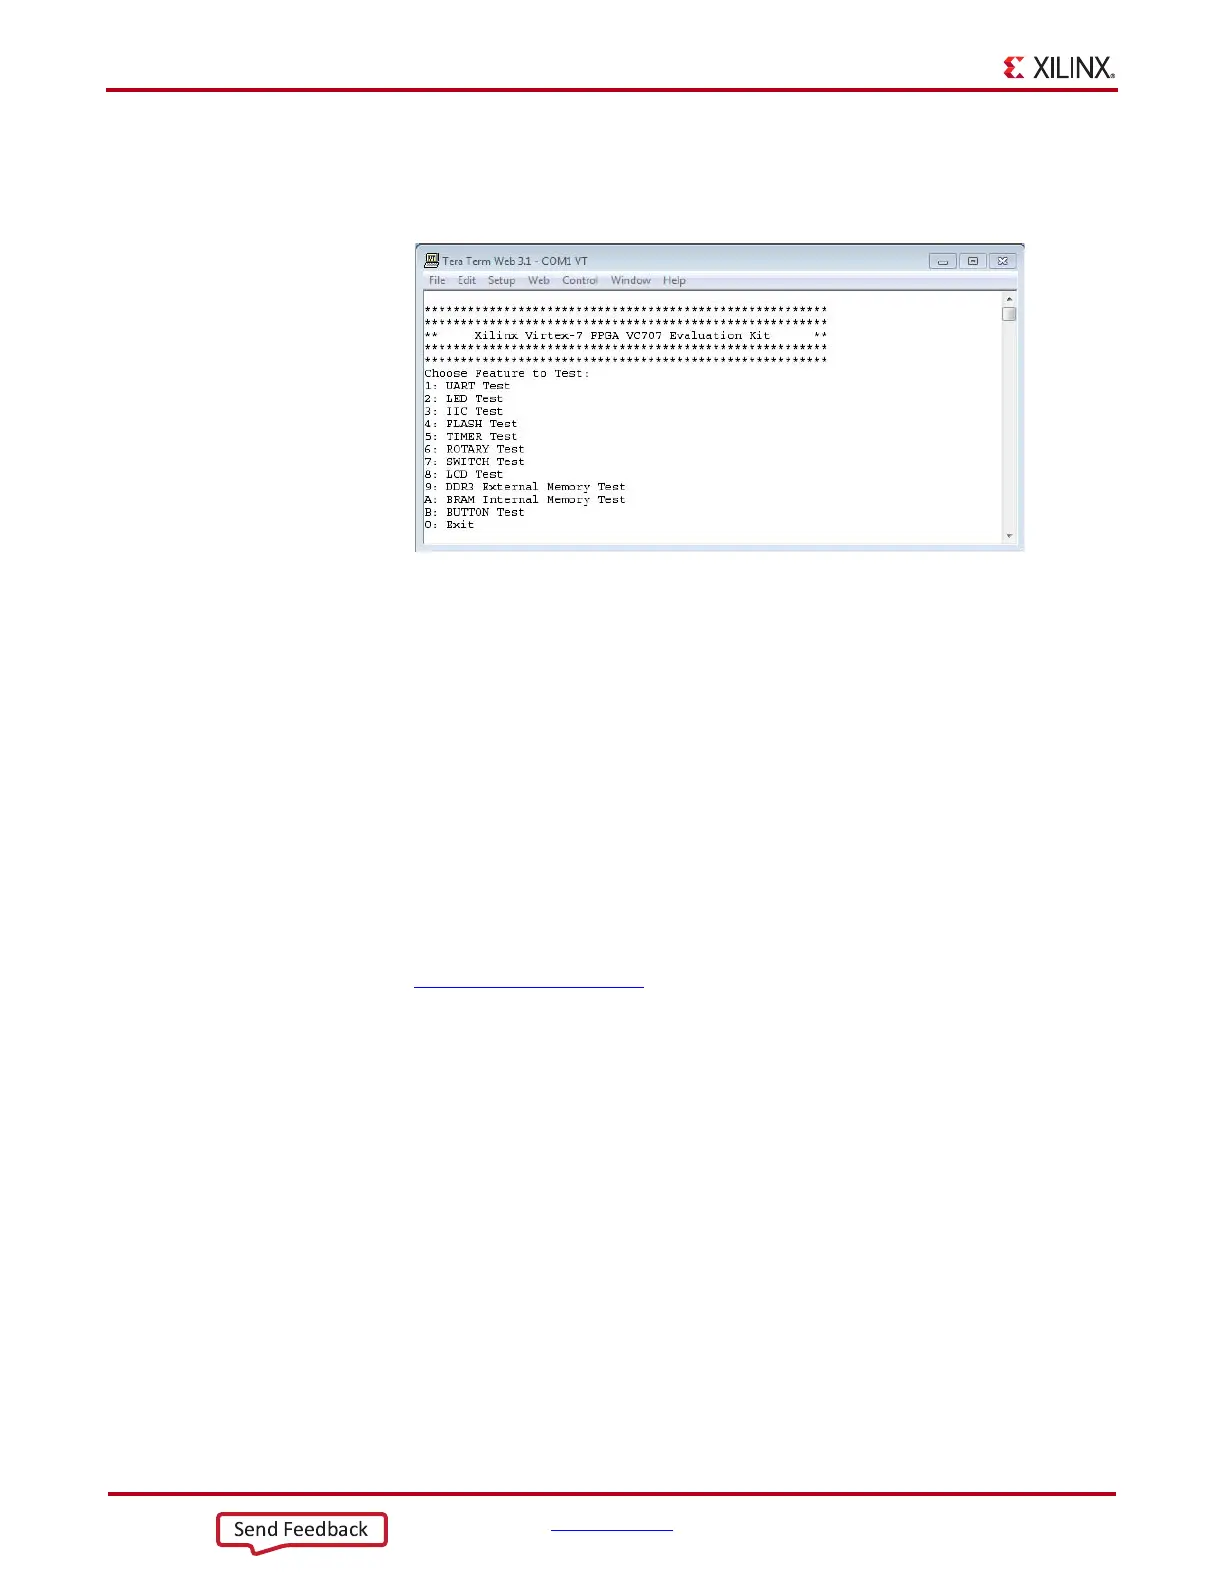
5. Press and release the Program button SW9 (Figure 1-7). The BIST bitstream configures
the FPGA and then runs BIST. The terminal program displays the BIST menu shown in
Figure 1-9.
6. To run a test, type the test number, and press the Enter key. Press any key to end the
test and return to the menu.
AMS 101 Card Demonstration
The XC7VX485T FPGA features dual one Mega-sample per second (MS/s), 12-bit,
analog-to-digital converters (XADC) built into the FPGA. The AMS card demonstration
uses the AMS 101 card (Figure 1-11, page 14) to generate an analog signal and the AMS
evaluator tool (Figure 1-13, page 15) to view and control the signal.
Install the AMS Evaluator Tool
Download the AMS Evaluator installer files:
1. Go to AMS101 Evaluation Card.
2. Click AMS101 Evaluation Card Targeted Reference Designs.
3. Download the 7 series FPGA and Zynq®-7000 AP SoC AMS Evaluator Installer for
AMS Targeted Reference Design zip file.
4. Extract the AMS101 AMS Evaluator Installer Vxx to your hard drive.
5. Click the setup.exe file to install the National Instruments LabVIEW Engine needed
to host the AMS Evaluator tool.
The GUI was developed with National Instruments LabVIEW 2011 software. To enable use
of the GUI without a LabVIEW license, Xilinx bundled the LabVIEW run-time engine with
the GUI installer. During the installation process, the run-time engine is installed on the
PC.
X-Ref Target - Figure 1-9
Figure 1-9: BIST Menu
 Loading...