6-2
FUEL TANK
REMOVING THE FUEL TANK
1. Extract the fuel in the fuel tank
through the fuel tank cap with a
pump.
Be careful not to damage the fuel
pump.
2. Remove:
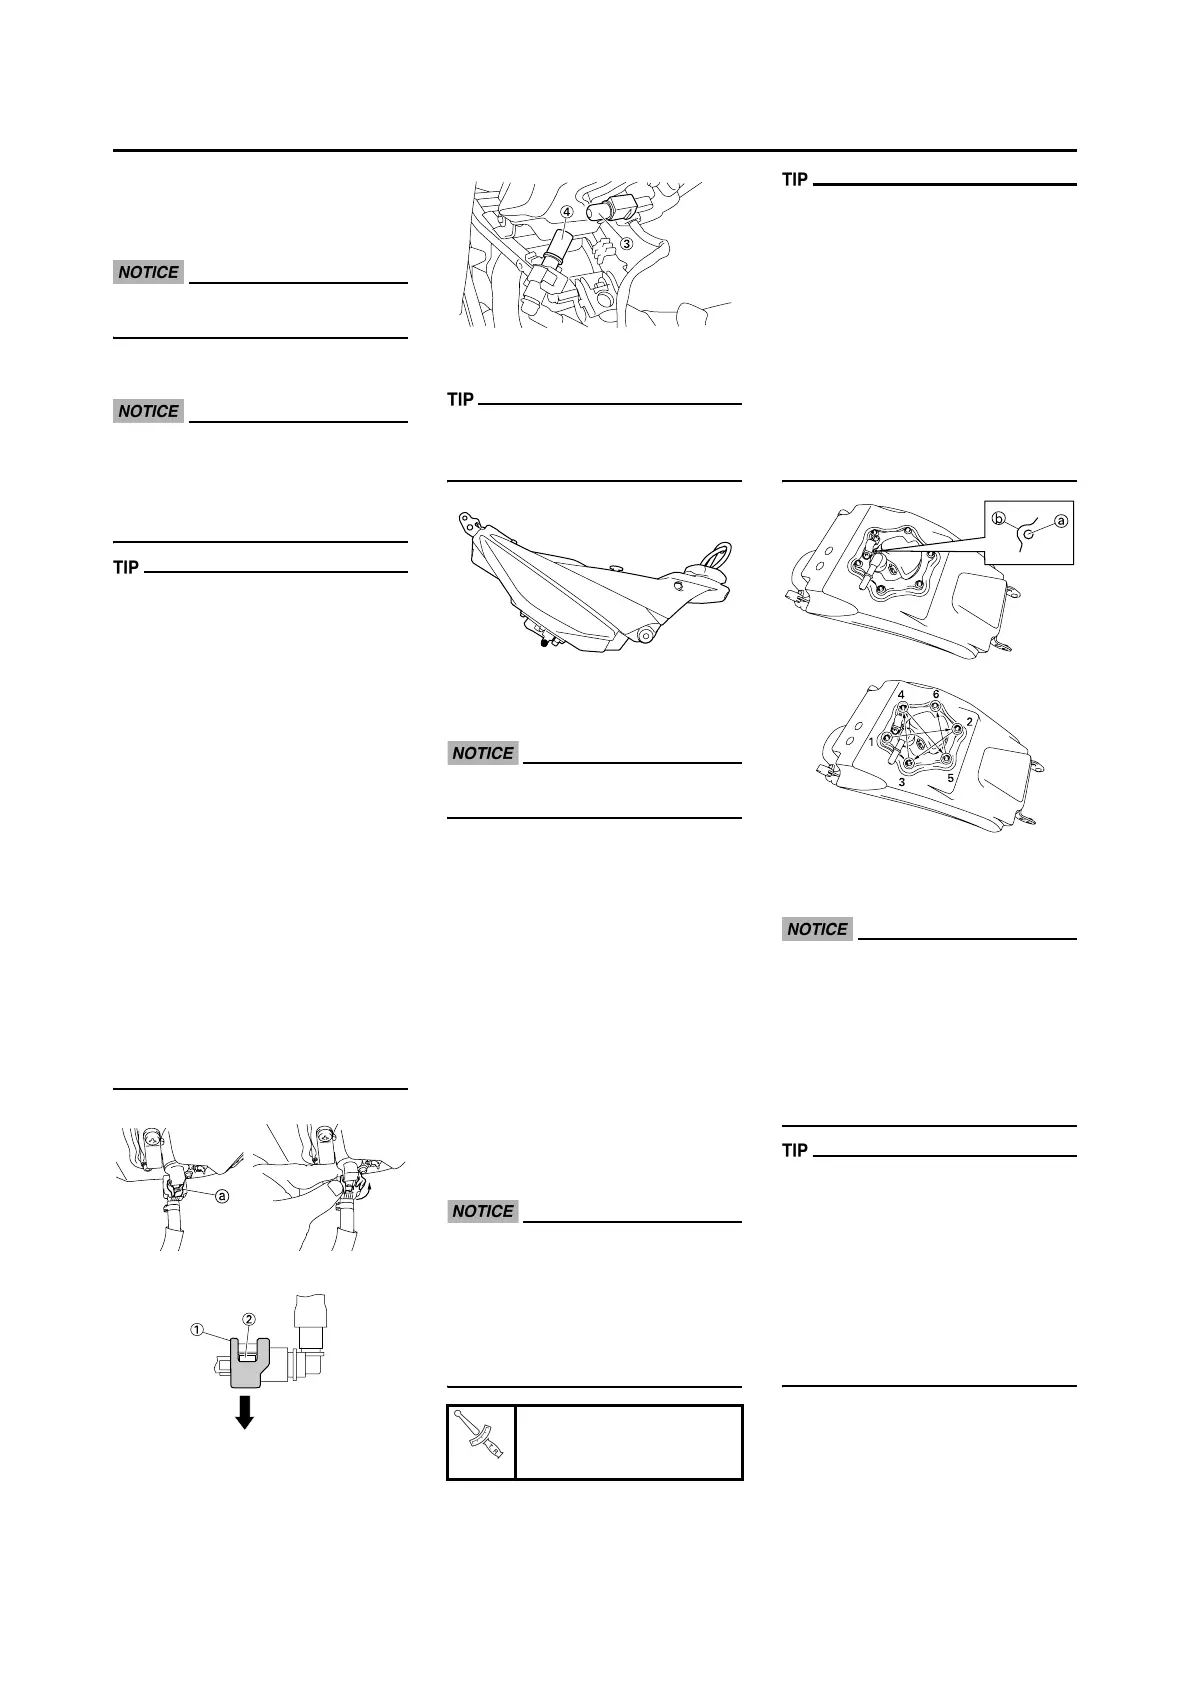
• Fuel pump coupler
Although the fuel has been re-
moved from the fuel tank be care-
ful when removing the fuel hoses,
since there may be fuel remaining
in it.
• Before disconnecting the fuel hose,
clean the area around the fuel hose
connector.
• Before removing the fuel hose,
place a few rags in the area under
where it will be removed.
• To disconnect the fuel hose from
the fuel tank, remove the fuel hose
connector holder "a", and then slide
the fuel hose connector cover.
• Slide the fuel hose connector cover
"1" in the direction of the arrow
mark, and press the buttons"2" on
both sides of the connector to re-
move the fuel hose.
• Disconnecting the hose is done by
hand. There is no need to use tools.
• To prevent sand, dust, and other
foreign material from entering the
fuel pump, install the included fuel
hose joint cover 1 "3" and fuel hose
joint cover 2 "4" onto the fuel pump
and disconnected fuel hose.
3. Remove:
•Fuel tank
Do not set the fuel tank down so that
the installation surface of the fuel
pump is directly under the tank.
REMOVING THE FUEL PUMP
1. Remove:
•Fuel pump
Do not drop the fuel pump or give
it a strong shock.
CHECKING THE FUEL PUMP
BODY
1. Check:
• Fuel pump body
Cracks/damage → Replace fuel
pump assembly.
CHECKING THE FUEL PUMP
OPERATION
1. Check:
• Fuel pump operation
Refer to "CHECKING THE FUEL
PRESSURE" section.
INSTALLING THE FUEL PUMP
1. Install:
•Fuel pump
• Fuel pump bracket
• Do not damage the installation
surfaces of the fuel tank when in-
stalling the fuel pump.
• Before installing the fuel pump,
remove any dirt and other foreign
material from the installation sur-
face on the fuel tank.
• Always use a new fuel pump gas-
ket.
• Install the lip on the fuel pump gas-
ket upward.
• Install the fuel pump as shown in
the illustration.
• Align the projection "a" on the fuel
pump with the slot in the fuel pump
bracket. Align the slot "b" on the fuel
tank damper with the projection "a"
on the fuel pump.
• Tighten the fuel pump bolts in stag-
es in a crisscross pattern.
INSTALLING THE FUEL TANK
1. Install:
•Fuel hose
• When installing the fuel hose,
make sure that it is securely con-
nected, and that the fuel hose
holders are in the correct posi-
tion, otherwise the fuel hose will
not be properly installed.
• Be sure not to kink or pinch the
fuel hose.
• Insert the fuel hose on the fuel pipe
until you hear a definite "click".
• Slide the fuel hose connector cover
"1" at the fuel hose end in the direc-
tion of the arrow.
• Install the fuel hose connector hold-
er "a".
• Make sure that the fuel hose and
fuel pump lead are routed through
the guide on the cover.
Fuel pump bracket bolt
4 Nm (0.4 m•kg, 2.9
ft•lb)
 Loading...