model number 054-5757-2 | contact us: 1.866.523.5218
19
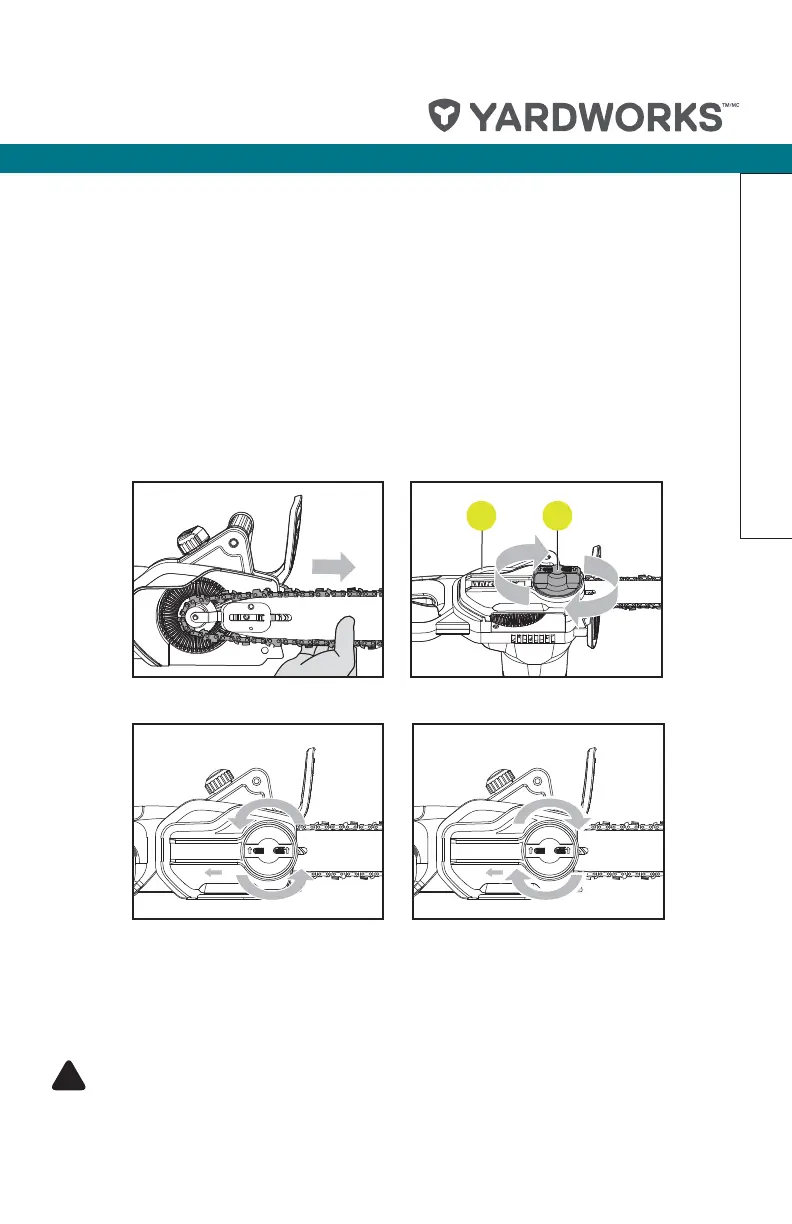
5. Check to make sure all parts are seated properly and hold chain and guide bar in a level
position. (See Fig. A3)
6. Fit the Chain Cover (12) and tighten the Chain Cover by turning the Chain Tensioning Knob
(11) clockwise until it is tight.(See Fig. A4)
NOTE: The new Chain (10) will stretch while cutting and lose proper tension. When the chain
becomes loose, completely unscrew the Chain Tensioning Knob (11) or turn the knob around
three (3) full turns in a counter-clockwise direction (See Fig. A5), then retighten the Chain
Tensioning Knob (11) (See Fig. A6) to properly reset the chain tension by repeating Steps 5
and 6 listed above.
TENSIONING CHAIN/LOCKING KNOB
"MXBZTDIFDLUIFDIBJOUFOTJPOCFGPSFVTFBGUFSUIFªSTUDVUTBOESFHVMBSMZEVSJOHVTF6QPO
initial operation, new chains can lengthen considerably.
!
WARNING:
• Unplug chainsaw from power source before adjusting saw chain tension.
• Cutting edges on chain are sharp. Use protective gloves when handling chain.
11 10
1112
A3
A4
A5 A6
Assembly
 Loading...