- 24 -
INSTALL THE HOOD
CAUTION: At least two installers are
recommended because of the large size
and weight of this range hood.
1. Re-install the grease filters and control
panel (Fig. 10/11).
2. Lift range hood into the ceiling opening.
3. Secure each support frame to the wooden
hood support frame using (6) 6 x 60 mm
lag bolts and washers provided. Fig. 32.
4. Adjust height of the telescoping support
frame to ensure a tight fit between the
hood and finished ceiling.
5. Connect ductwork; Duct tape all joints to
ensure an air tight seal.
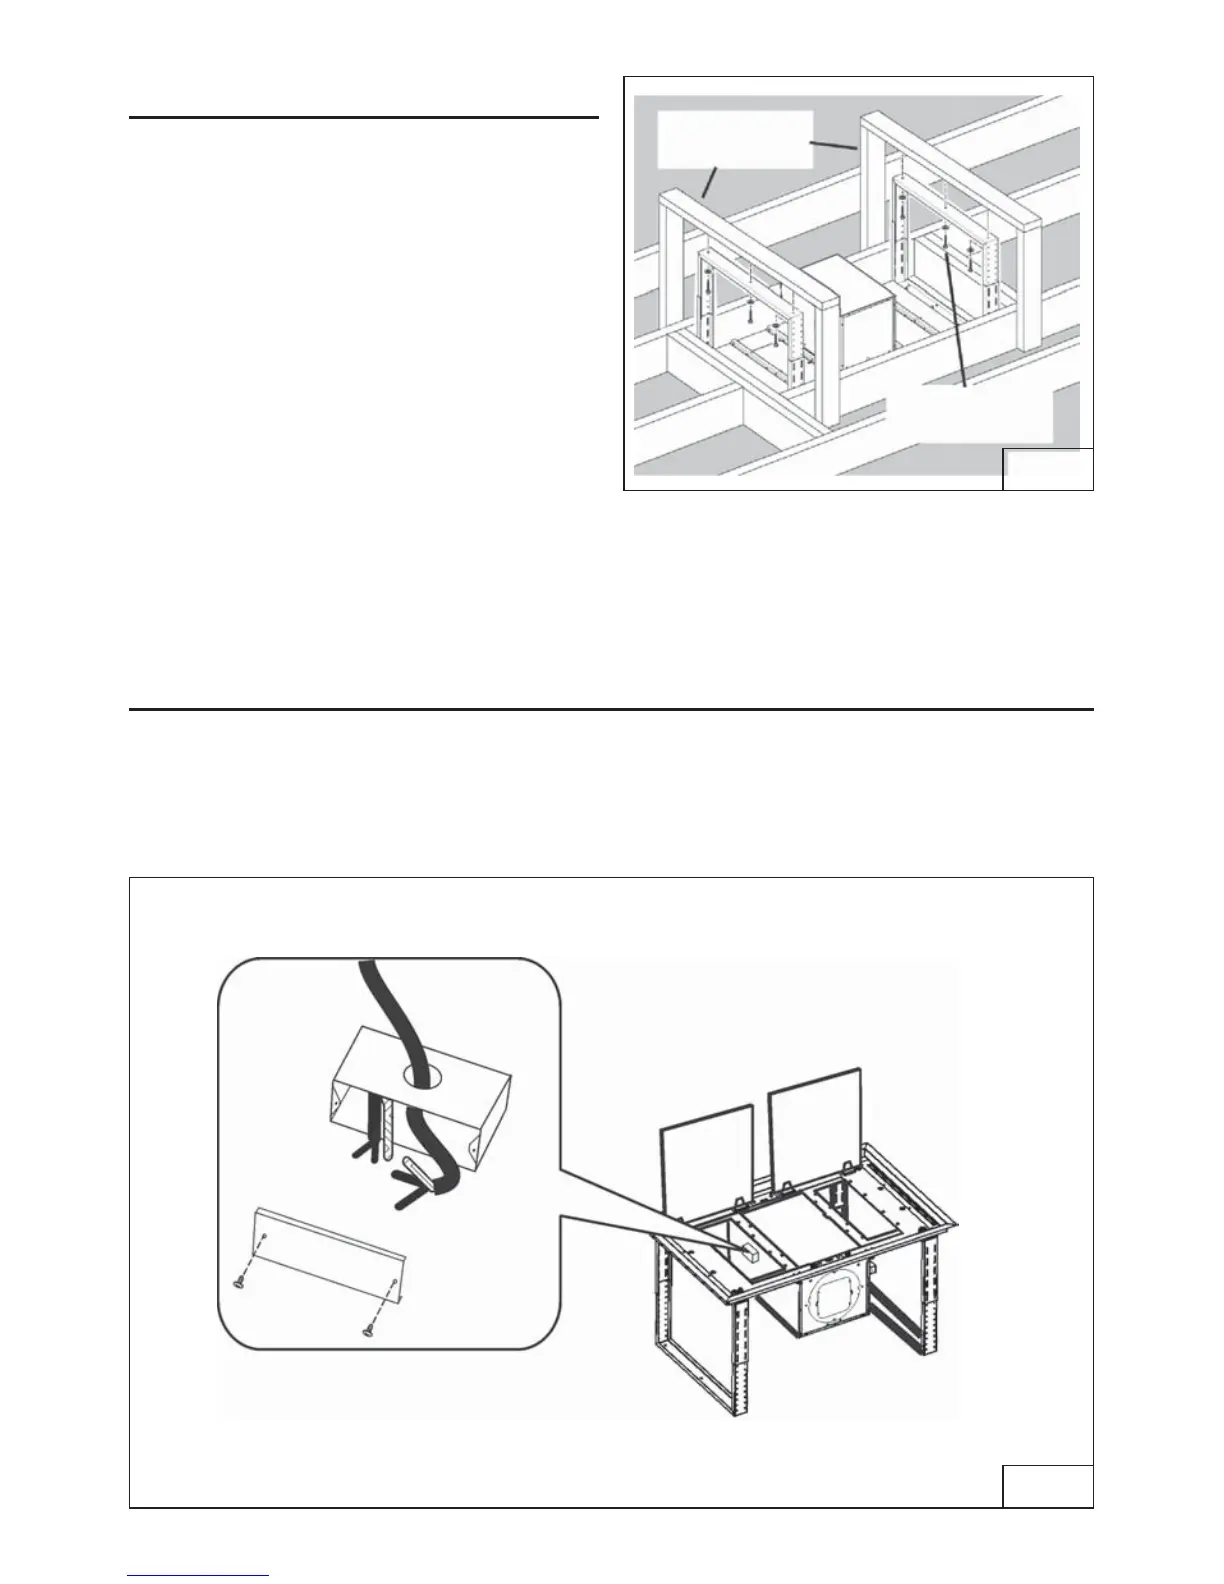
FIG.32
2x4 WOOD
FRAME
(6) WASHERS
& LAG BOLTS
WIRING (HOOD WITH INTERNAL BLOWER/S)
1. Remove a knockout from the wiring box marked120 Vac input (Fig.33).
2. Secure the conduit to the wiring box through a conduit connector.
3. Make electrical connections. Connect white to white, black to black and green to ground.
4. Fix wiring box cover and screws (Fig.33). Make sure that wires are not pinched between
cover and box.
FIG.33
BOX MARKED
“120 VAC INPUT”
WIRING BOX
COVER
CONNECT:
WHITE-TO-WHITE,
BLACK,-TO-BLACK,
GREEN-TO-GROUND.
 Loading...