24 CHAPTER 2: INSTALLING THE SWITCH
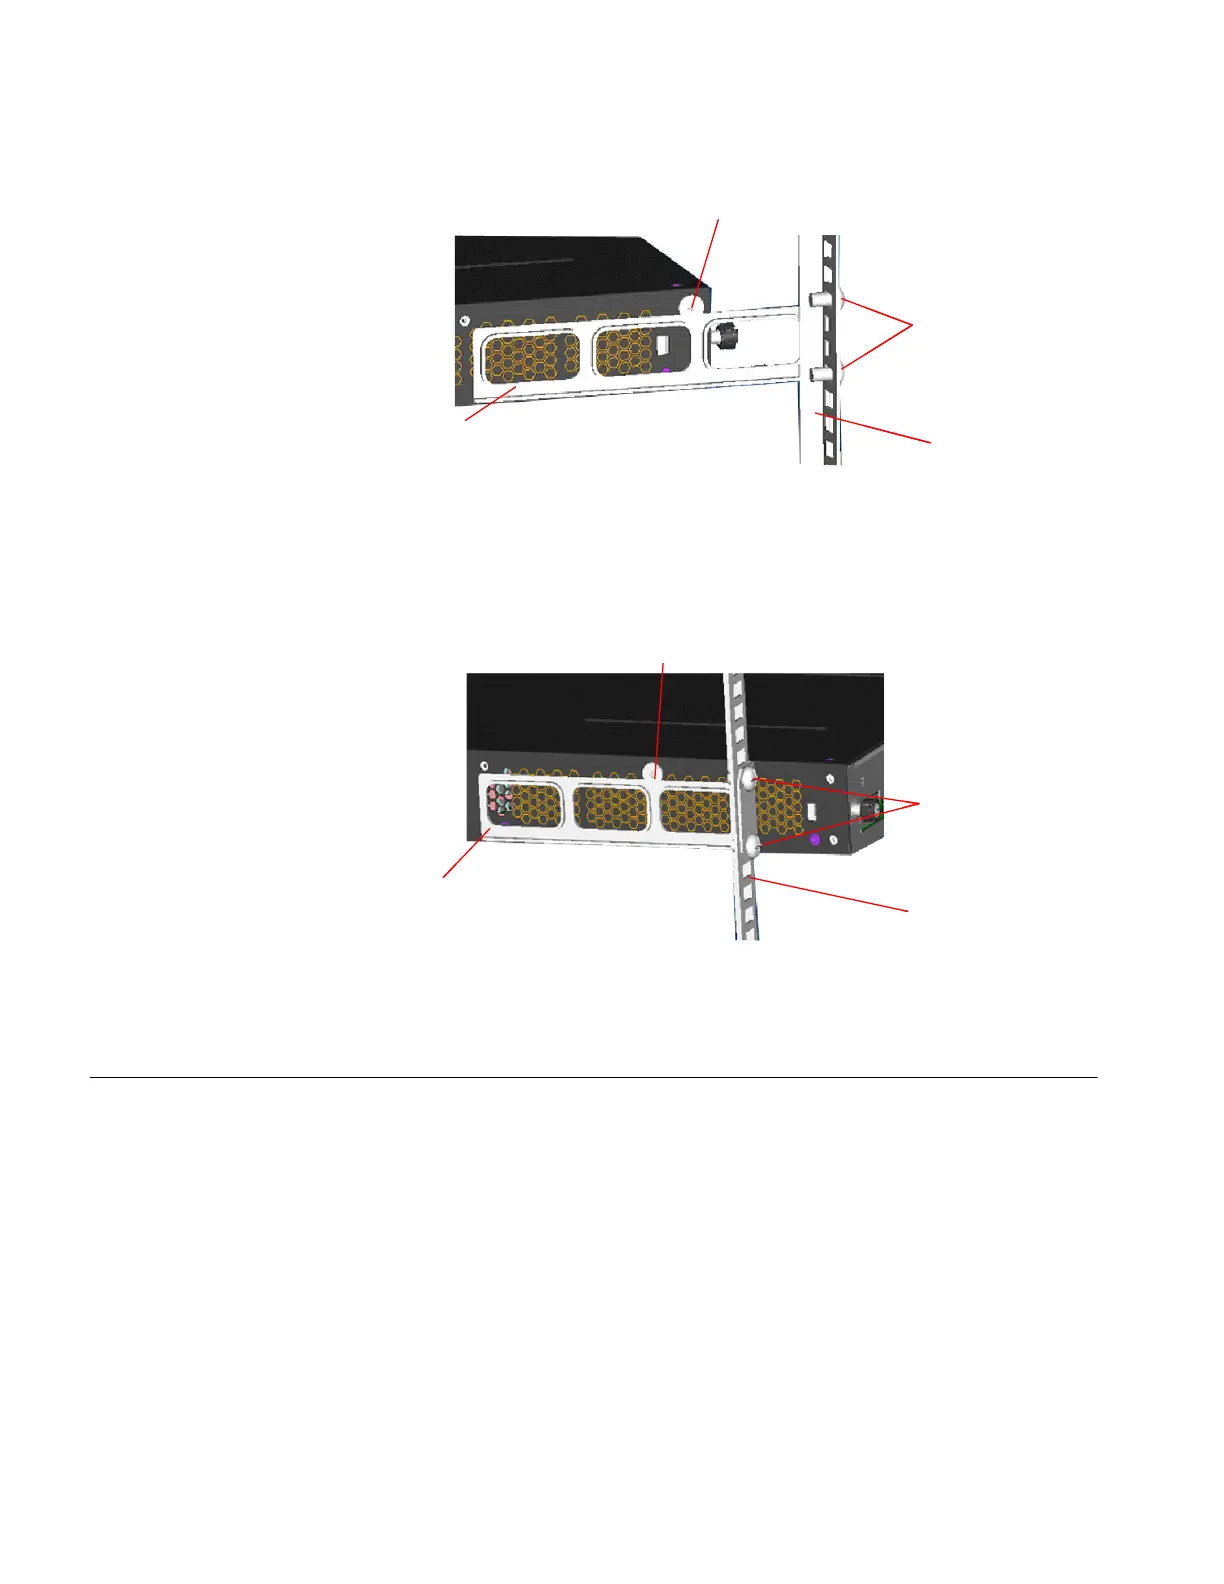
Figure 20 Installation completed 1
Figure 21 Installation completed 2
Mounting the Switch
on a Desktop
In many cases, standard 19-inch racks are not available. Therefore, switches are
often placed on a desktop. To place your switch on a desktop, you simply need to:
■ Make sure that the surface is clean, flat, and sturdy.
■ Makes sure that the environment is well ventilated and allow 10 cm (3.9 in.) of
space around the chassis for heat dissipation.
■ Do not place heavy objects on your switch.
■ When stacking, the vertical distance between two switches must be at least 1.5
cm (0.59 in).
Screw 1: Fix the rear bracket to the mount
angle.
Screw 2 is mounted to the switch.
Screw 1: Fix the rear bracket to the mount
angle.
Screw 2 is mounted to the switch.
Screw 1
Screw 2
Rear bracket
Rear mount
angle
Screw 1
Screw 2
Rear bracket
Rear mount
angle
Screw 2
Screw 1
Rear mount angle
Rear bracket
Screw 2
Screw 1
Rear mount angle
Rear bracket
 Loading...