59
13 Observe the post-installation instructions described on page 36.
To remove the FDD from the optical drive bay:
1 Observe the ESD precautions and pre-installation instructions
described on page 35.
2 Disconnect the data cable from the USB connector on the
backplane board.
3 Press the blue release lever to unlock the FDD tray and remove the
FDD tray assembly from the server.
4 Slide the tray out through the front of the server.
5 Press downward on the side of the tray and disengage the drive
from the two metal tabs on the opposite side of the tray.
6 Lift the FDD out of the tray.
7 Store the FDD tray for future use.
8 Install the filler panel into the drive bay. If installing a new FDD,
see “To install a FDD in the optical drive bay” section on page 56
for installation instructions.
To remove the FDD from a converted HDD bay:
1 Observe the ESD precautions and pre-installation instructions
described on page 35.
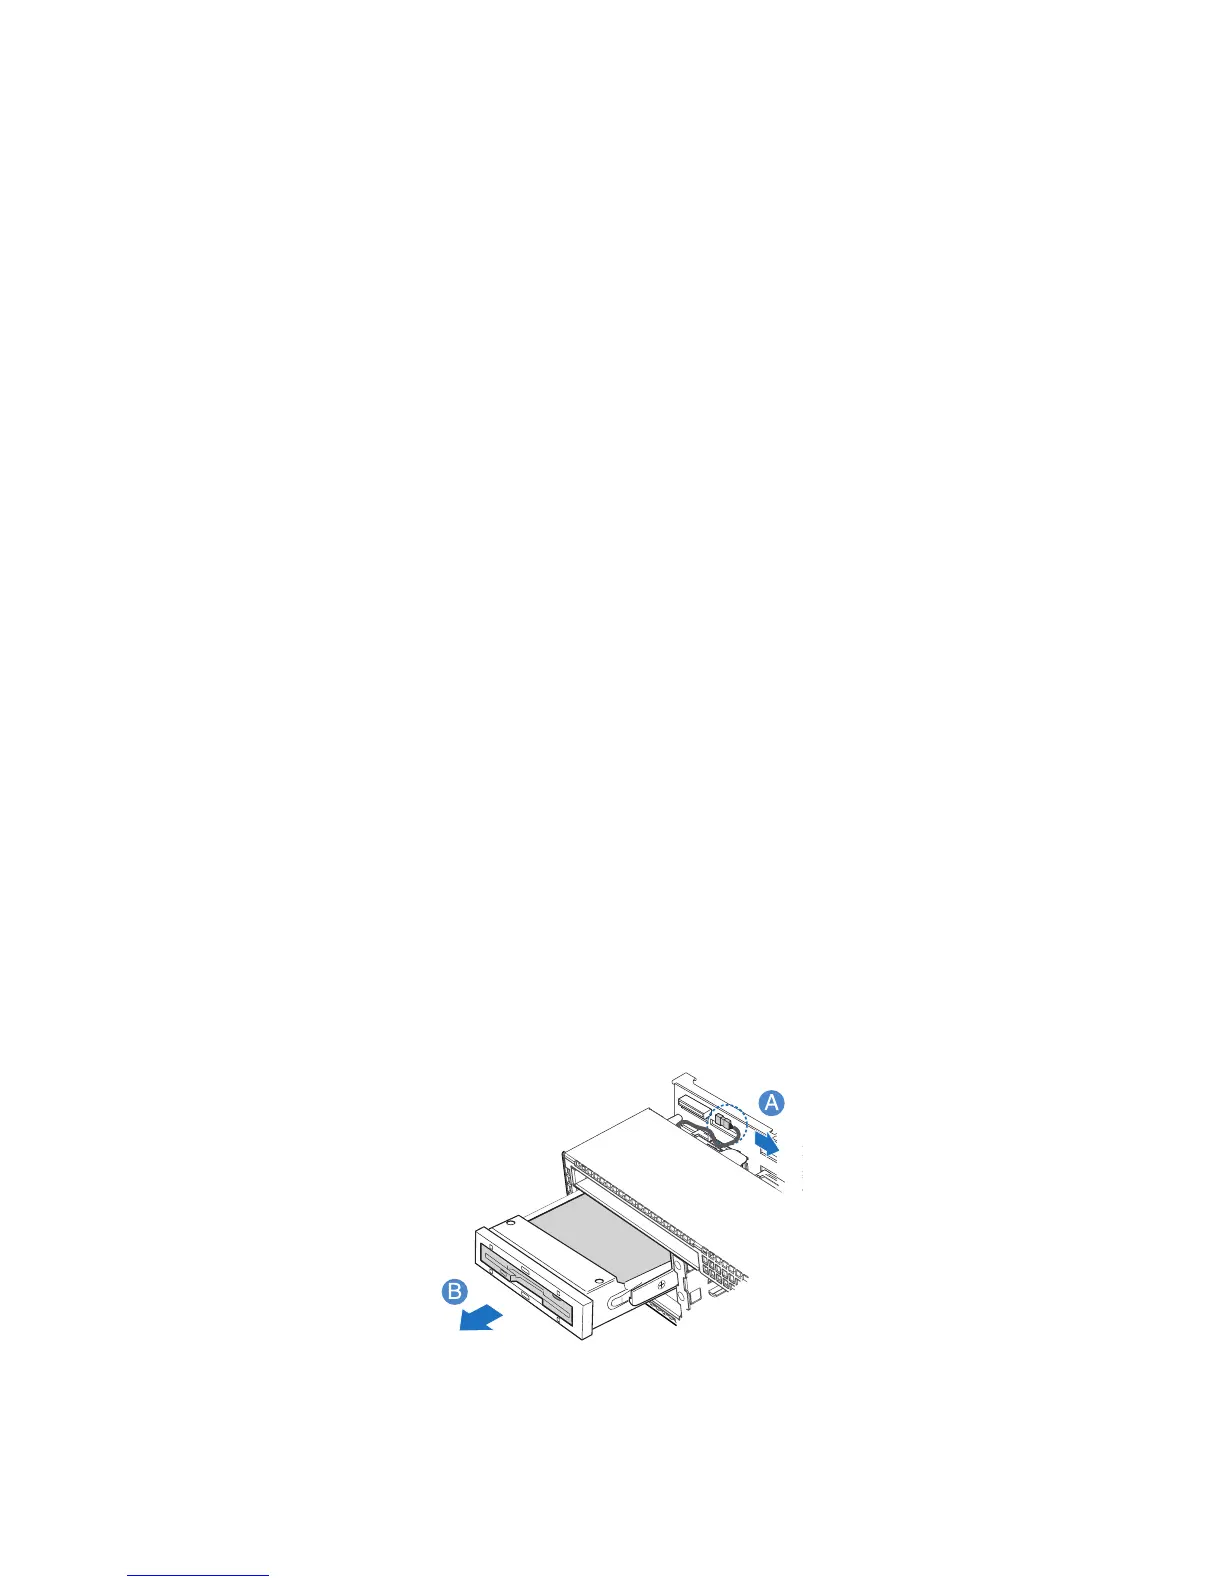
2 Disconnect the data cable from the USB connector on the
backplane board (A).
3 Press the blue release latch on the rear of the drive carrier.
4 Slide the drive carrier out through the front of the server (B).
5 Remove the four screws securing the two rails to the carrier, then
lift the rails from the carrier. .

 Loading...