10 Rockwell Automation Publication 193-IN080A-EN-P - September 2018
E300 Electronic Overload Relay
1. Verify that the E300 Relay is fully powered, then turn the three dials to your selected IP address.
2. Once dials are in place, cycle power to the E300 Relay.
For example, when the left dial is set to 0, the middle is set to 0, and the right dial is set to 6, the resulting IP address is: 192.168.1.006 or
192.168.1.6.
E300 Relay Configuration via the BOOTP/ DHCP Utility
By default, the E300 relay EtherNet/IP™ Communication Module is DHCP Enabled. The BOOTP/DHCP utility is a standalone program that is
included when you install RSLinx™ Classic software.
To assign an IP address to the E300 relay via the BOOTP/DHCP utility, perform the following procedure.
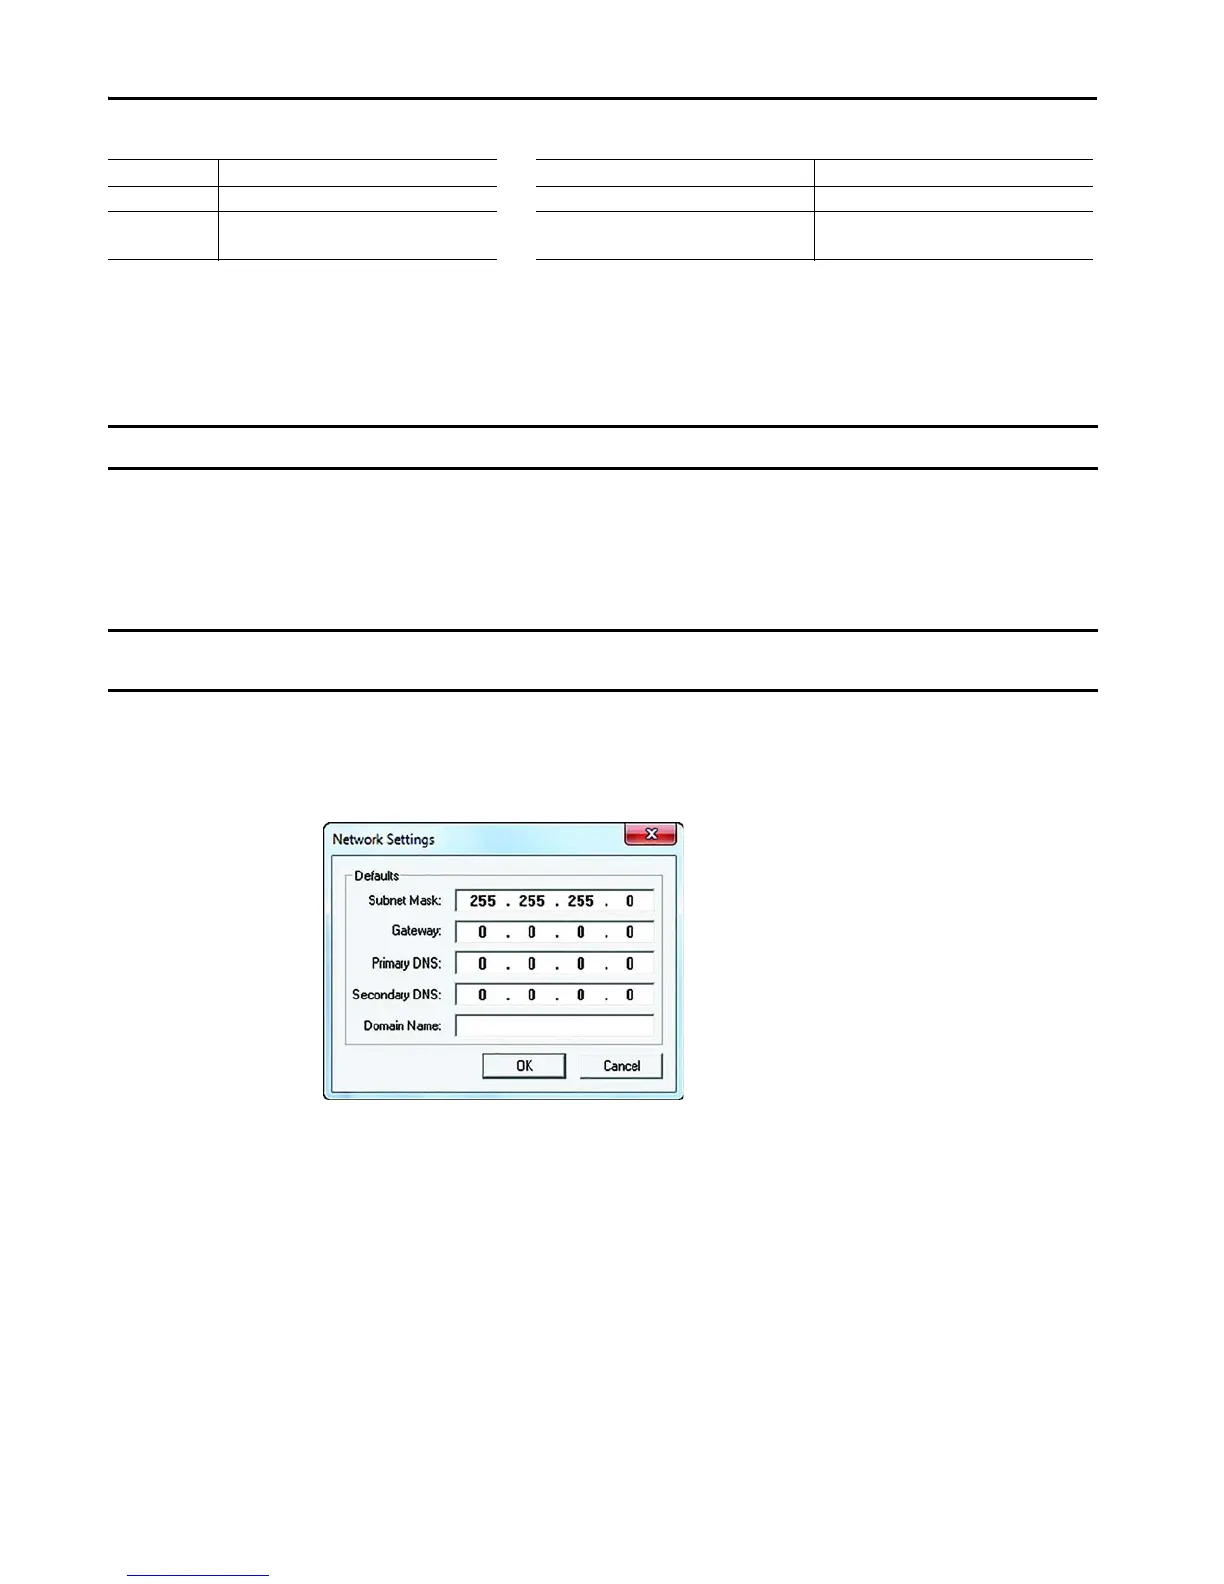
1. Execute the BOOTP/DHCP software and choose Tool, then select Network Settings.
2. Type the subnet mask, gateway address, primary/secondary server addresses, and domain name in their respective fields. Click OK.
Node Address Function Node Address Function
001…254 Set IP address to 192.168.1.xxx 888 Reset to factory defaults
255…887
889…999
Set IP address via DHCP or use static IP address 000 Administration mode
IMPORTANT
A power cycle is required for any rotary dial changes to the E300 Relay to take effect.
IMPORTANT
Before starting the BOOTP/DHCP utility, verify the hardware MAC ID, which is printed on the front of the E300 Relay Communication Module. The MAC ID has
a format similar to: 00-0b-db-14-55- 35.
 Loading...