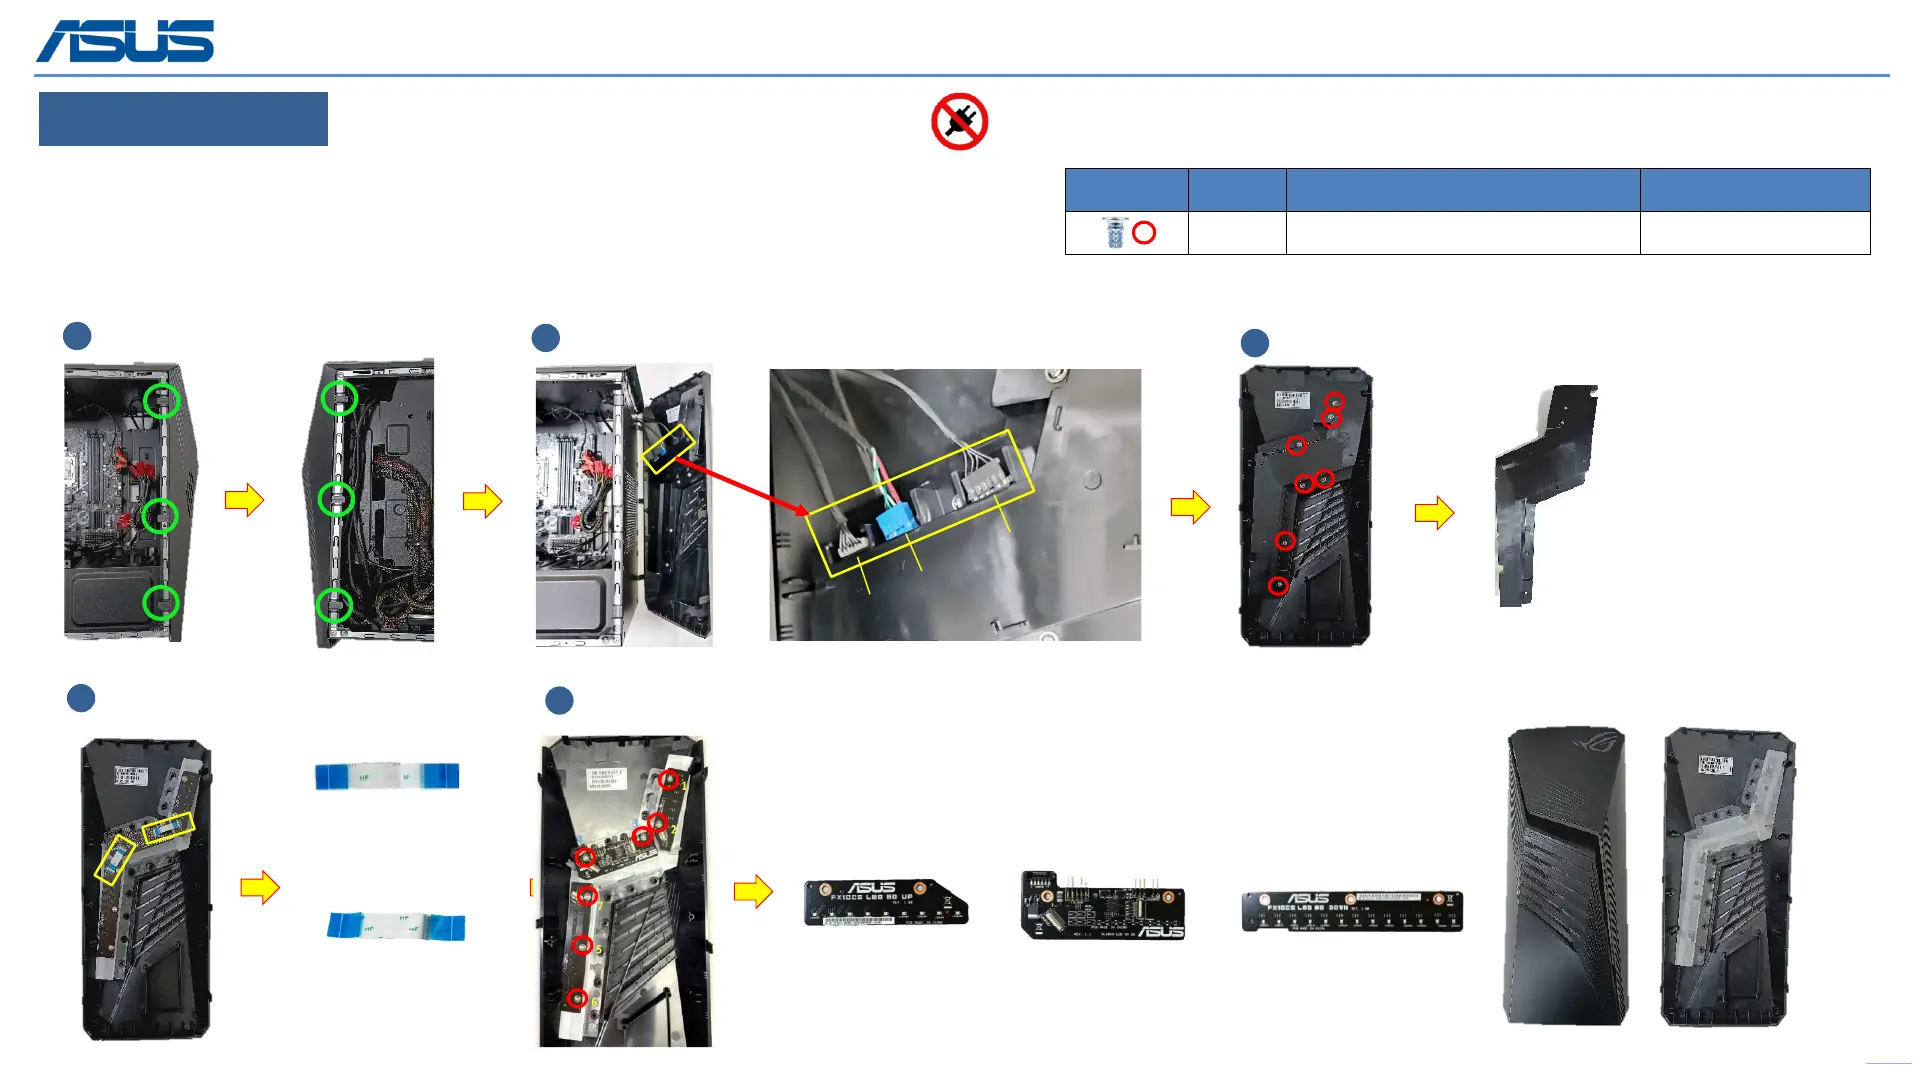
FRONT BEZEL AND LED BOARD
Screws QTY Spec Torque (kgf-cm)
14 M3*8L
3.0±0.5
Step 1 : Pull the latch (green mark) to release and open FRONT BEZEL.
Step 2 : Disconnect the (yellow mark) connectors and remove FRONT BEZEL .
Step 3 : Remove screws *7pcs then remove LED COVER.
Step 4 : Disconnect and remove FFC *2pcs.
Step 5 : Remove screws *7pcs then remove board *3pcs.
Disconnect
Back
16
Disassembly Notice
Please be sure to pull out AC POWER CORD.
1
3
2
Pull the Latch (blue mark)
Remove
LED BD UP LED CR BD
LED BD DOWN
FFC CABLE 20P 0.5MM
FFC CABLE 14P 0.5MM
4
Disconnect and remove
5
Remove
SIDE LED CABLE
CABLE USB2.0
SATA CABLE
 Loading...