5.0 Installation
14
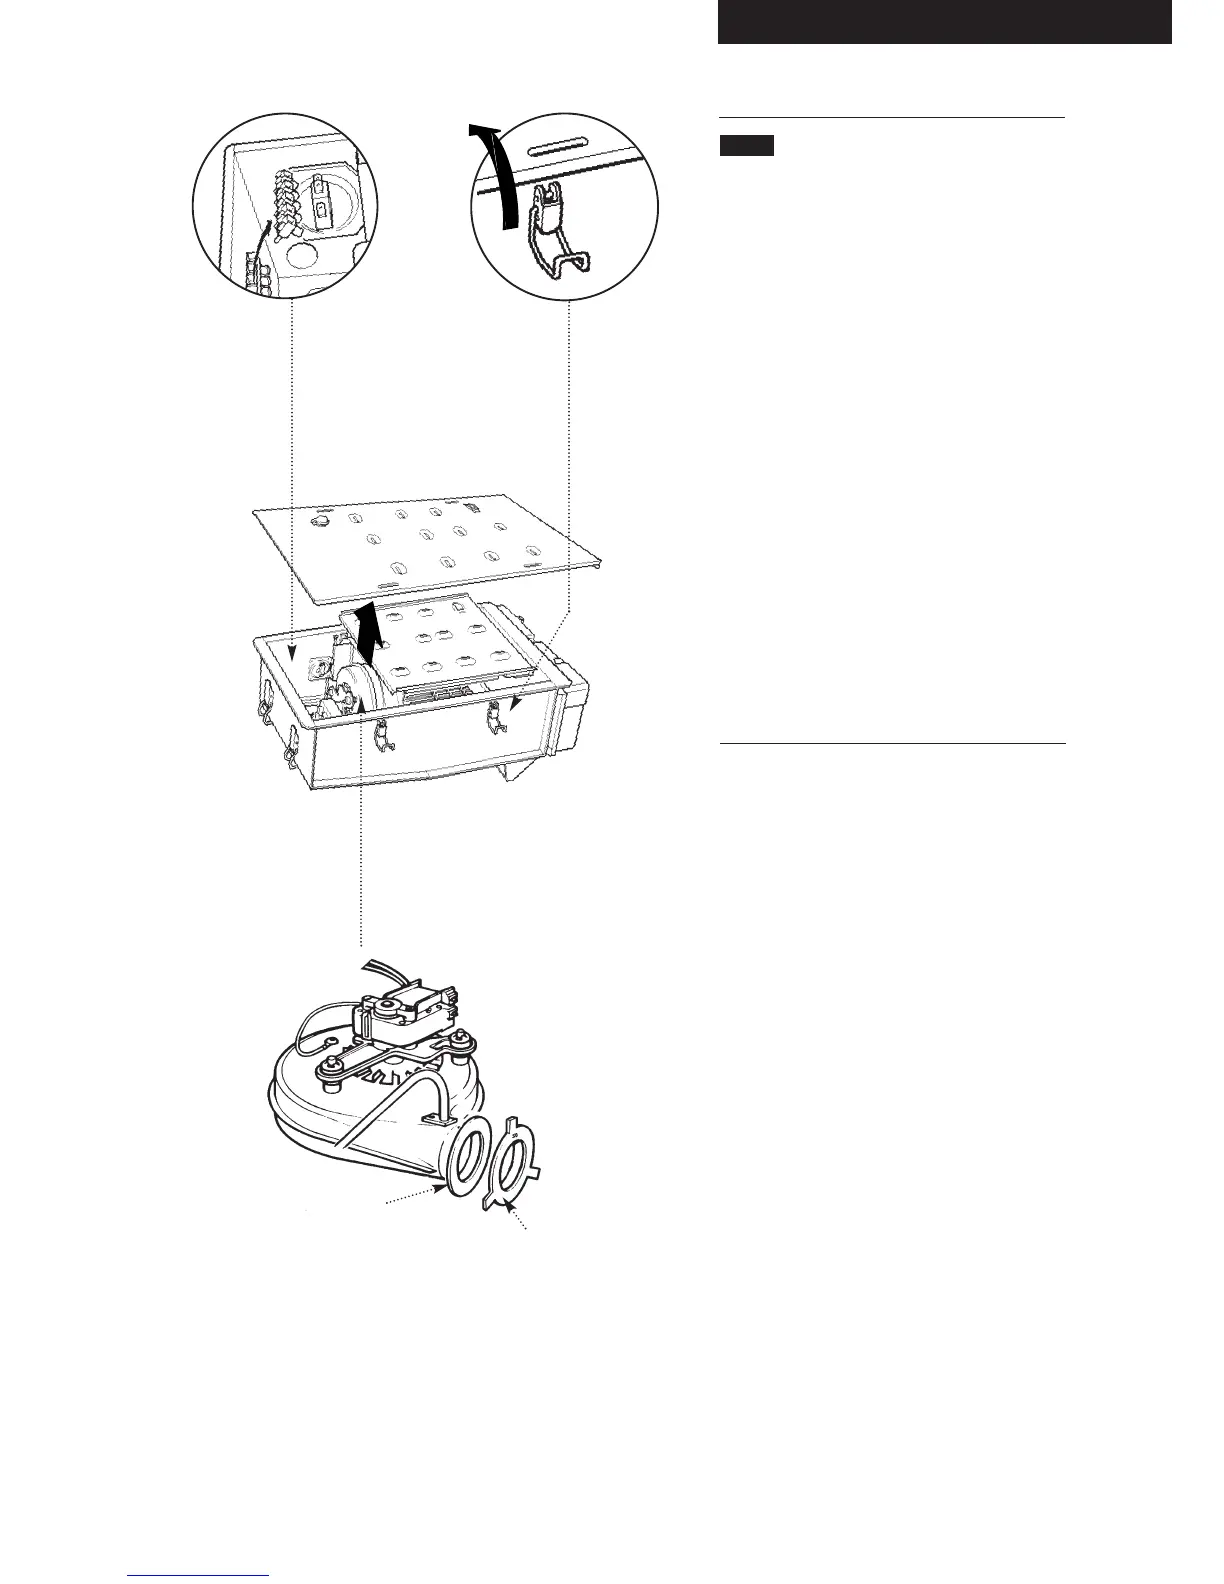
5.2 Fan Outlet Restrictor
(30, 40, 50, 60, 70 and 80)
Rear Flue only up to 686mm (27 in)
1. Release the four latches holding the
combustion box door (Fig 16a). Remove the
combustion box door by pulling forward from the
bottom and unhooking its top edge (Fig. 16).
2. Release the 5-pin electrical plug connecting
the pressure switch and fan (Fig. 17). Withdraw
the fan assembly by pulling forwards from the
top edge (Fig. 16).
3. Take the sheetmetal restrictor (supplied in the
kit of parts), check that the number stamped on
the restrictor matches the appliance (e.g. 50
stamped on the restrictor is for 50 PF appliance)
4. Fit the restrictor to the fan outlet flange,
bending the 3 lugs equally over the flange to
secure (Fig. 18).
5. Re-assemble the fan assembly and
combustion box door.
Fan Outlet Flange
Fan Outlet Restrictor
Fig. 17
Fig. 16a
Fig. 16
Fig. 18
 Loading...