5.0 Installation
18
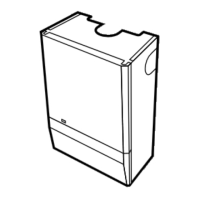
5.7
Fitting the Back Plate
1. Engage the assembly into the hole previously
cut in the wall and slide in place (Fig. 31).
2. Secure the assembly to the wall at the
previously drilled anchorage points with suitable
screws (Fig. 31). Before finally tightening the
screws, check that the assembly is level.
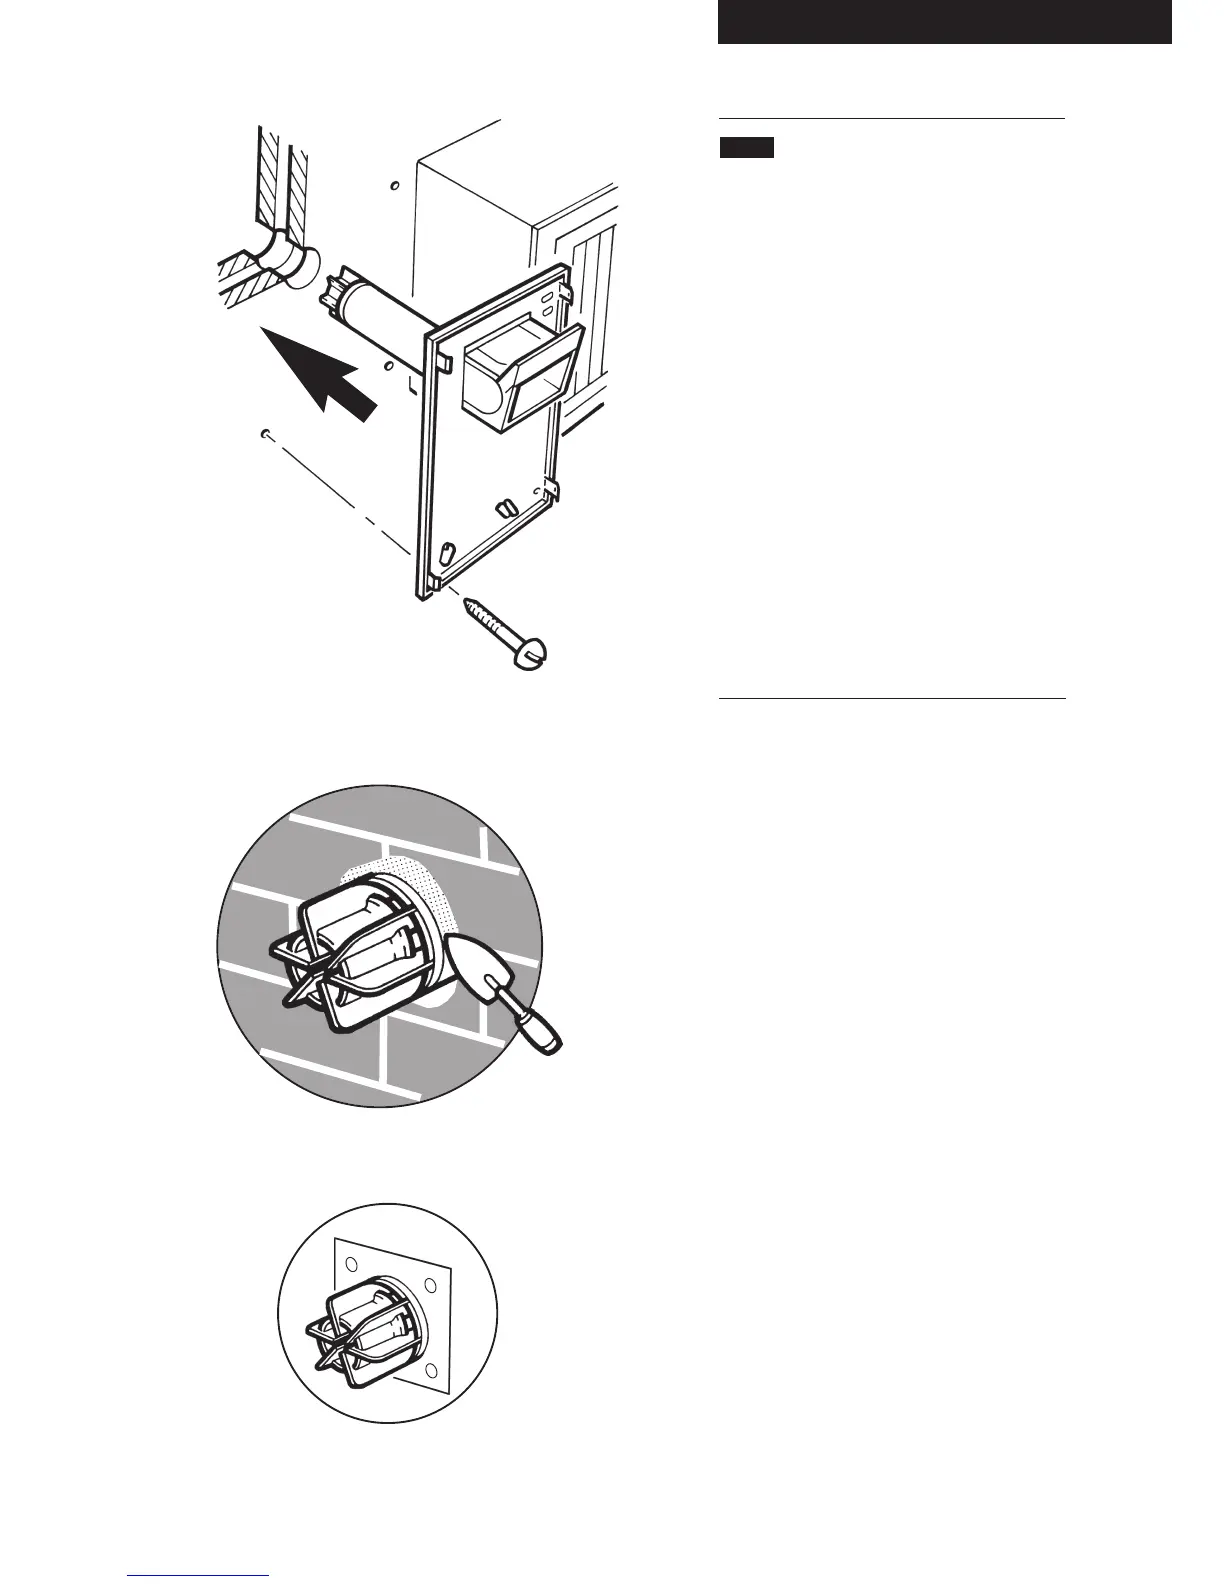
3. Make good between the wall and the air duct
outside the building if the internal fitting kit has
not been used (Fig. 32).
4. The flue trim provided may be fitted if required,
to neaten up the make-up around the terminal.
This plate may also be used as a protection plate
on outside walls of combustible material.
5. Fit the trim over the flue terminal and mark
through the four securing holes. Remove the trim,
drill holes 63mm (2
1
/
2
in) deep to accept suitable
wall plugs. Fit the trim over the flue terminal and
secure using suitable screws (Fig. 33).
Fig. 31
Fig. 32
Fig. 33
 Loading...