6 | Hanging Bracket Kit EP Series
EP Series
8733953041 (2019/01)
Subject to change without prior notice
HANGING BRACKET KIT
Installation instructions
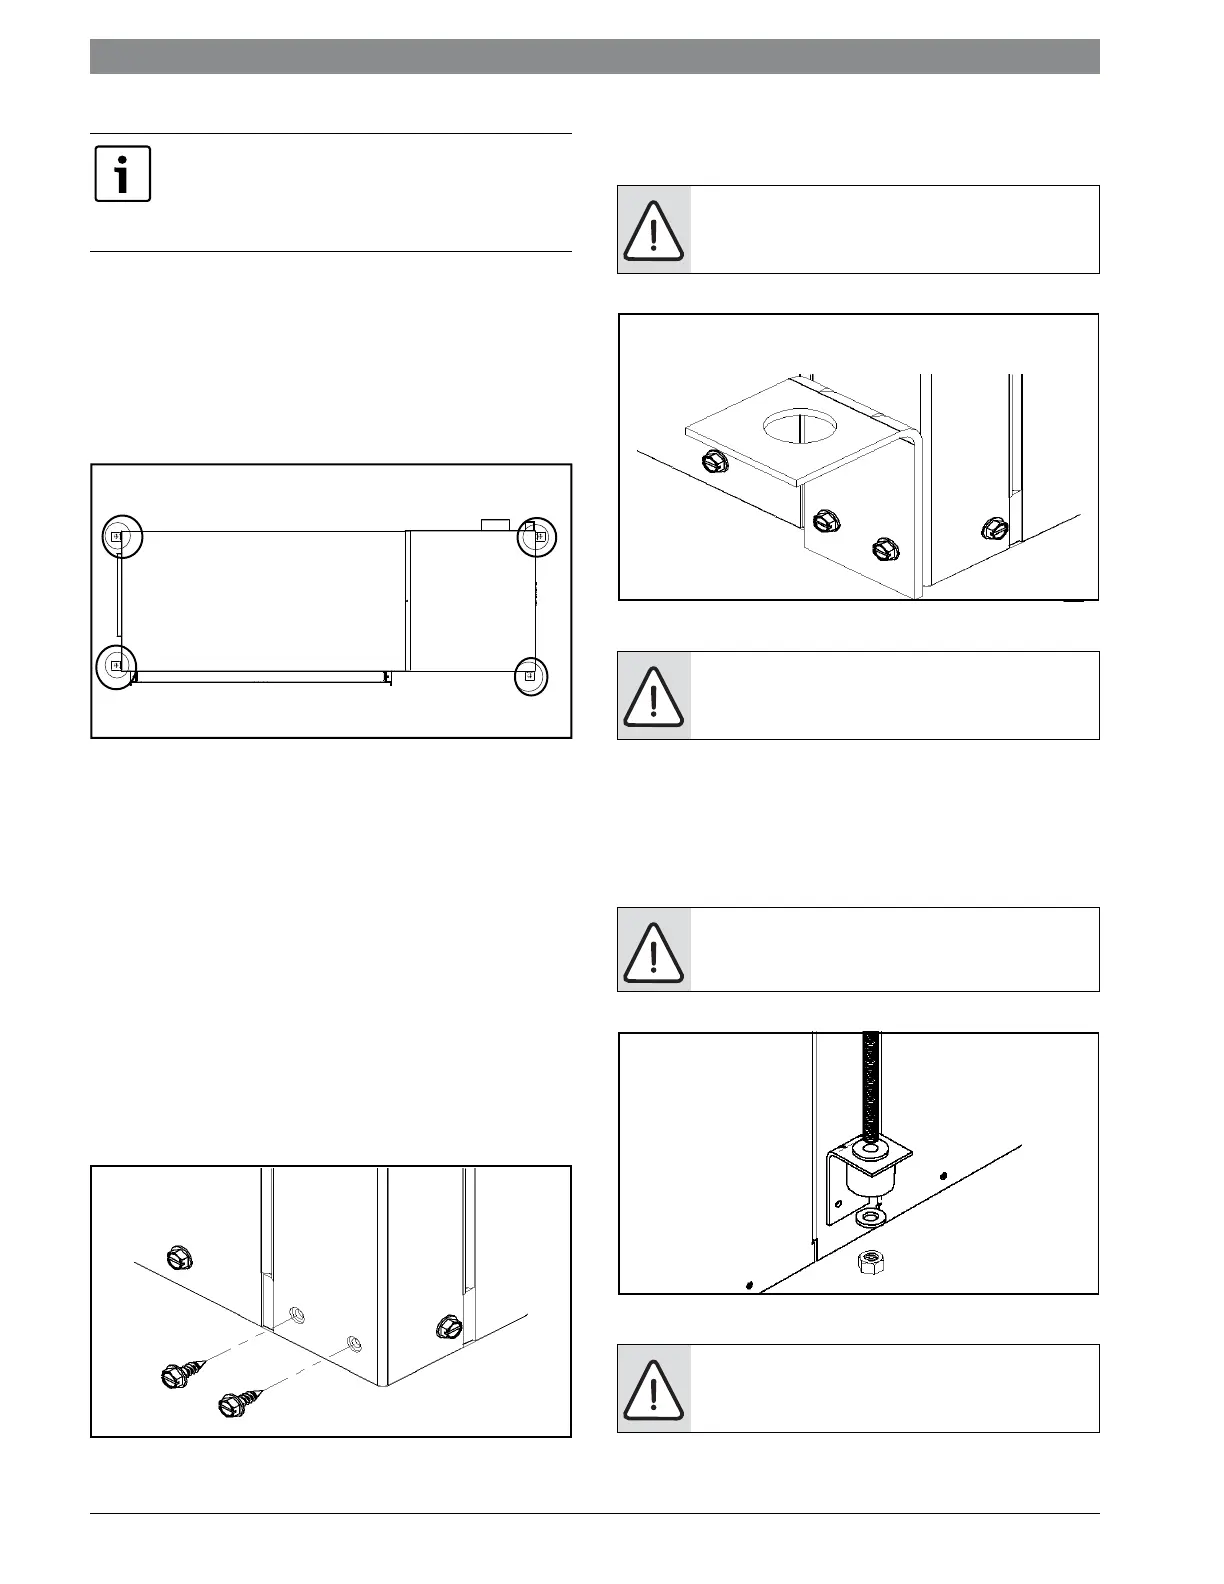
All horizontal units come with Hanging Bracket Kit
facilitate suspended unit mounting using threaded
rod. Hanging brackets are to be installed as shown
in Figure#4.
Figure # 4
This Kit includes the following:
(5) Brackets
(5) Rubber Vibration isolators
(8) Screws #10x1/2
(10) Bolts 1/4-28x12” Hex Bolt (not used for these
models)
The following are needed and are to be field
provided:
Threaded rod (3/8” max dia)
Hex Nuts
Washers (1-3/4” min O.D.)
1. Remove and discard factory provided screws
from locations where hanging brackets will be
installed shown in Figure# 5.
Figure # 5
2. Mount 4 Brackets to unit corner post using the
bolts provided in the kit as shown on Figure#6.
Figure # 6
3. Install rubber grommet onto the Brackets as
shown in Figure#7.
4. Hang the unit and assemble the field provided
threaded rod, nuts and washers on to the brackets
as shown in Figure#7
Figure # 7
NOTE: IF unit is located in a crawl space, the
bottom of the unit MUST be at least 4” above
grade to prevent flooding of the electrical parts
due to heavy rains.
WARNING: Do not re-use screws removed
from the unit on step 1 to mount the
Hanging brackets to the unit.
WARNING: Follow all applicable codes and
requirements when hanging this unit,
selecting threaded rod material, etc.
WARNING: Rods must be securely
anchored to the ceiling.
NOTE: Plumbing connected to the heat
pump must not come in direct contact with
joists, trusses, walls, etc.
 Loading...