114
TEST PROCEDURE
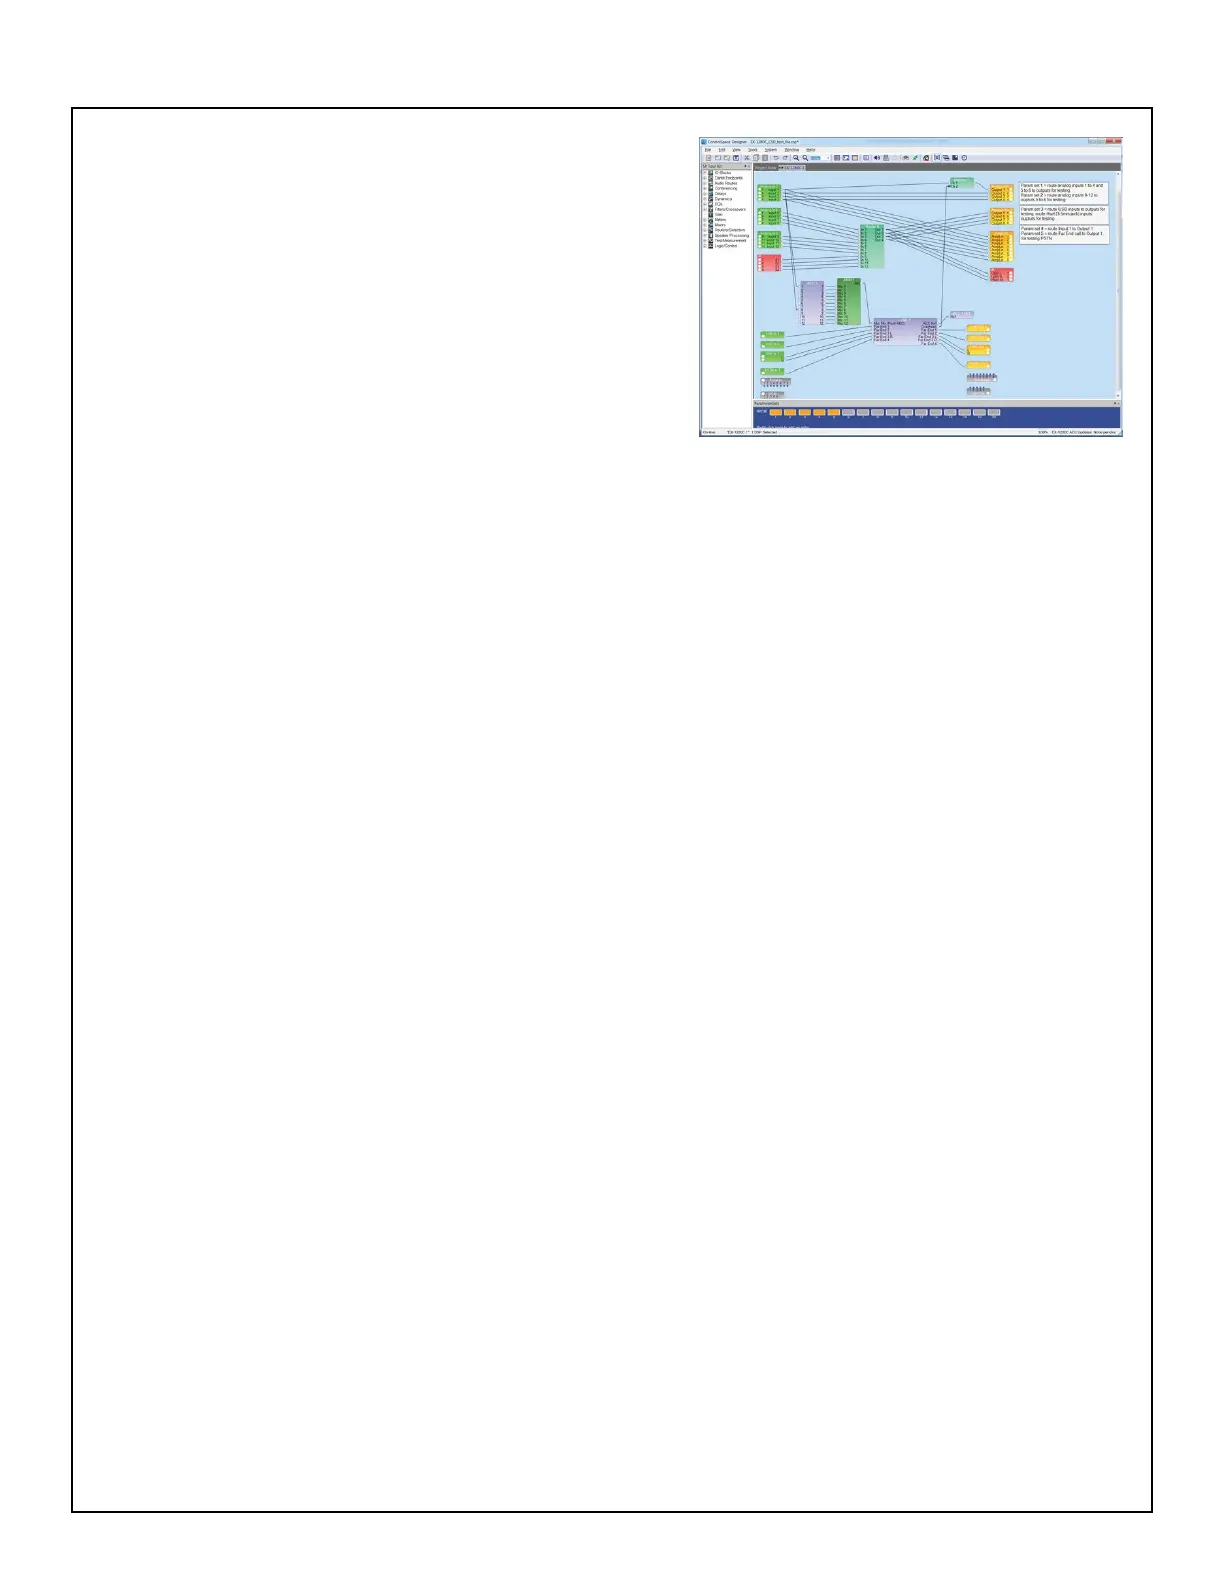
18.6 Click on the EX-1280C tab in the window to show
the inputs/outputs and connections. See photo at right.
Background color should be blue to show that you are ON-
LINE. Click on the Parameter 3 button to set up the correct
signal routing on the UUT.
18.7 On the PC, play an mp3 music le. Verify that you can
hear the audio from the powered speaker. In the window at
right, with the music playing, you should see green dots in
the Dante input box on channels 3 and 4 and green output
LEDs on the analog out 2 box, channels 7 and 8 and also
AmpLink out ch. 7 and 8.
19. Voice Over IP (VoIP) Test
Note: VoIP uses the same circuitry on the Main/DSP PCB as the ControlSpace and Dante jacks. They are
all routed through a data switch on the board, U19, that directs data to and from the correct jack. As a result,
if you can connect the UUT to ControlSpace and see it correctly, then the VoIP jack should also be working
properly, unless U19 has failed.
19.1 Connect the UUT to the PC using an Ethernet cable. Verify that you can connect to the UUT and that
you can pass audio correctly.
20. USB Audio Test
Note: Only the micro USB connector on the EX-1280C UUT is checked in this test. The USB-A connector
on the back of the unit is not activated at this time. It is for future use.
20.1 Connect a micro USB cable to an open USB port on the PC, and to the UUT’s micro USB jack. Verify
that the PC recognizes the UUT as a USB audio device. You should be able to see this in Device Manager
on the PC.
20.2 Connect a powered speaker to the Output 1 analog output on the EX-1280C rear panel.
20.3 Open ControlSpace Designer, open the EX-1280C_CSD_test_le.csp test le. Click GO ON-LINE.
Verify that you are on-line. Click on the Parameter 5 button to get the correct signal routing for this test.
20.4 Play an mp3 audio le from the PC to the UUT. Verify that you can see the audio input level on the
UUT front panel. Verify that there is clear, undistorted audio coming from the powered speaker.
21. AmpLink Audio Test
21.1 Using a shielded CAT-5 Ethernet cable, connect the EX-1280C (UUT) to a ZA 2120-LZA amplier
or a PowerMatch amplier with a PowerMatch AmpLink accessory card installed. This will be used as an
AmpLink destination. Connect a pair of 4 ohm loudspeakers to the OUTPUT 1 and OUTPUT 2 connectors
on the ZA 2120-LZA amplier. Turn the Trim knobs fully clockwise.
21.2 Open ControlSpace Designer. Open the EX-1280C_CSD_test_le.csp test le. Connect to the UUT by
clicking GO-ONLINE. Click SEND TO DEVICE to send the design le to the UUT. Once you see the blue
background, indicating you are on-line, click on the EX-1280C tab at the top of the project window. Select
the Parameter 1 button at the bottom of the window. This will route the audio signal properly for this test.
21.3 Connect an analog audio input to the EX-1280C analog input channels IN7 and IN8 jacks. Play a
music source and verify that you can hear clear, undistorted audio coming from the loudspeakers.
 Loading...