36
T8S Mixer
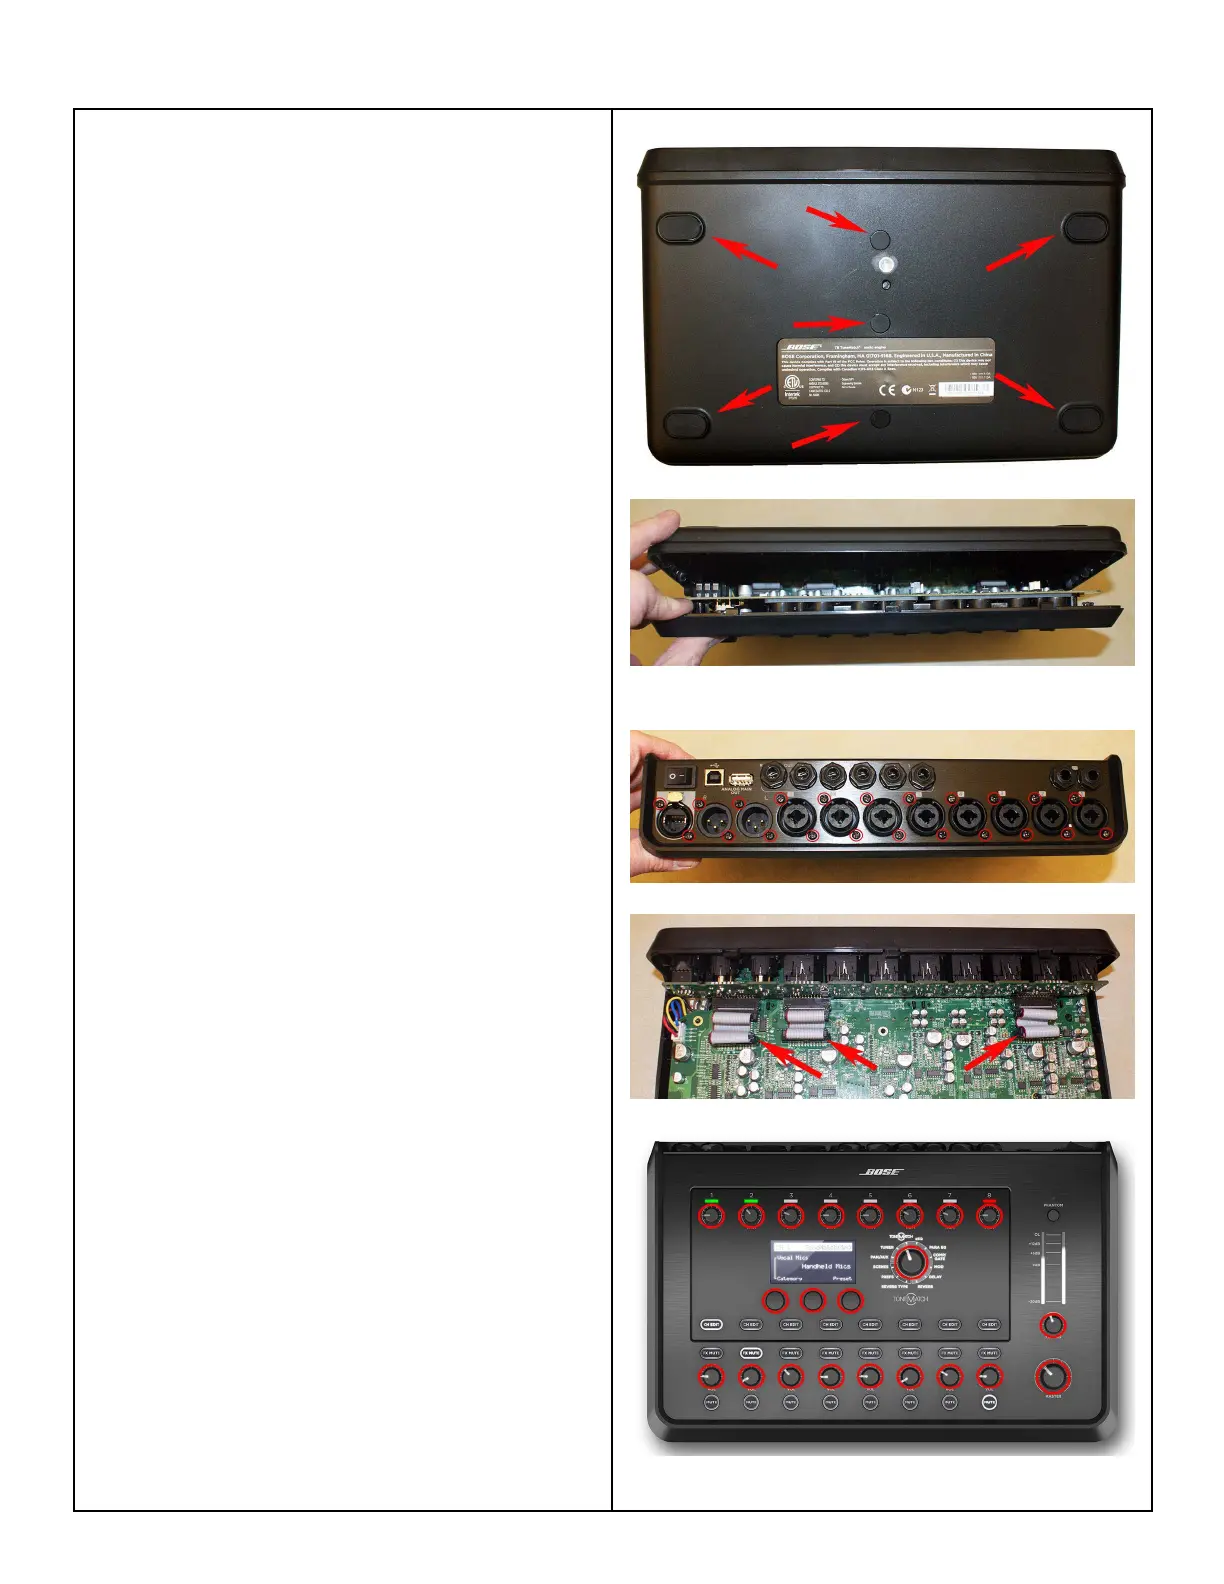
1. Bottom Housing Removal
1.1 Place the T8S onto a soft surface. Remove
the four feet and the three rubber screw covers,
located along the centerline of the product. See
photo at right. Remove the seven screws that
secure the bottom housing to the top housing.
Note: It is recommended to replace the feet with
new ones after removal. Be sure to remove all of
the old adhesive before installing the new feet.
1.2 At the bottom front edge of the unit near the
volume controls, carefully separate the bottom
housing from the top housing. Lift off the bottom
housing. Take care to not damage the plastic
housing.
2. Input / Output PCB Removal
2.1 Perform procedure 1.
2.2 Remove the twenty-two screws that secure
the RJ45 and Neutrik
®
XLR/TRS jacks to the I/O
panel.
2.3 Carefully angle the I/O PCB out of the rear
panel. Disconnect the three ribbon cables that
connect to the main PCB. Lift off the I/O PCB.
3. Main PCB Removal
3.1 On the front panel, carefully remove the
twenty-three knobs by pulling them straight off.
3.2 Perform procedure 2 to remove the I/O PCB
assembly.
DISASSEMBLY PROCEDURE
 Loading...