7. ADJUSTMENT
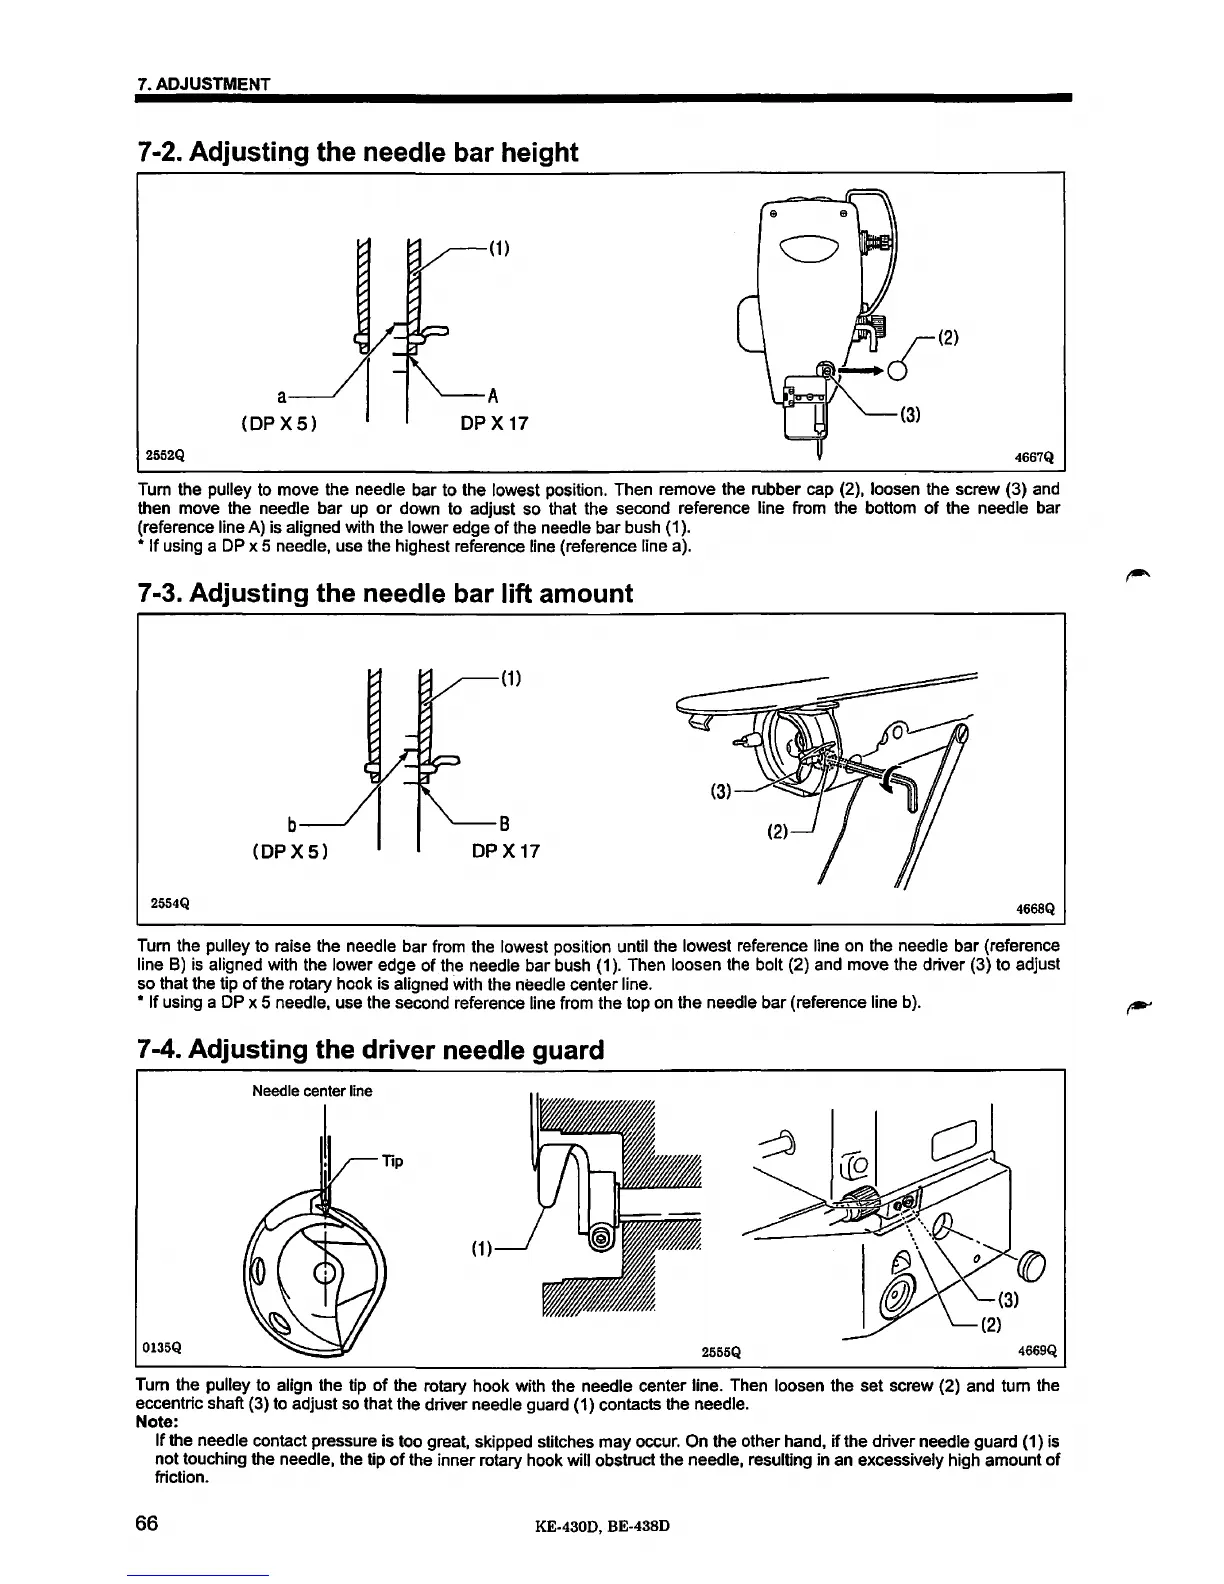
7-2. Adjusting the needle bar height
2552Q
a
(DP
XS)
(1)
A
DPX
17
4667Q
Tum the pulley to move the needle bar to the lowest position. Then remove the rubber cap (2), loosen the screw (3) and
then move the needle bar
up
or
down to adjust so that the second reference line from the bottom
of
the needle bar
(reference
line A) is aligned with the lower edge
of
the needle bar bush
(1
).
•
If
using a DP x 5 needle, use the highest reference line (reference line a).
7-3. Adjusting the needle bar lift amount
2554Q
b
(DP X
5)
(1)
B
DPX
17
4668Q
Tum the pulley to raise the needle bar from the lowest position until the lowest reference line on the needle bar (reference
line
B)
is
aligned with the lower edge
of
the needle bar bush
(1
).
Then loosen the bolt (2) and move the driver {3) to adjust
so that the tip
of
the rotary hook is aligned with the needle center line.
•
If
using a DP x 5 needle, use the second reference line from the top on the needle bar (reference line b).
7-4. Adjusting the driver needle guard
Needle
center line
(1)
0135Q
2555Q
4669Q
Tum the pulley to align the tip
of
the rotary hook with the needle center line. Then loosen the
set
screw (2) and tum the
eccentric shaft (3) to adjust so that the driver
needle guard (1) contacts the needle.
Note:
If
the needle contact pressure is too great, skipped stitches
may
occur.
On
the other hand,
if
the driver needle guard (1) is
not
touching the needle, the tip
of
the inner rotary hook will obstruct the needle, resulting in an excessively high amount
of
friction.
66
KE·430D,
BE-4380