7.ADJUSTMENT
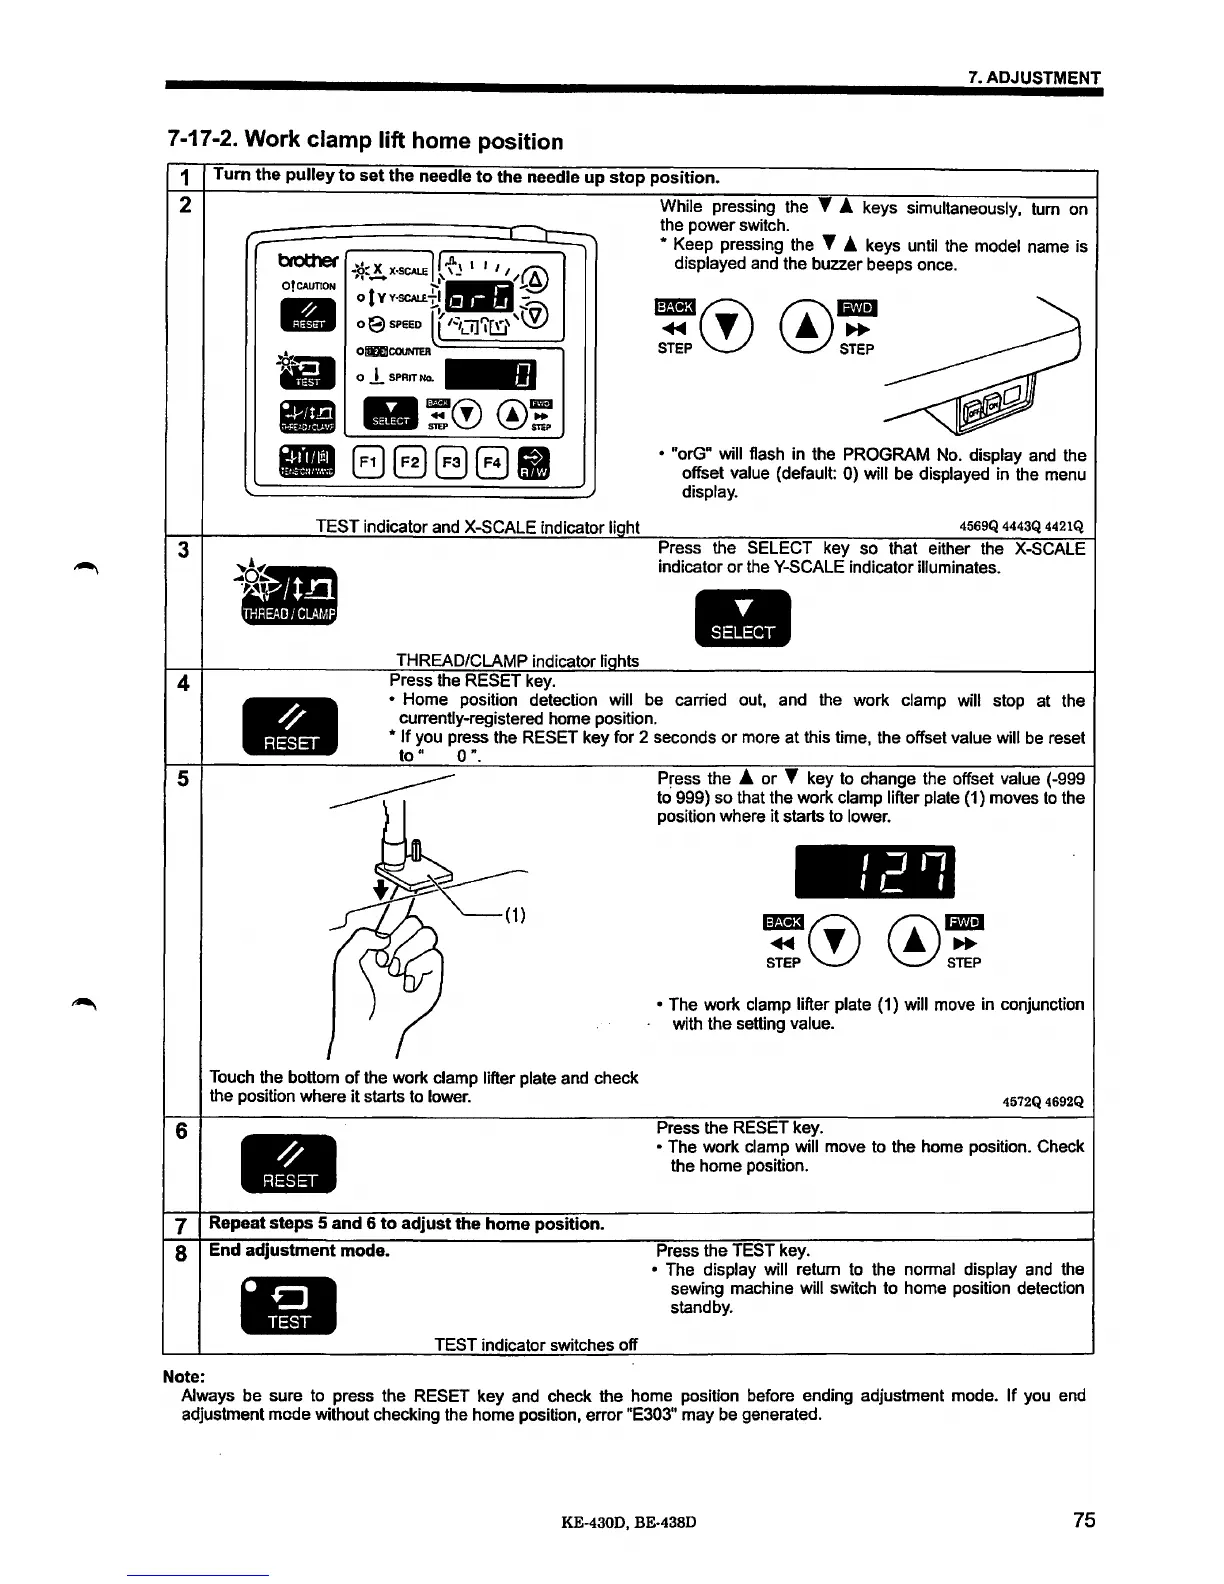
7-17-2. Work clamp lift home position
1
2
3
4
5
6
Tum
the
pulley
to
set
the needle
to
the needle
up
stop
position.
O!CAUTION
•
~~
--
ol.sPRITNo.-
•
-'!(!)
@=:
-
8§)8811
TEST indicator
and
X-SCALE indicator li ht
THREAD/CLAMP indicator
li
hts
Press the RESET
key.
While pressing the
'f
A keys simultaneously, tum
on
the power switch.
* Keep pressing the T A keys until the model name is
displayed and the buzzer beeps once.
®
Em
II+
STEP
• "orG" will flash
in
the PROGRAM
No.
display
and
the
offset value (default:
0) will be displayed in the menu
display.
4569Q 4443Q 4421Q
Press the SELECT key so that either the X-SCALE
indicator or the Y-SCALE indicator illuminates.
• Home position detection will be carried out, and the work clamp will stop at the
currently-registered home position.
*
If
you press the RESET key for 2 seconds
or
more at this time, the offset value will
be
reset
to"
0
•.
Touch the bottom
of
the work clamp lifter plate and check
the position where
it
starts to lower.
Press the A or
'f
key
to
change the offset value (-999
to 999) so that the work clamp lifter plate (1) moves
to
the
position where it starts to lower.
I J
II
I L I
ID:t(!)
~
.
STEP
®
li'fm
II+
STEP
o The work clamp lifter plate (1) will move in conjunction
with the setting value.
4572Q4692Q
Press the RESET key.
o The work clamp will move to the home position. Check
the home position.
7 Repeat steps 5 and 6
to
adjust
the home position.
8 End adjustment mode.
TEST indicator switches off
Note:
Press the TEST key.
• The display will return
to
the normal display
and
the
sewing machine will switch to home position detection
standby.
Always be sure to press the
RESET key
and
check the home position before ending adjustment mode. If you end
adjustment mode without checking the home position, error
"E303" may
be
generated.
KE-430D, BE-438D
75
 Loading...