DC10 E, DC20 E
DISASSEMBLING
42
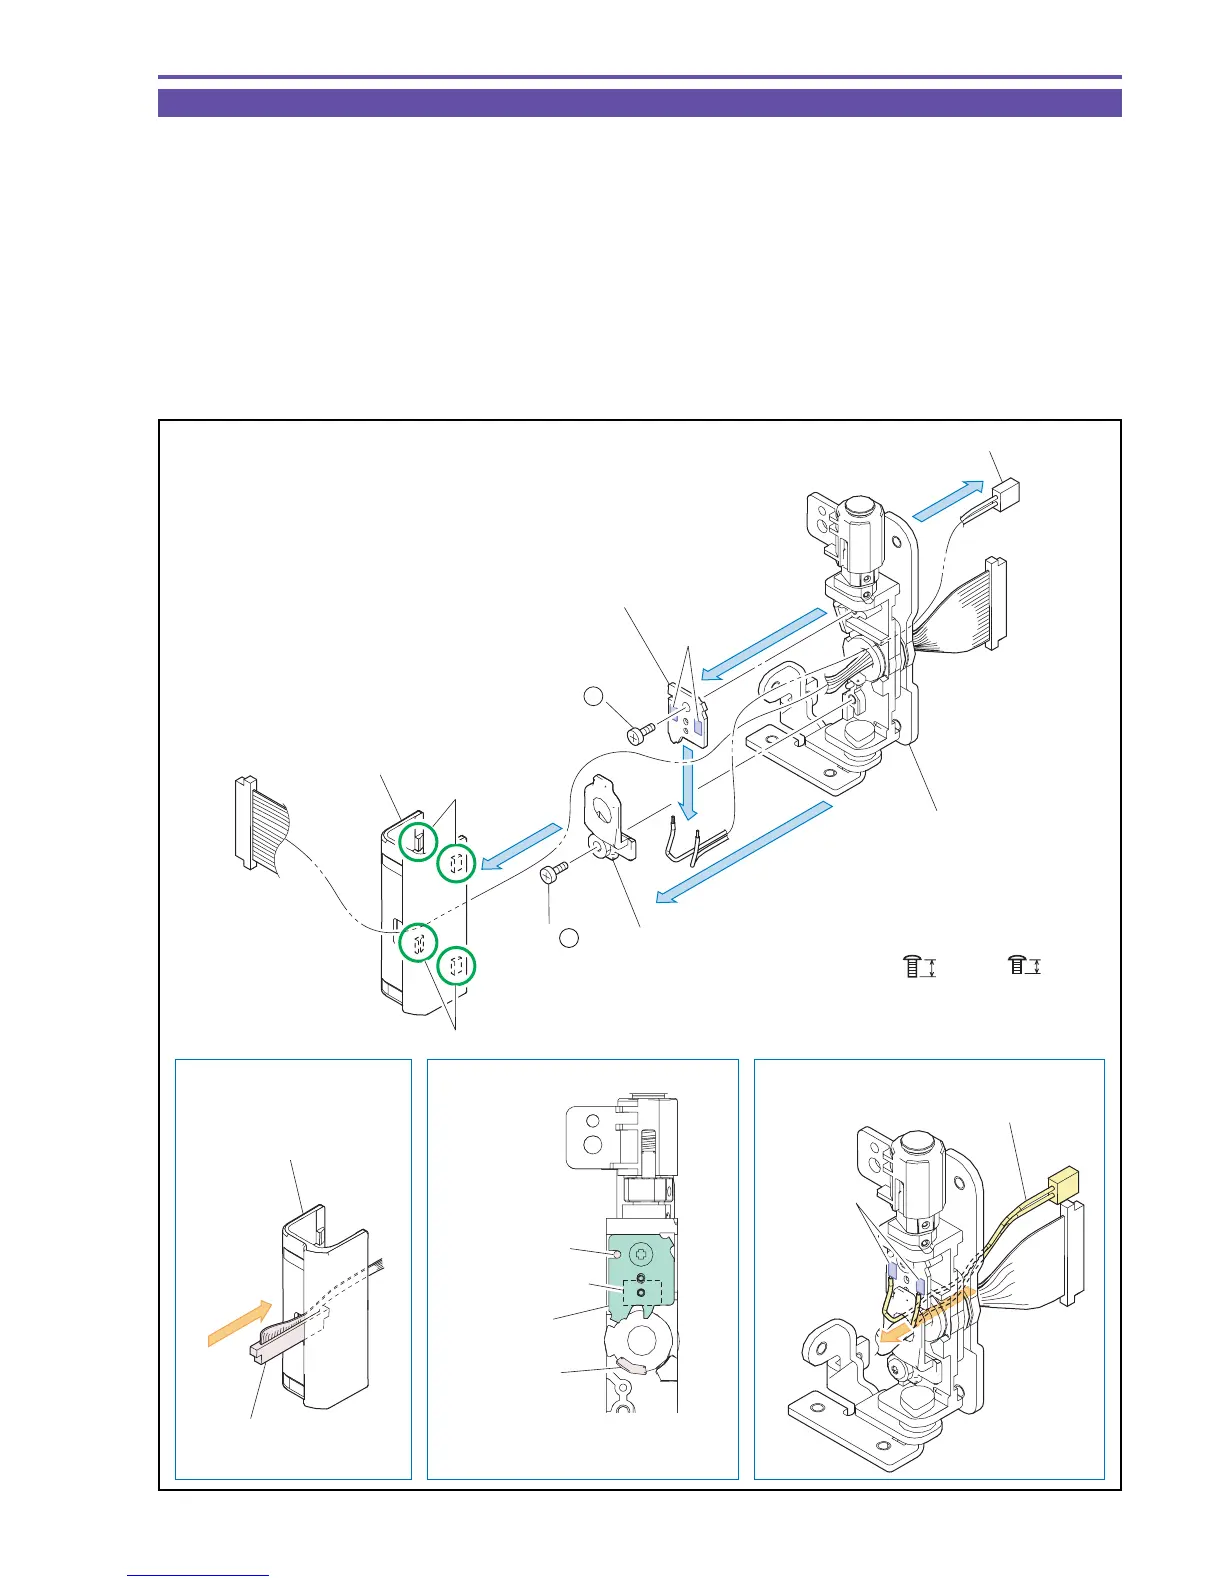
1-23 Disassembly of LCD Hinge Ass'y
(1) Disengage four claws A, and detach the Hinge Cover.
Note1 : When pulling the Connector section of the LCD Hinge Ass'y cable from the hole in the Hinge Cover, be careful
about damage.
(2) unsolder (α) at two places, and detach the LCD Hinge SW Wire.
(3) Remove two screws (m × 1, r × 1), and detach the Wire Protect and the LCD HINGE PCB.
Note2 : Take care not to damage the LCD Hinge SW.
<Note on Reassembling>
(1) Attach the LCD HINGE PCB as shown in the figure below.
(2) Soldering of the LCD Hinge SW Wire to the LCD HINGE PCB should be done after passing it through the rotating section of the
Hinge.
Fig. 39
r
2.5mm
Metal
M1.4
Metal
M1.4
m
3mm
Note on Reassembling (1) Note on Reassembling (2)
Note 1
Dowel
Attach it at the location where the
SW operating section does not
touch the LCD Hinge SW.
LCD HINGE
PCB
LCD Hinge SW
SW operation
section
LCD Hinge SW Wire
Hinge Cover
LCD HINGE PCB
LCD Hinge SW Wire
Wire Protect
Connecter
Hinge Cover
Pull out
(1)
(2)
(3)
(3)
(2)
Claws A
Claws A
LCD Hinge Ass'y
(3) - m
Solder α
Solder α
(3) - r

 Loading...