669224-R5
ERVICE
S
37
5.6-4 Check Valve Service –
Center Mount Valves
IMPORTANT: Service the check valve in a clean work
area.
1 Remove the cartridge valves. The non-sideshifting
check valve has one cartridge valve, the sideshift check
valve has three cartridge valves.
2 Remove all plugs and fittings.
3 Remove the O-rings and back-up rings from the
cartridge valve, fittings and plugs.
4 Clean all parts with cleaning solvent.
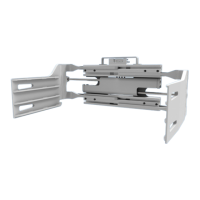
6 For reassembly, reverse the above procedures except
as follows:
• The cartridge valve back-up rings and O-rings must
be installed as shown to avoid seal damage during
reassembly.
• Lubricate cartridges and seals with petroleum jelly
prior to reassembly.
5.6-5 Eliminating the Arm Opening
Regenerative Function
The 25D, 35D, 40D and 50D attachments utilize a
regenerative hydraulic circuit in the arm opening mode.
The arms open at a faster speed than when closing. The
regenerative circuit can be eliminated (use Service Kit
212867) to give equal arm speed when opening and
closing the arms as follows:
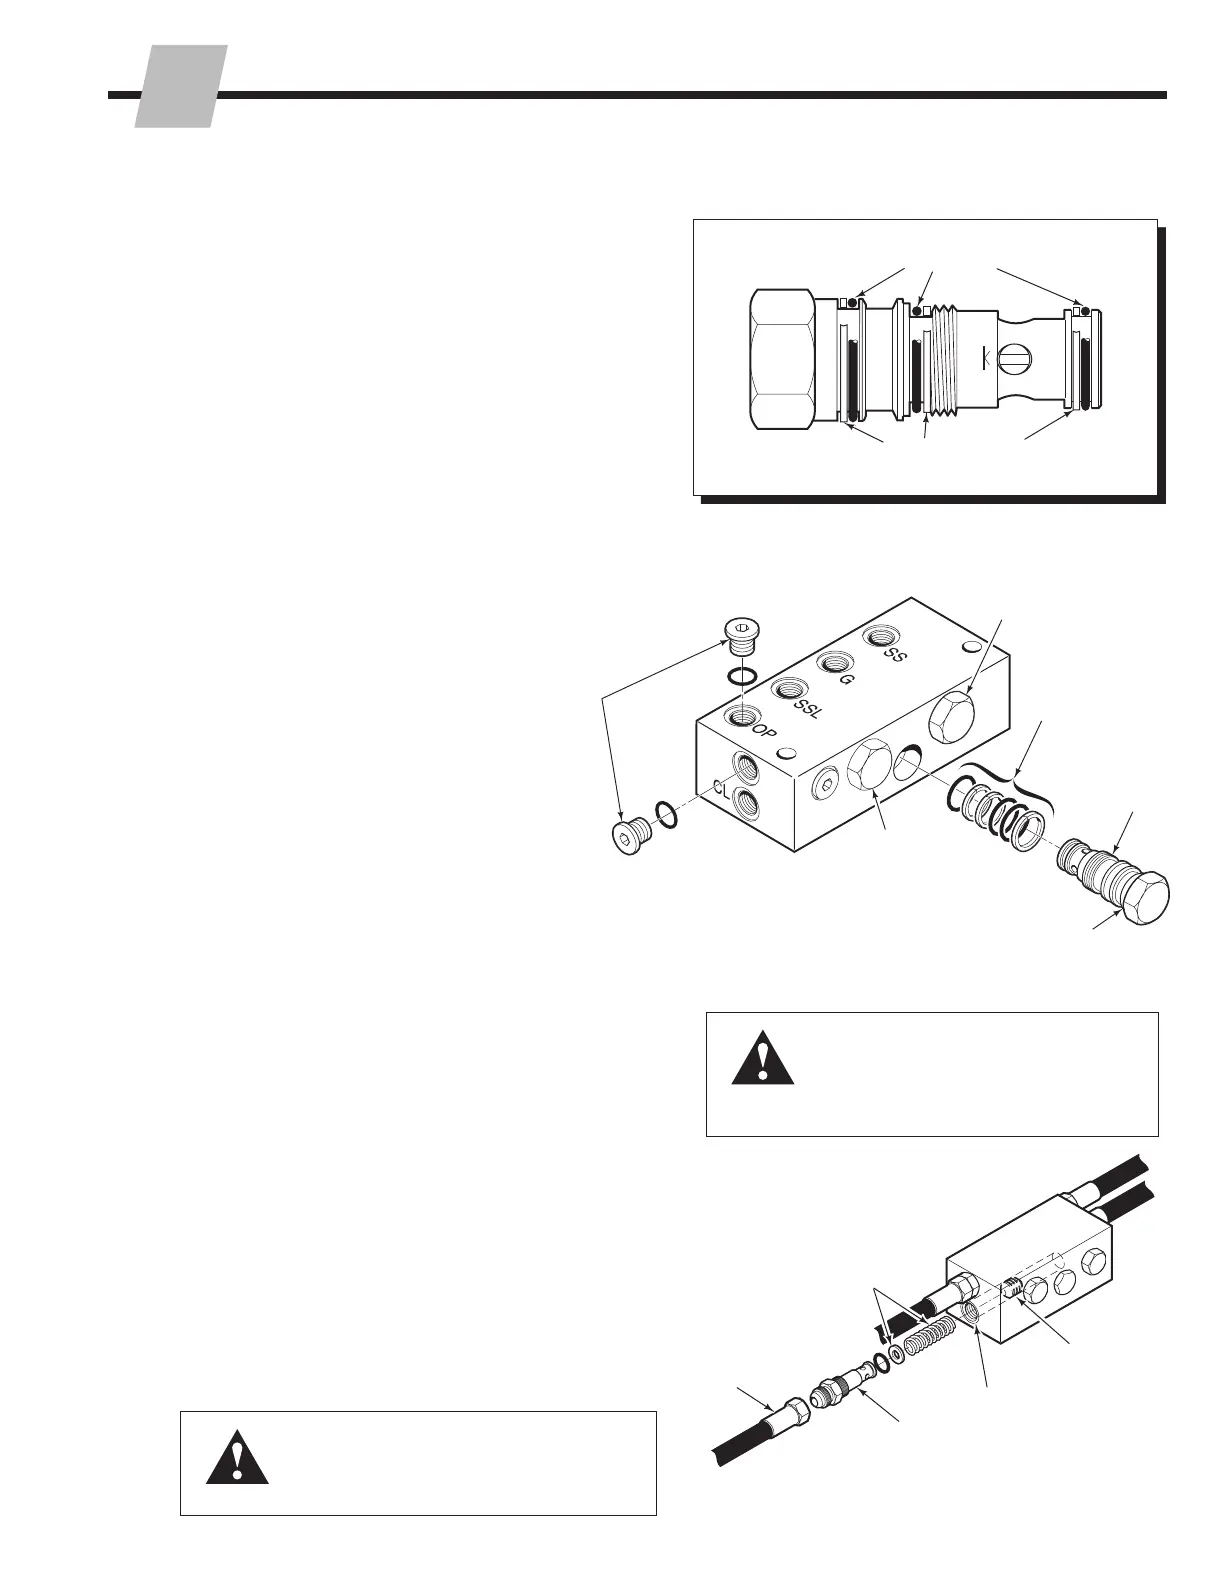
1 Open the attachment arms to the width of the frame.
2 Remove the hose from the check valve port marked CL.
3 Remove the special fitting from the CL port.
NOTE: The spool must remain in the CL port.
4 Install the spring and spacer supplied with the kit into
the CL port, as shown.
5 Reinstall the special fitting and hose.
NOTE: Operate the attachment through several cycles to
remove trapped air in the system and to check for proper
operation. Check for leaks.
CL1012.eps
O-Ring
Back-Up Ring
CL4423.eps
2
3
1
Sideshift Right
Cartridge Valve
Clamp Cartridge
Valve
Sideshift Left
Cartridge Valve
WARNING: Before removing any hoses,
relieve pressure in the hydraulic system.
Turn the truck off, then open the truck
auxiliary control valve(s) several times in
both directions.
WARNING: Make sure that the special
fitting is always installed in the CL port.
The attachment's arms will not function
properly without the special fitting installed.
OP
CL
CL4424.eps
2
3
4
Special Fitting
Spacer, Spring
CL Port
Spool (Do Not
Remove)
 Loading...