– 22 –
V-R200 / VER.2
COM 1, COM 2, COM 3
0
Carry out the COM port communication test.
0
Information of the loop back tool.
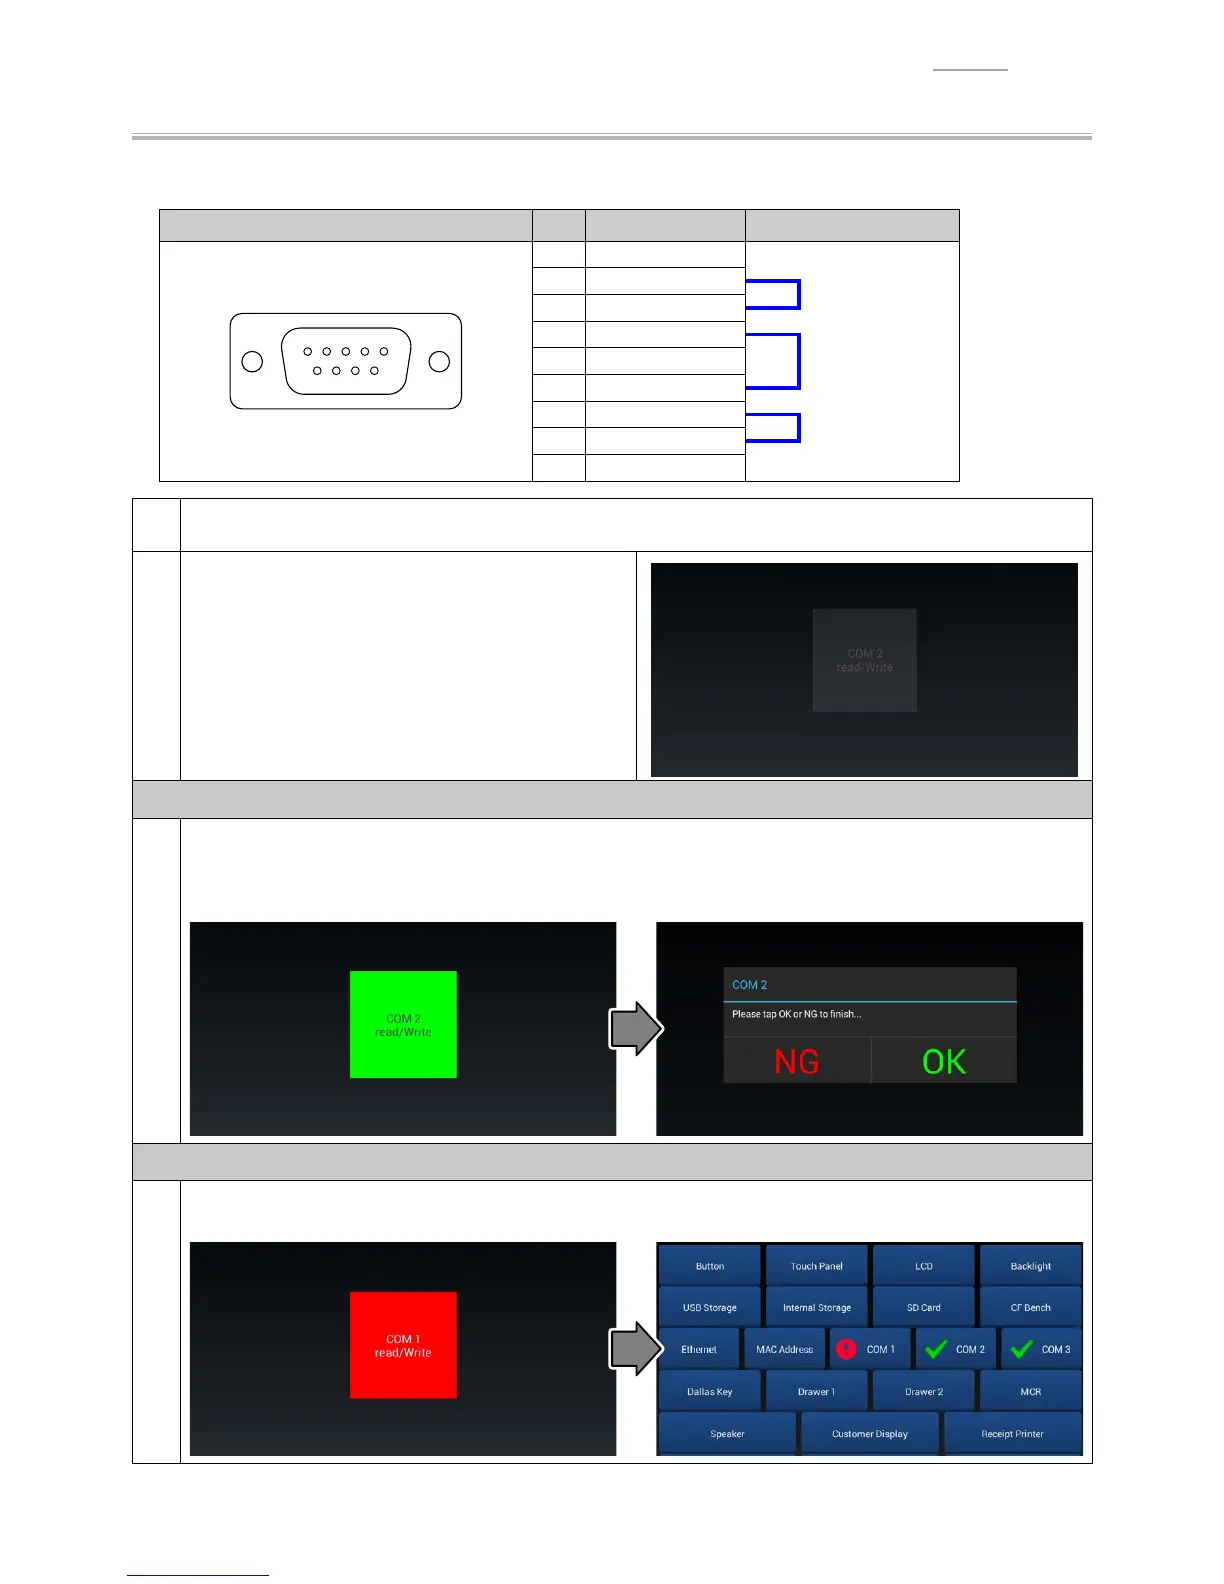
Pin assignment on the register side (male) Pin Signal name Connection information
51
69
1 DCD
2 RxD
3 TxD
4 DTR
5 GND
6 DSR
7RTS
8 CTS
9RI
1
Connect the loop-back connector to the COM port to be tested.
2
Start the test by tapping the COM port to which the
loop-back connector is connected.
When the test result is “OK”.
3
The COM port tile being tested turns to green, and
COM1: test result appears on menu screen.
COM2&3: judgement screen appears, then tap “OK” to return to menu screen.
When the test result is “NG”.
4
The COM port tile being tested turns to red, and the display returns to the menu screen.
 Loading...