62 SMART 6 Maintenance
SMART 6 Maintenance
The SMART 6 is designed for durability and is intuitive enough to be used on a production oor as well as in a
laboratory setting. Therefore, there are relatively few maintenance procedures for the SMART 6 as compared to
other moisture/solids analyzers. CEM Corporation offers multiple service contracts to enhance the longevity of the
instrument as well as to reduce down time.
Routine Maintenance
Maintaining a clean SMART 6 during day-to-day usage is one of the best ways to reduce down time and ensure
proper and accurate testing.
Daily
• Turn the instrument off. Clean the SMART 6 cavity using paper towels and a household cleaning solution or soap
and water. Use caution to avoid wetting or spraying the touchscreen interface (although it is waterproof) or the
cavity openings for the cover latch and balance stem.
•
Weekly
• Remove the infrared and electronics lters and clean them using pressurized air or water. If washing the lters,
ensure that they are completely dry prior to installing them in the instrument.
• The infrared lter is accessed by removing the instrument front cover which is secured with magnets. Using
a Phillips head screwdriver, remove the two (2) screws securing the white lter bracket. Slide the bracket out.
Remove and clean the lter.
• The electronics lter is located below the touchscreen. The drawer securing the lter is held in place by magnets.
Slide the drawer out to remove and clean the lter.
• Inspect the cavity intake lter on the side of the magnet and the ports and fans in the back of the instrument for
excessive buildup. Use a pressurized air source or dry towel to remove any dust or particulate from these areas.
NOTE
See “Instrument Overview” to locate lters.
Monthly
• Balance Calibration
• The SMART 6 is equipped with an internal high precision 4-place analytical balance to monitor and calculate
sample weight. To ensure the balance is performing correctly, regular calibration and validation should be
performed.
• Following the procedure outlined in this manual, calibrate the balance using a certied traceable weight. When
the calibration is complete, the calibration can be veried by selecting any method on the system, following the
Tare procedure with an empty balance pan, and placing a 10g certied weight on the balance and conrming that
it is 10.0000 +/- 0.001g.
•
Annually
• Change the SMART 6 Screen Protector, PN 192815, if applicable.
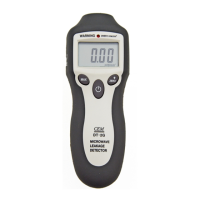
• The cover and cavity of the SMART 6 are designed for durability and reliable operation in laboratory and
production oor conditions. External radiation checks are performed on the instrument at several points in the
manufacturing process to ensure that microwave leakage is only a fraction of that permitted by U.S. law (5 mW/

 Loading...